| | |
|---|
| | | |
|---|
| | | 这种方法的操作方法是: |
|---|
| | | |
|---|
| | | 1. 先下载安装ubuntu24.04操作系统 |
|---|
| | | 1. 先下载[ubuntu24.04操作系统桌面版 ]([Ubuntu 24.04 LTS | Ubuntu](https://ubuntu.com/blog/tag/ubuntu-24-04-lts)),保存为ubuntu24.04-desktip-amd.iso。 |
|---|
| | | |
|---|
| | | 2. 在虚拟机或物理机中安装此ubuntu24.04操作系统.(临时使用) |
|---|
| | | 2. 在虚拟机或物理机中安装此ubuntu24.04操作系统.(临时使用)。 |
|---|
| | | 这个过程 ,请参考其它教程。 |
|---|
| | | |
|---|
| | | 3. 使用ubuntu24.04制作linux启动U盘ubuntu live |
|---|
| | | 3. 使用ubuntu24.04制作linux启动U盘ubuntu live。 |
|---|
| | | 安装完成后,把下载的ubuntu24.04-desktip-amd.iso放到新安装的Ubuntu操作系统下折任意目录,如,放到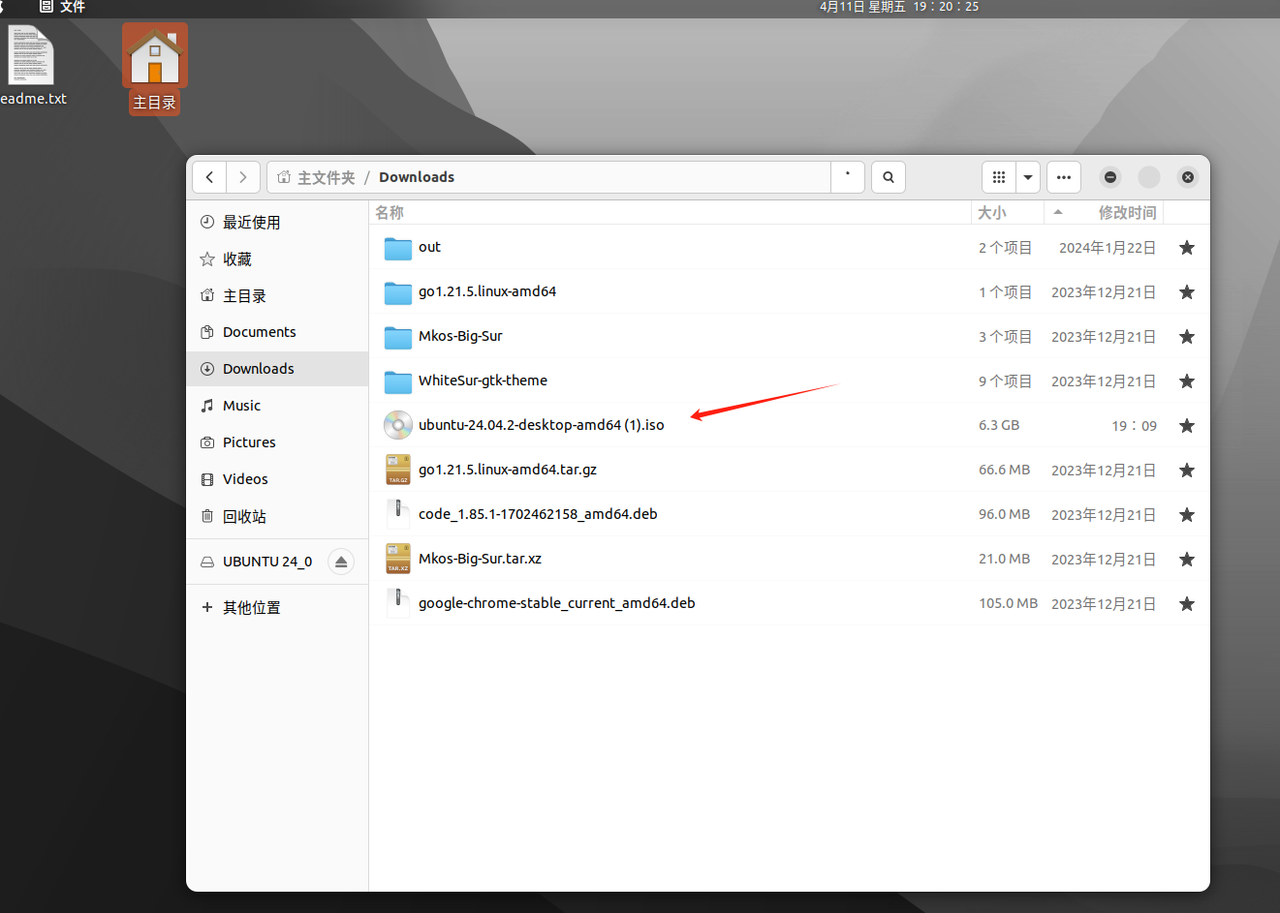这个目录. |
|---|
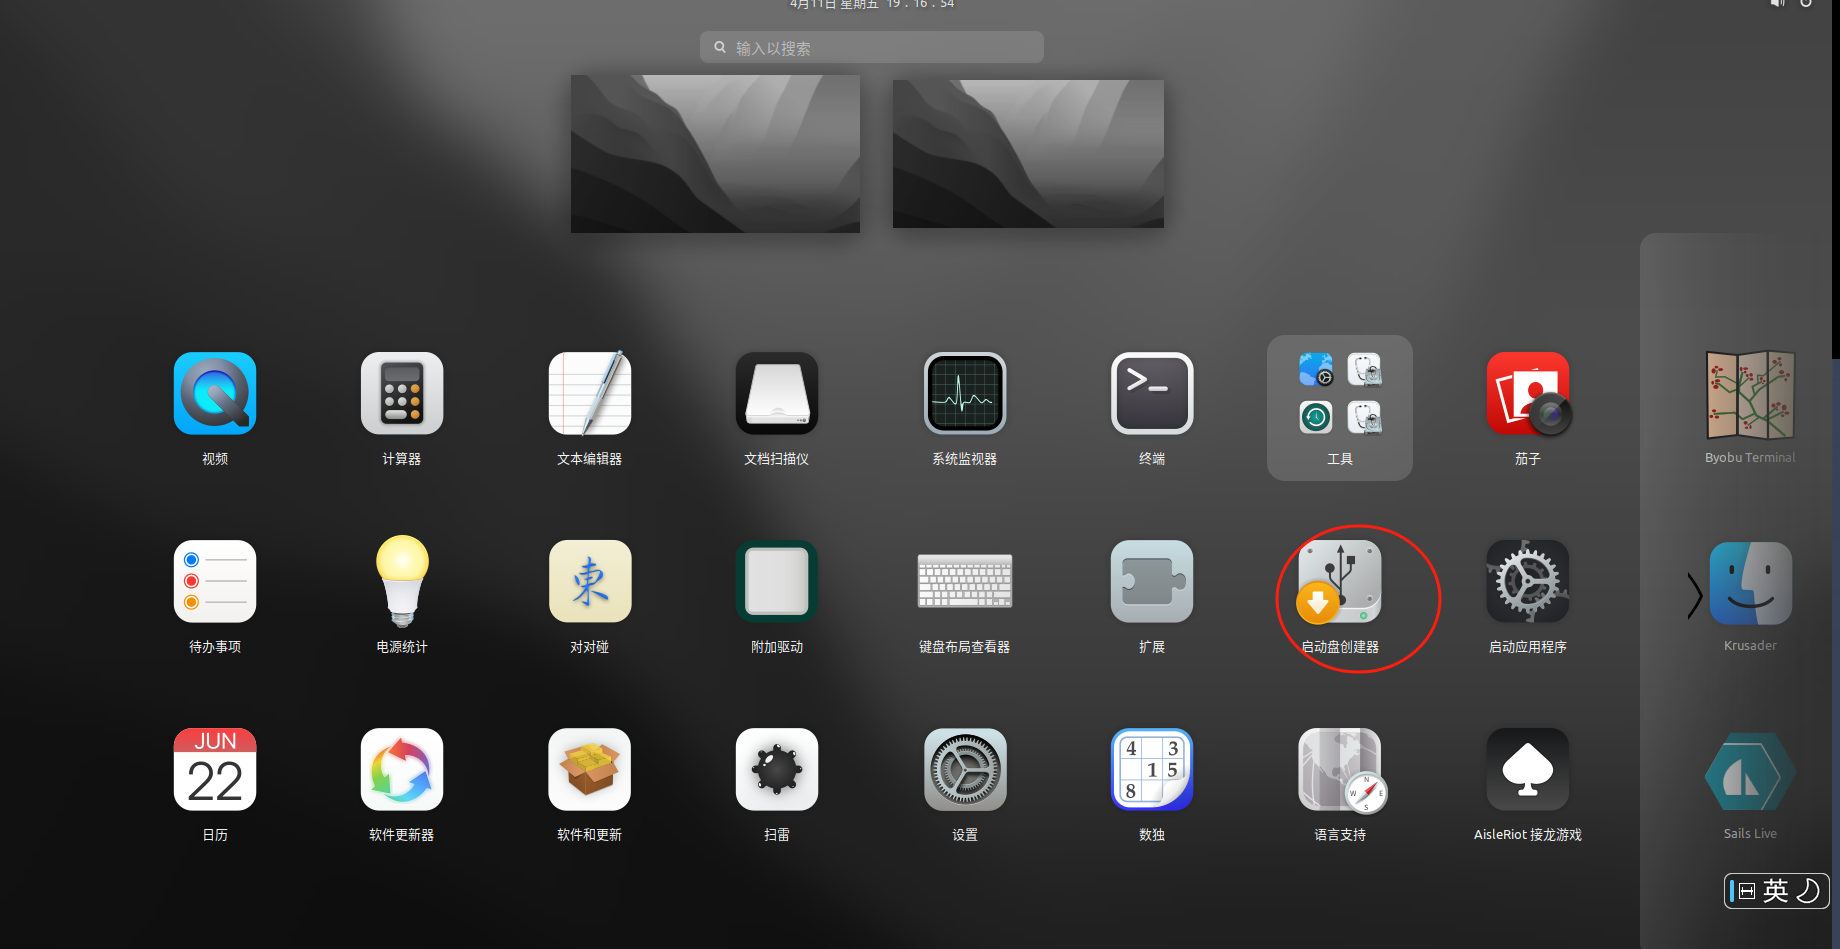
| | | 然后,找到ubuntu自带的启动盘制作工具,如图所示 |
|---|
| | |  |
|---|
| | | c运行启动盘创建器,如下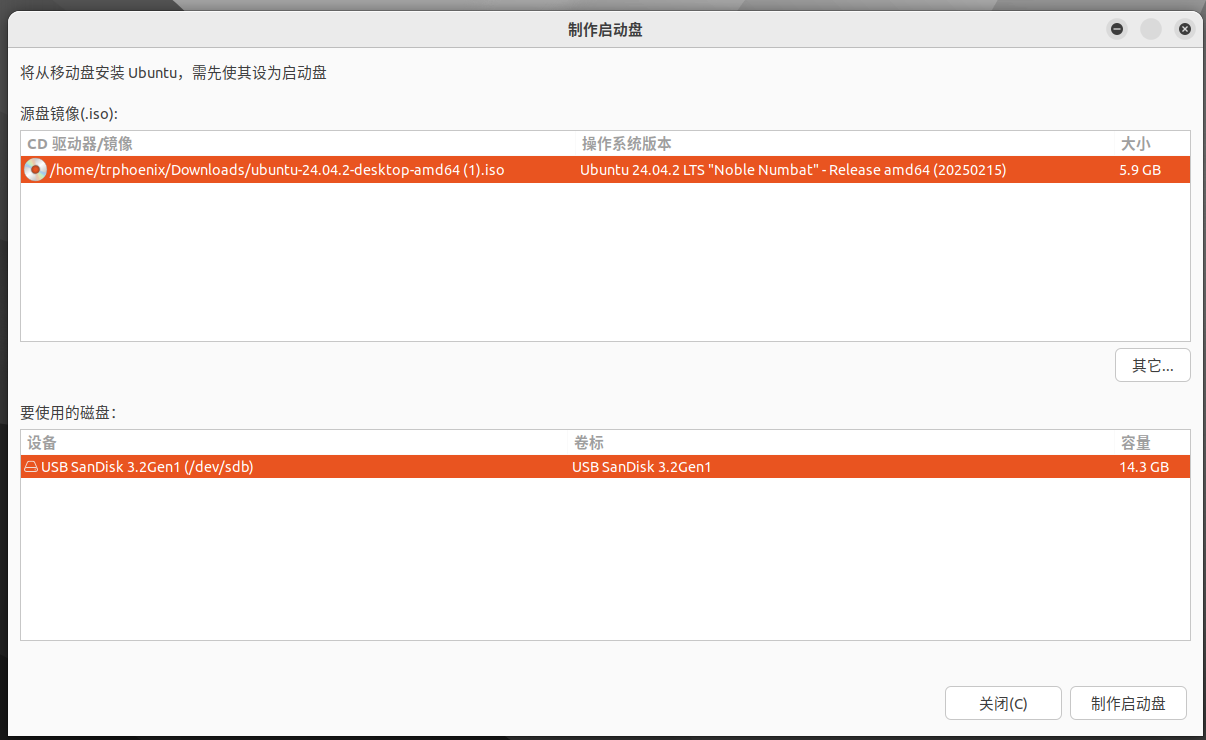先择刚刚放置的ubuntu24.04-desktip-amd.iso作为源镜像,然后把要制作启动盘的U盘插入USB口,然后,选 择作为要使用的磁盘,当然可以提前插入U盘。然后点击制作启动盘。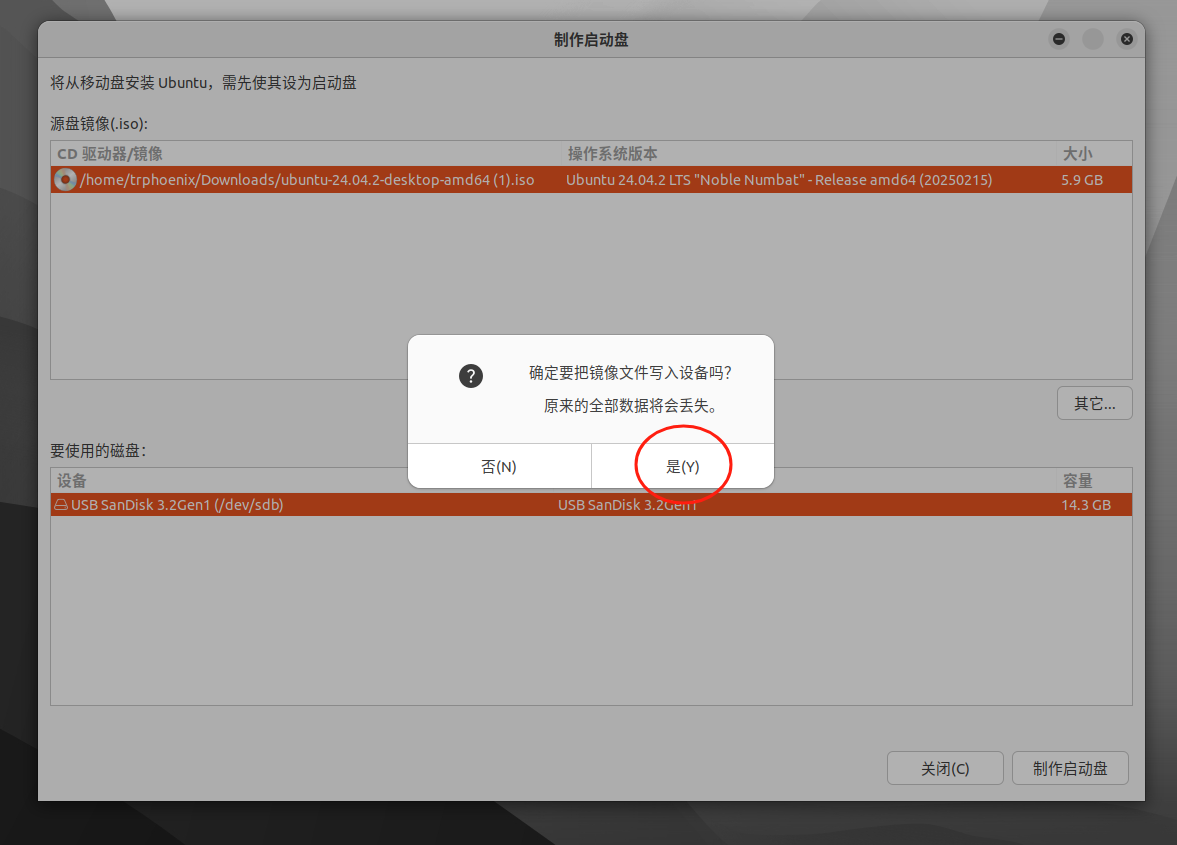在弹出的确认框中,点击是,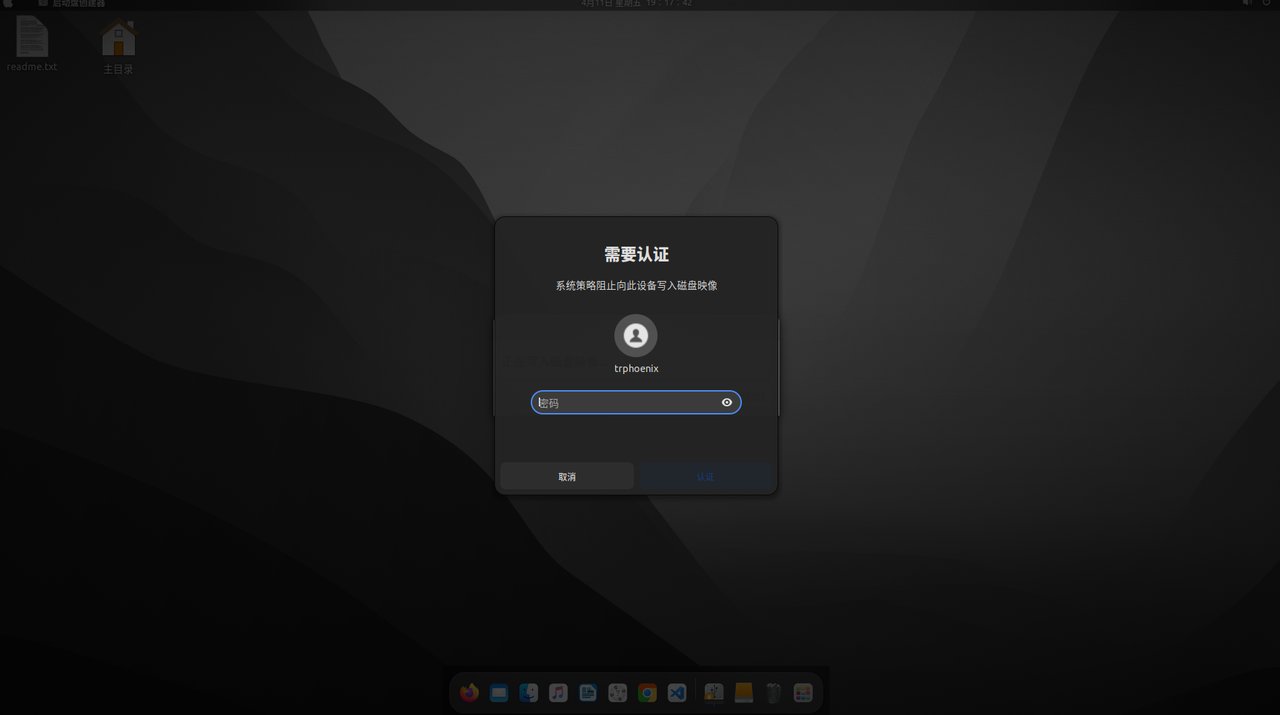然后输出当前的用户对应的密码,确认,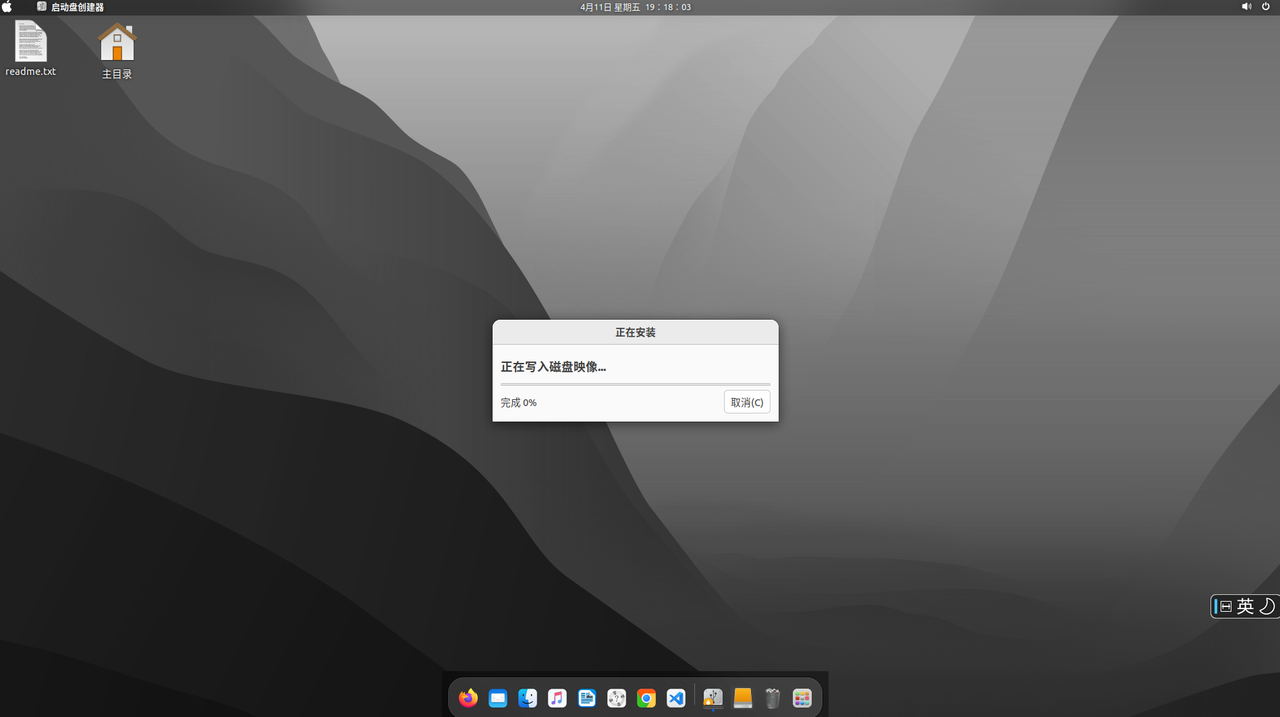系统将会自动开启把ubuntu live 启动引导盘信息, 写入U盘,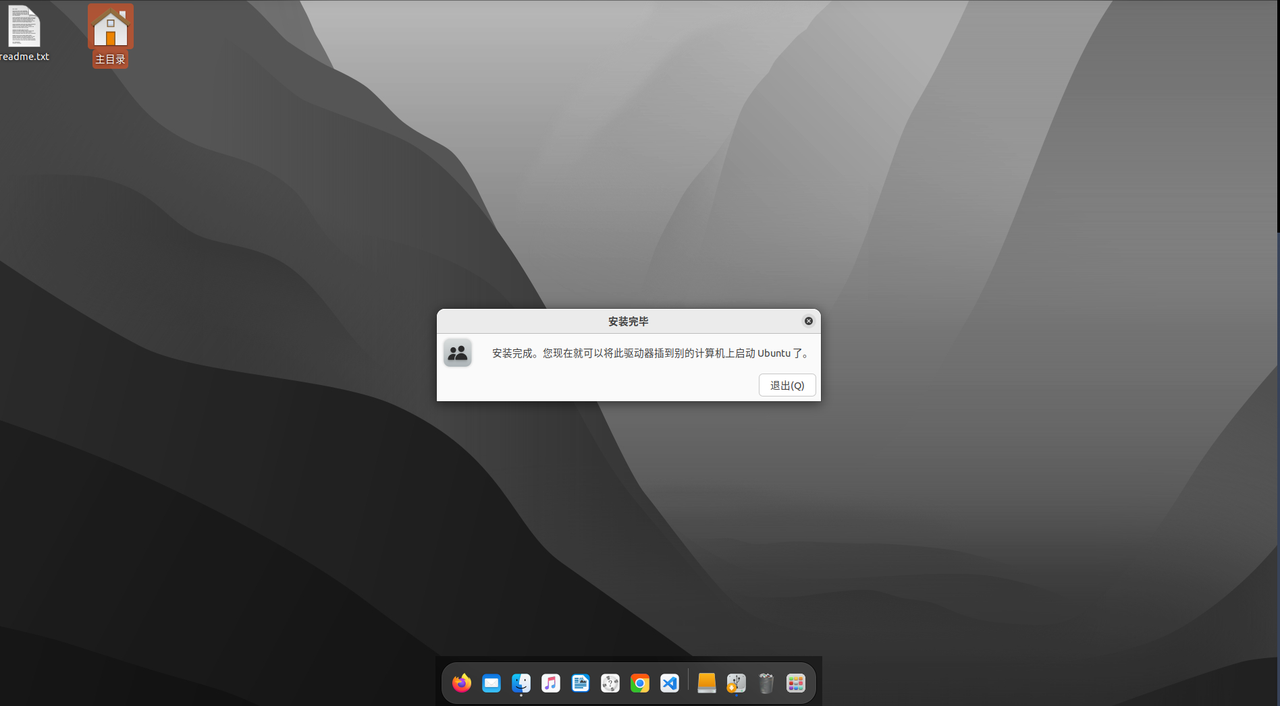提示完成时,点退出,弹出如下提示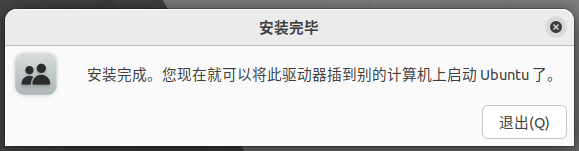,说明启动U盘制作成功了。 |
|---|
| | | |
|---|
| | | 4. 使用启动U盘ubuntu live引导x86小工控机. |
|---|
| | | 把U盘插入入X86小工控机并确保[正确配置了Bios](configX86Bios.md) |
|---|
| | | 启动后,按F11其它主机可能有所不同(可以查主板说明书,或咨询主板厂家),选择以U盘引导。 |
|---|
| | | 公司的小工控机,是启动时,按F11不放,进入系统引导菜单,根据U盘的不同,U盘引导盘中的系统类别不同,显示的内容略有不同,如下图所示 |
|---|
| | | 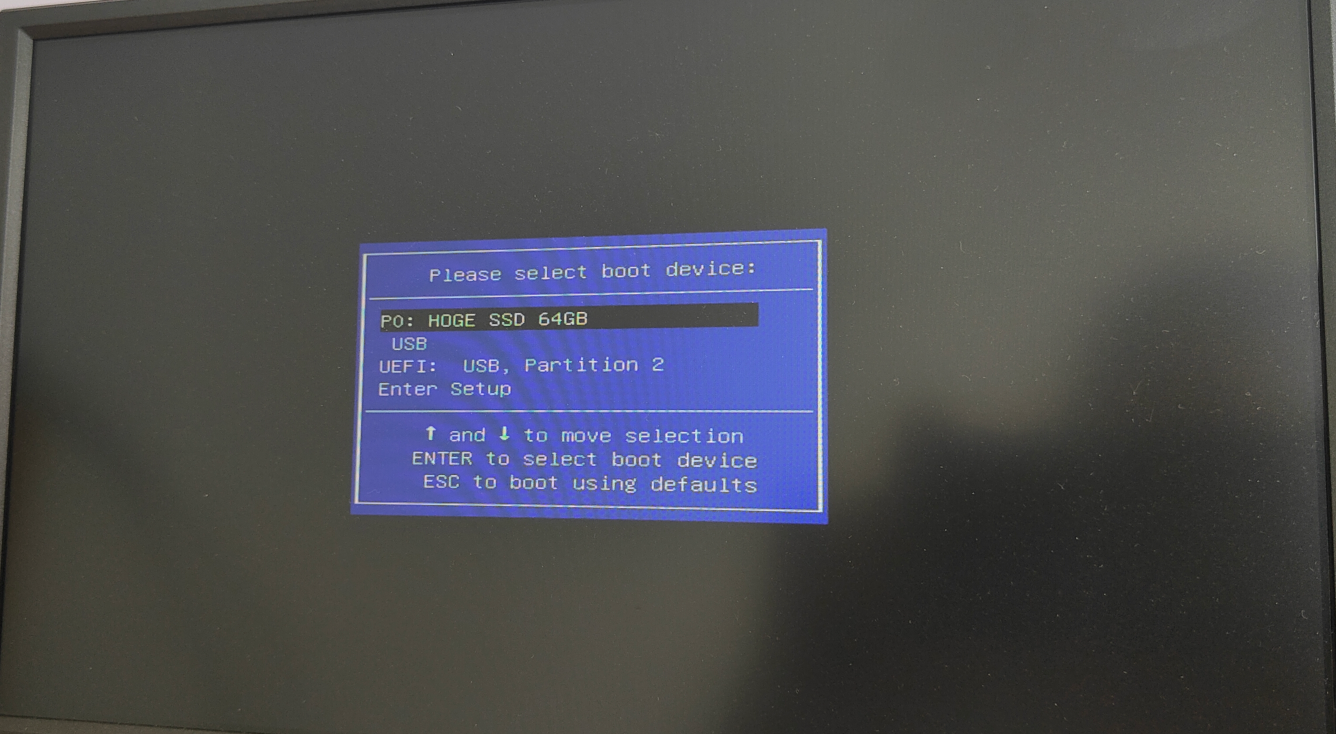 |
|---|
| | | 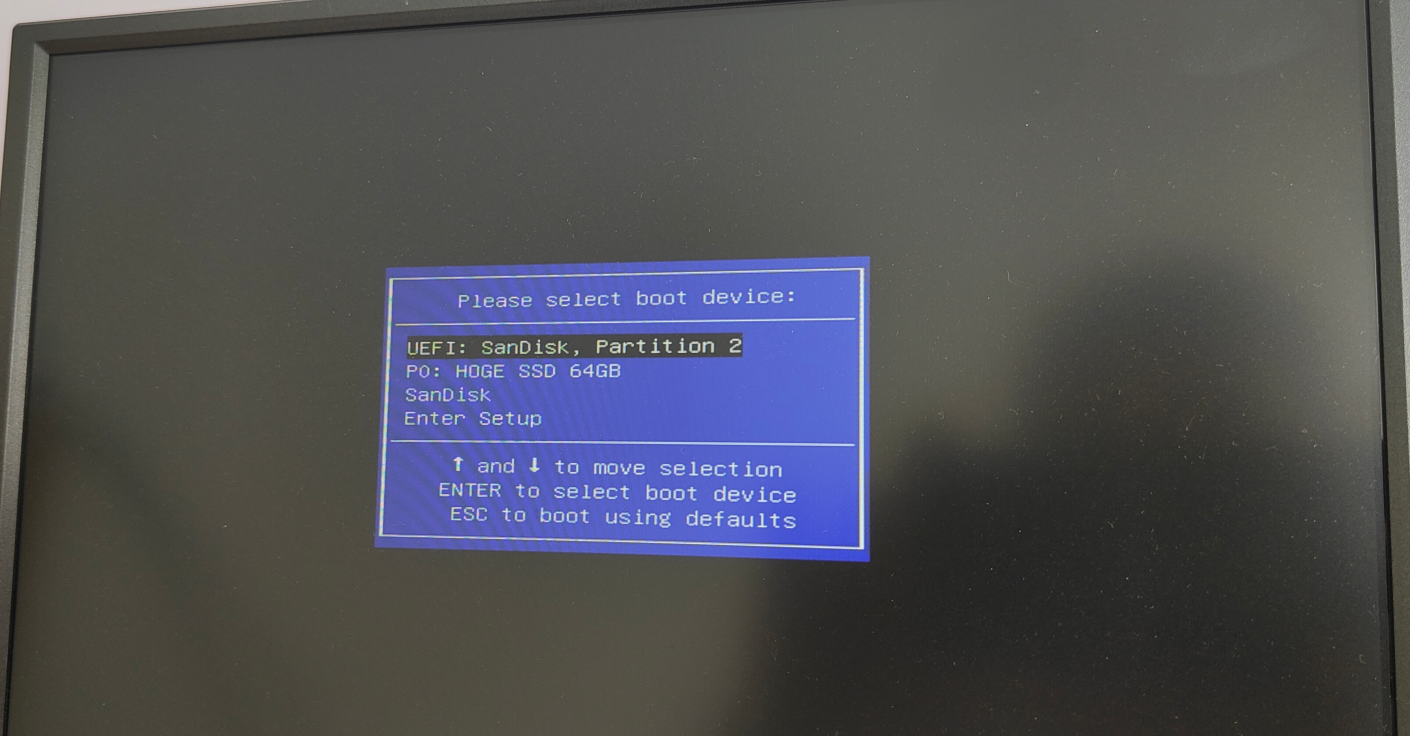 |
|---|
| | | |
|---|
| | | |
|---|
| | | 5. 进入try模式(不安装). |
|---|
| | | |
|---|
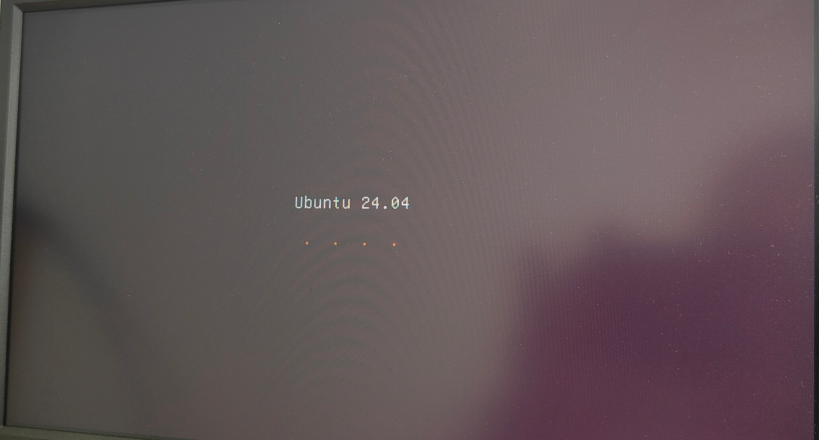
| | | 当系统启动时,请确保选择“Try or Install Ubuntu". |
|---|
| | |  |
|---|
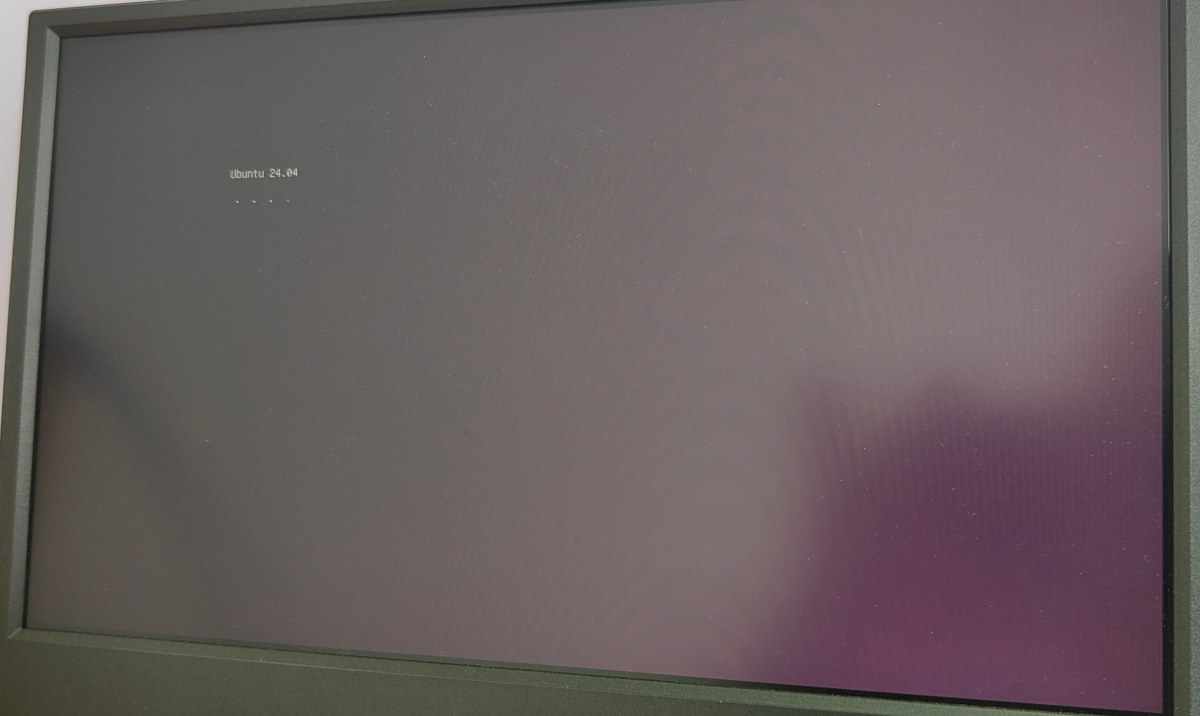
| | | 系统启会启动U盘中的Ubuntu live系统, |
|---|
| | |  |
|---|
| | |  |
|---|
| | | 在这个过程中, |
|---|
| | |  |
|---|
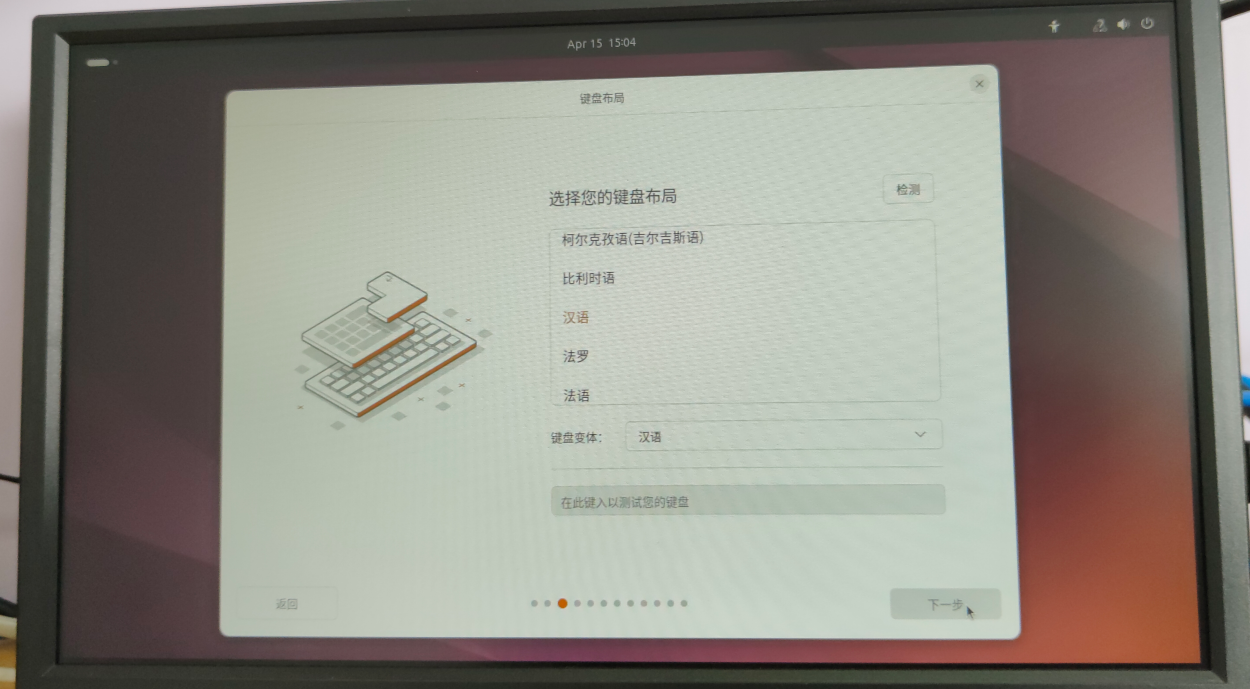
| | | 会有几个选项要选择如下图所示, |
|---|
| | |  |
|---|
| | |  |
|---|
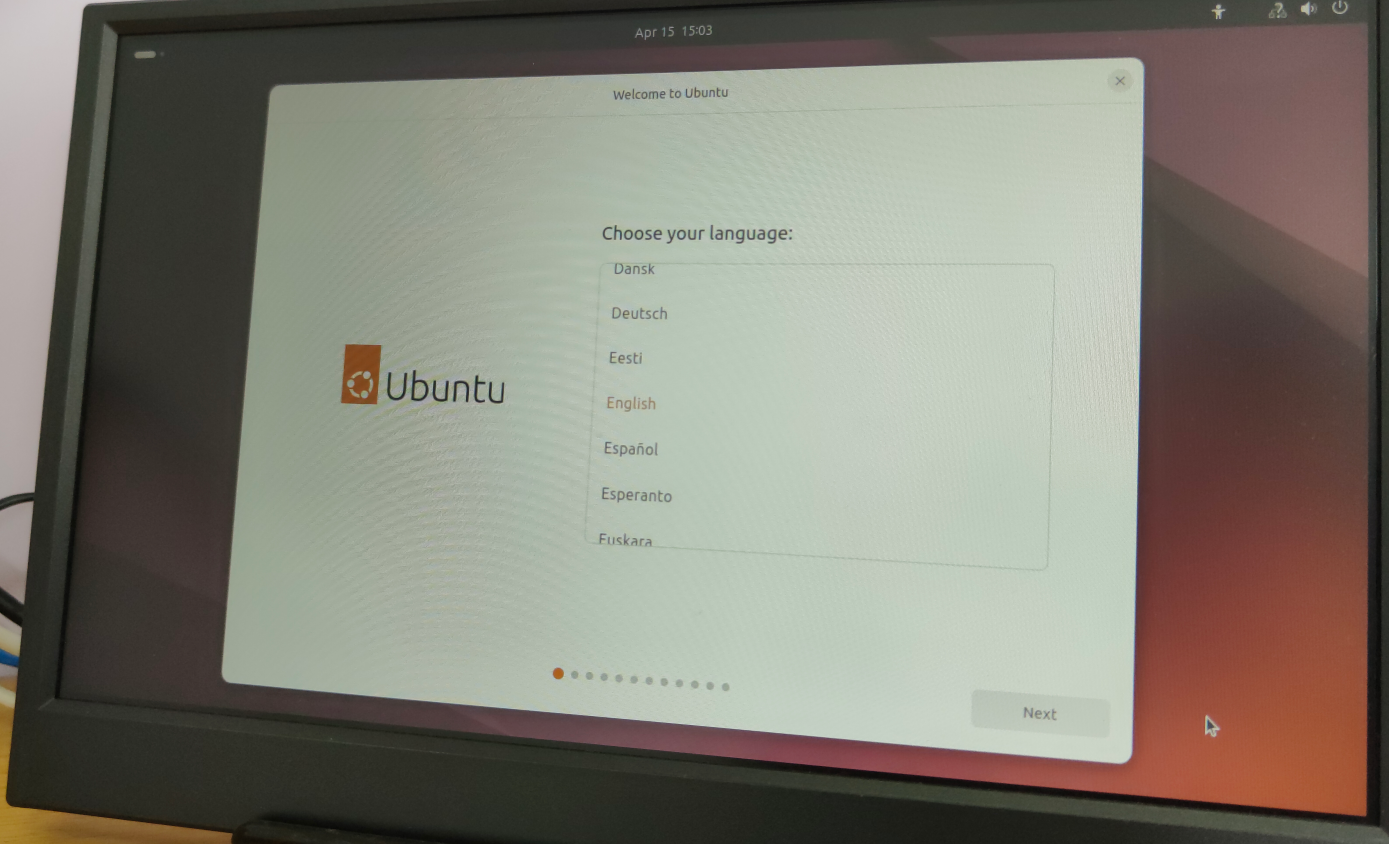
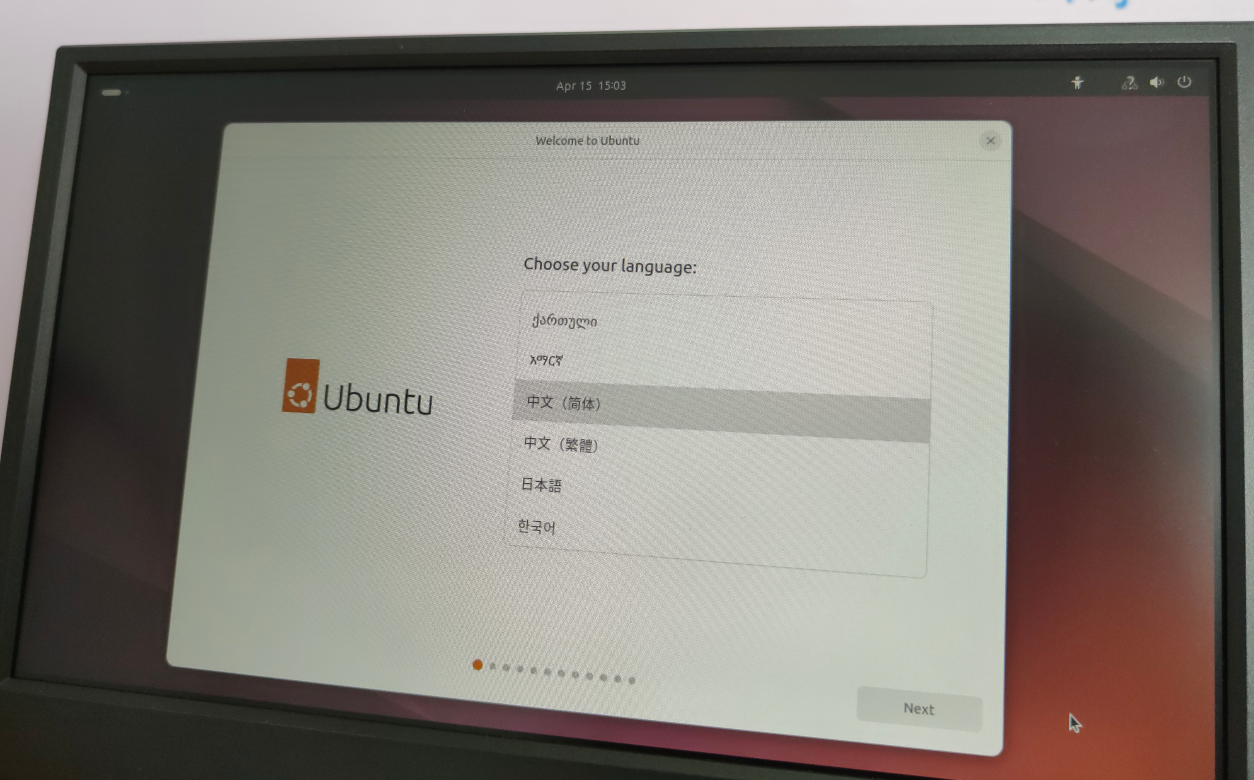
| | | 选择语言 |
|---|
| | |  |
|---|
| | | 此处直接下一步 |
|---|
| | | 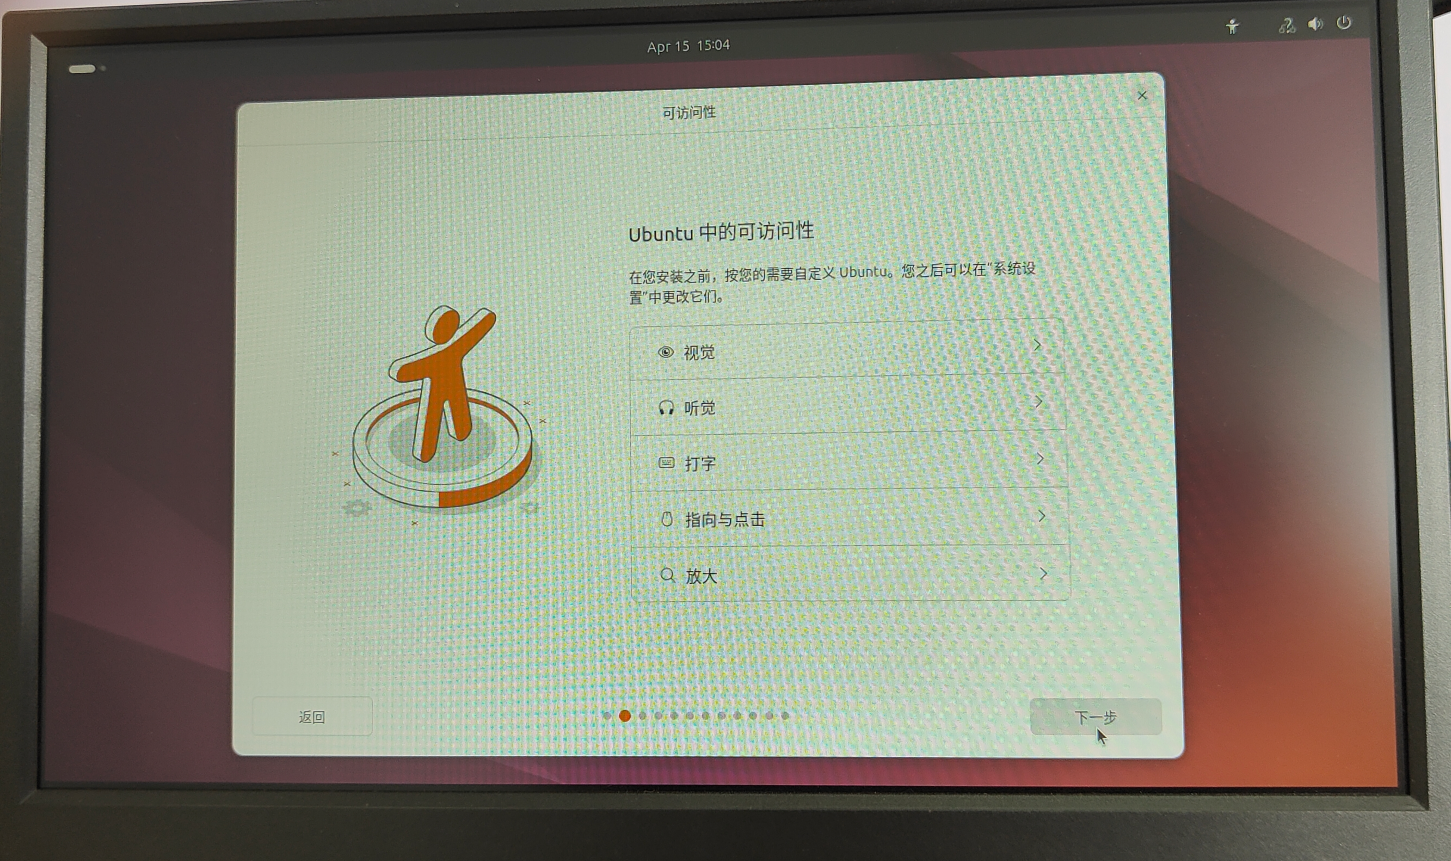 |
|---|
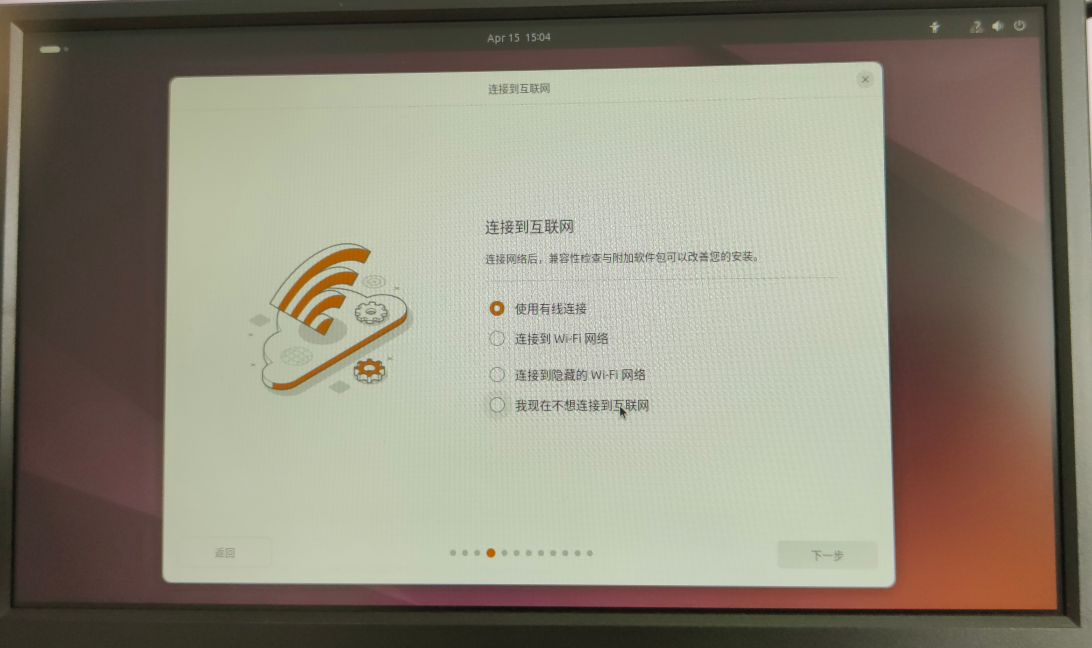
| | | 此处可以直接使用网络连接可以选直接连接,也可以选择wifi当然,wifi南要配置热点. |
|---|
| | |  |
|---|
| | | 同时,在这个过程中,要保持网络畅通(***一定要能正常访问Google及HomeAssistant官网**),能正常的访问并下载HomeAssistantOS的镜像. |
|---|
| | | |
|---|
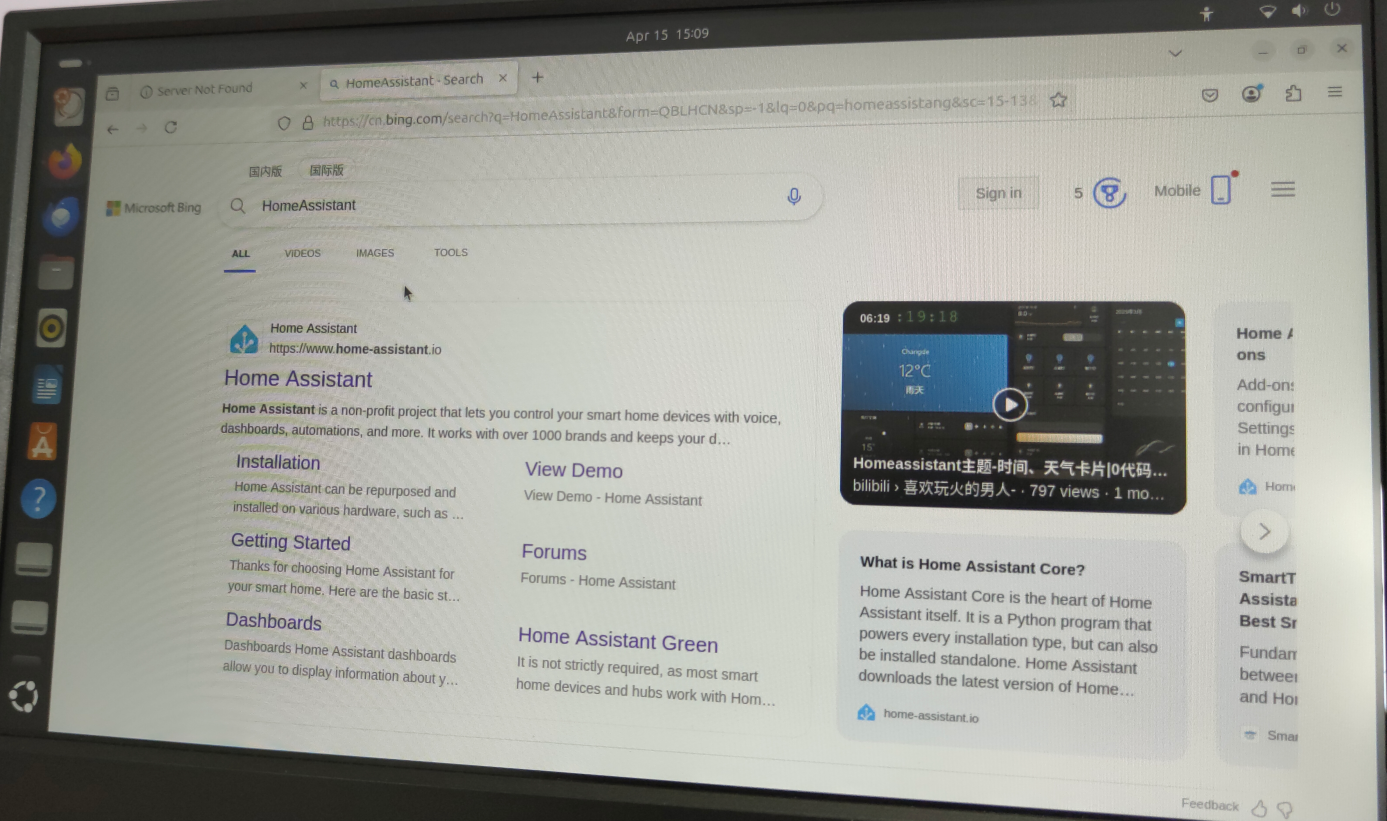
| | | 6. 在try模式中,下载ha安方镜像 |
|---|
| | | 进入Ubuntu Live系统后,打开浏览器,访问HomeAssistant的[官方文档]([Generic x86-64 - Home Assistant](https://www.home-assistant.io/installation/generic-x86-64)), |
|---|
| | |  |
|---|
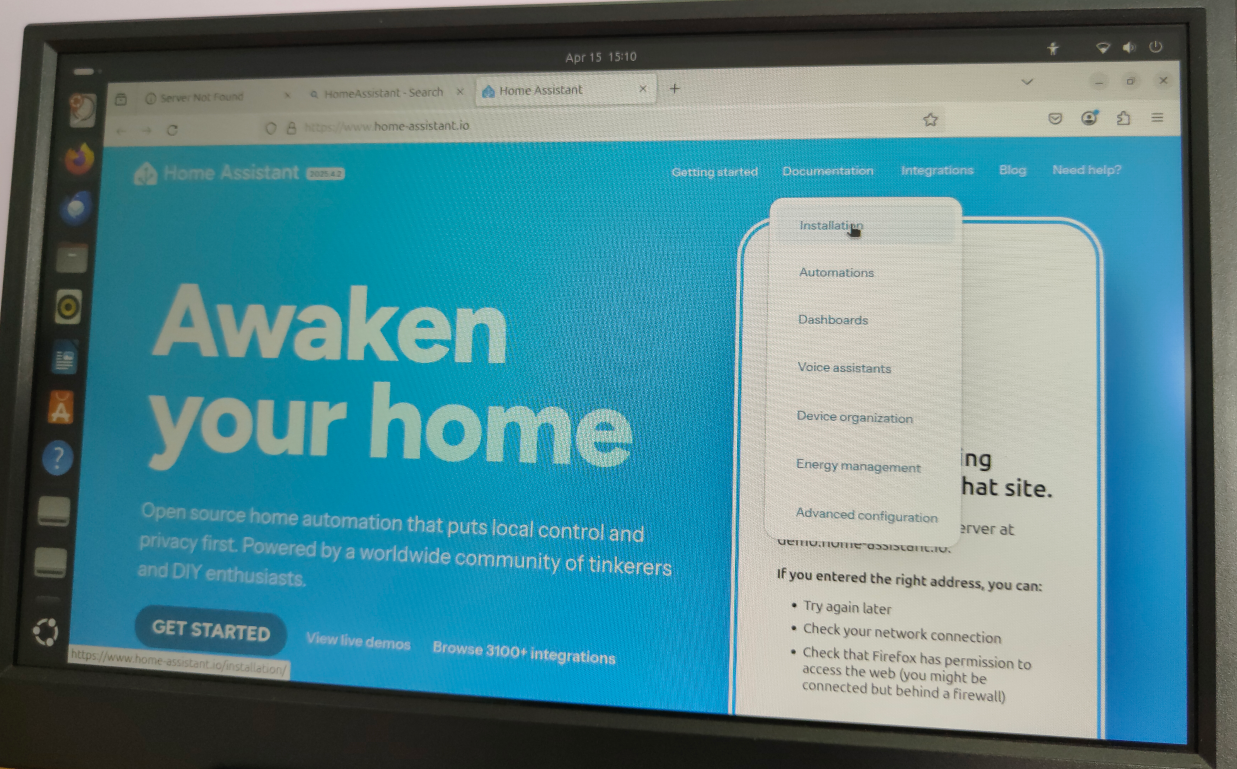
| | | 进入HomeAssistant官网,点\击菜单Installstatiion,进入安装说明 |
|---|
| | |  |
|---|
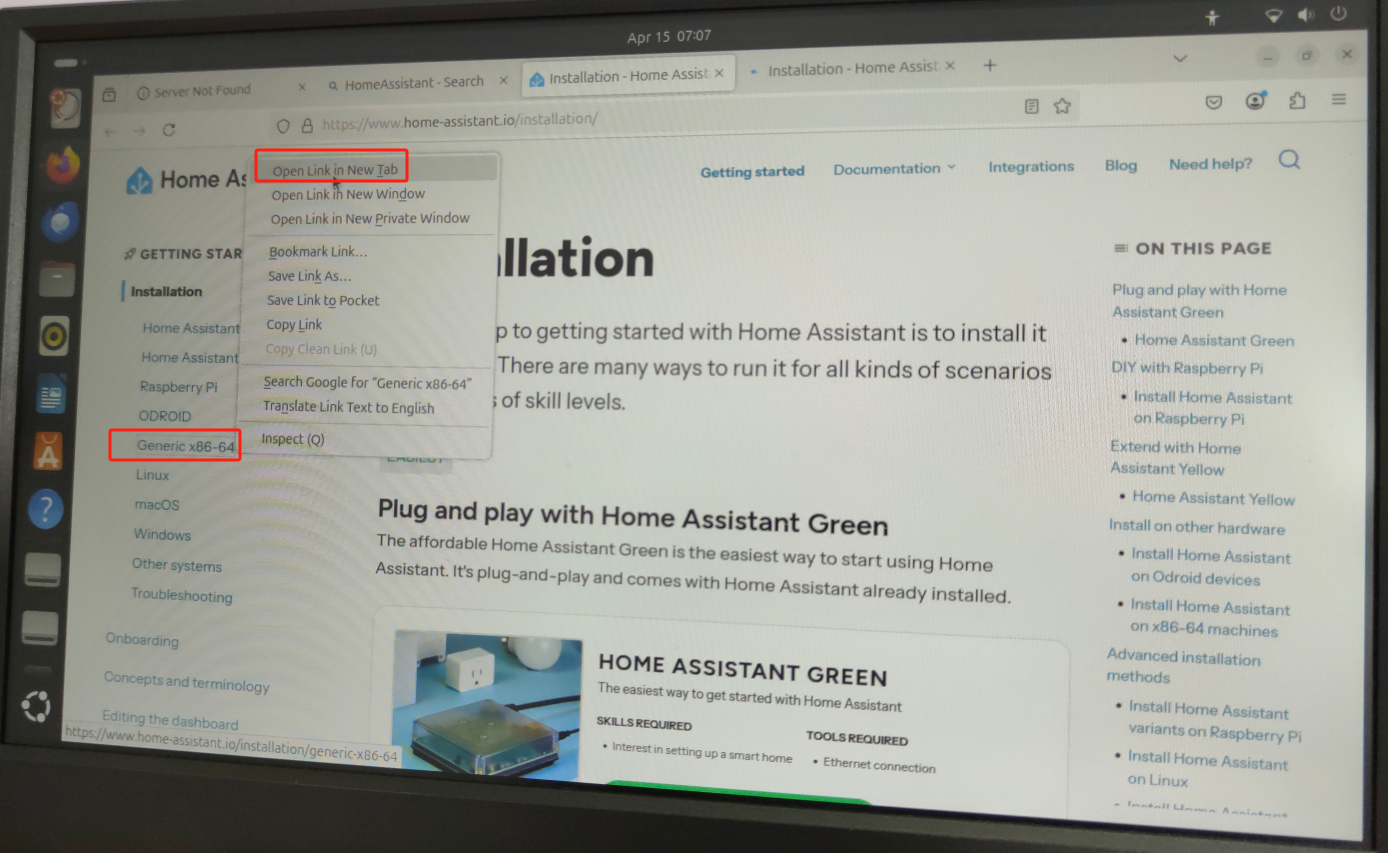
| | | 找到GenericX86-84,并打开这个在页面 |
|---|
| | |  |
|---|
| | | 找到页面中的镜像下载地址如下图 |
|---|
| | |  |
|---|
| | | 下载[HomeAssistOs-x86-64镜像](https://github.com/home-assistant/operating-system/releases/download/15.1/haos_generic-x86-64-15.1.img.xz) |
|---|
| | | 开始下载后,如下图所示 |
|---|
| | |  |
|---|
| | | 下载过程中如下图所示 |
|---|
| | |  |
|---|
| | | 下载完成后 |
|---|
| | | 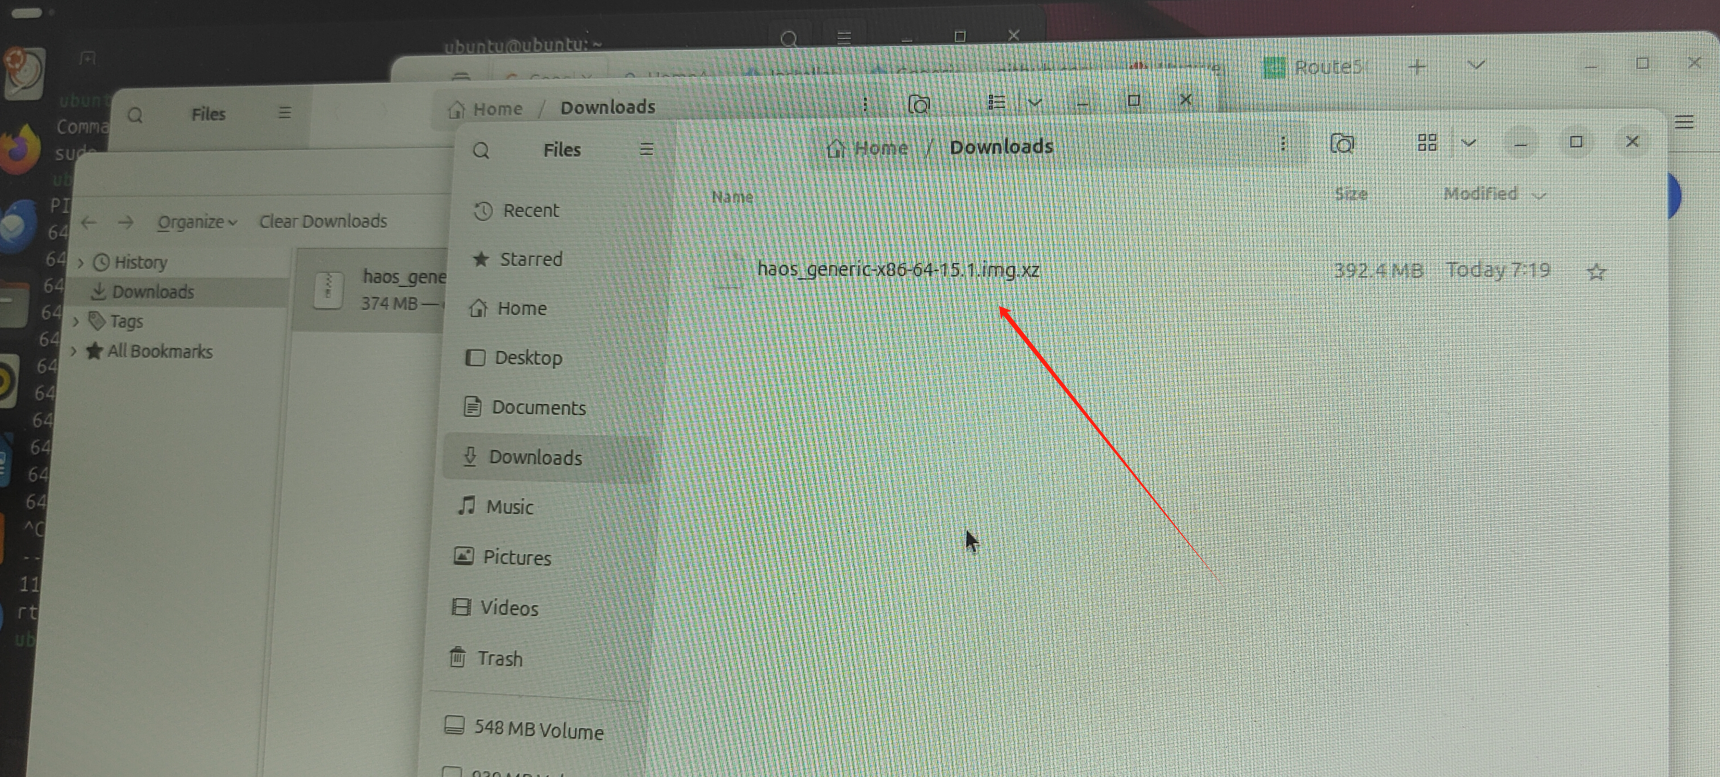 |
|---|
| | | 文件保存在/home/Downloads/hos_Generic-86-64-15.1.img.xz |
|---|
| | | |
|---|
| | | |
|---|
| | | |
|---|
| | | 7. 使用ubuntu live的自带的磁盘恢复工具写入镜像到硬盘. |
|---|
| | | 在Ubuntu Live的系统中,找到显示应用程序(一般在左上角或右下角), |
|---|
| | | |
|---|
| | | - 搜索并找到Disks应用程序,并打开Disks应用程序. |
|---|
| | | |
|---|
| | | 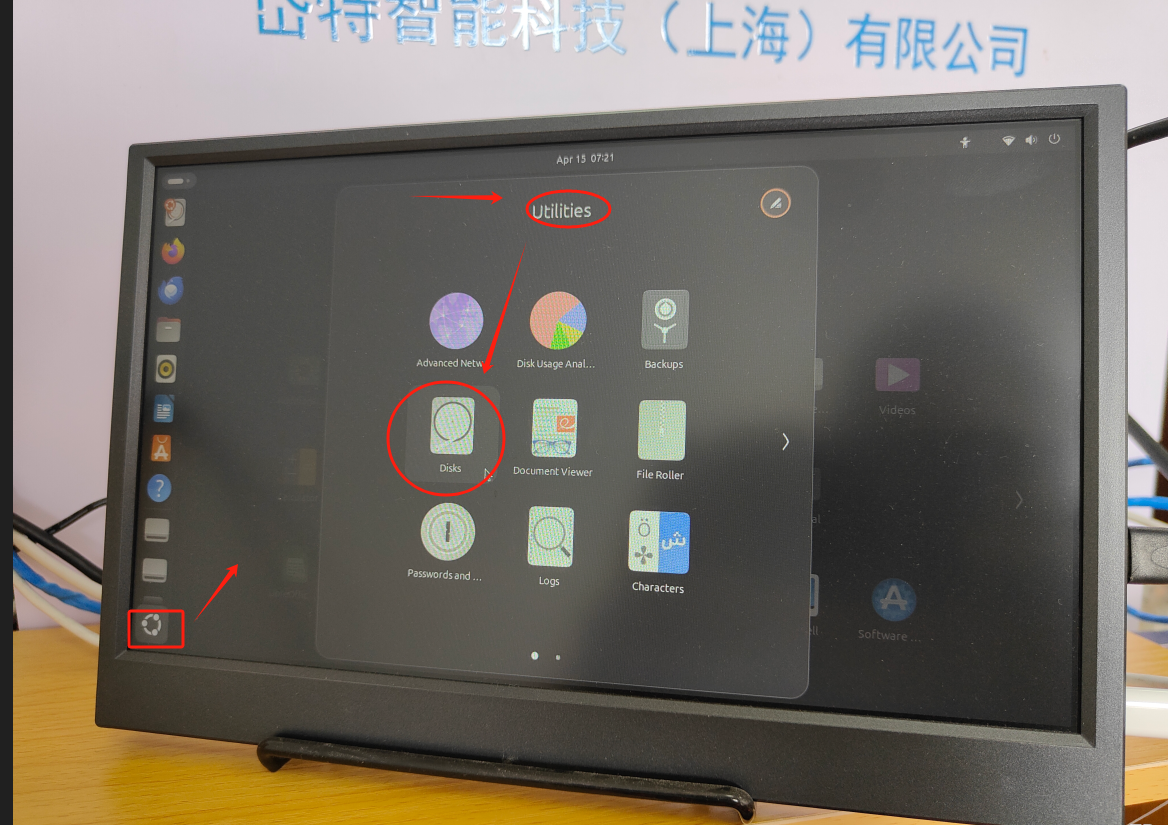 |
|---|
| | | |
|---|
| | | - 在左侧列表中找到并选择你的目标磁盘(一般为你要安装HAOS的硬盘) |
|---|
| | | |
|---|
| | |  |
|---|
| | | |
|---|
| | | - 点击右上角的菜单图标(三个点),选择“恢复磁盘镜像” |
|---|
| | | |
|---|
| | | 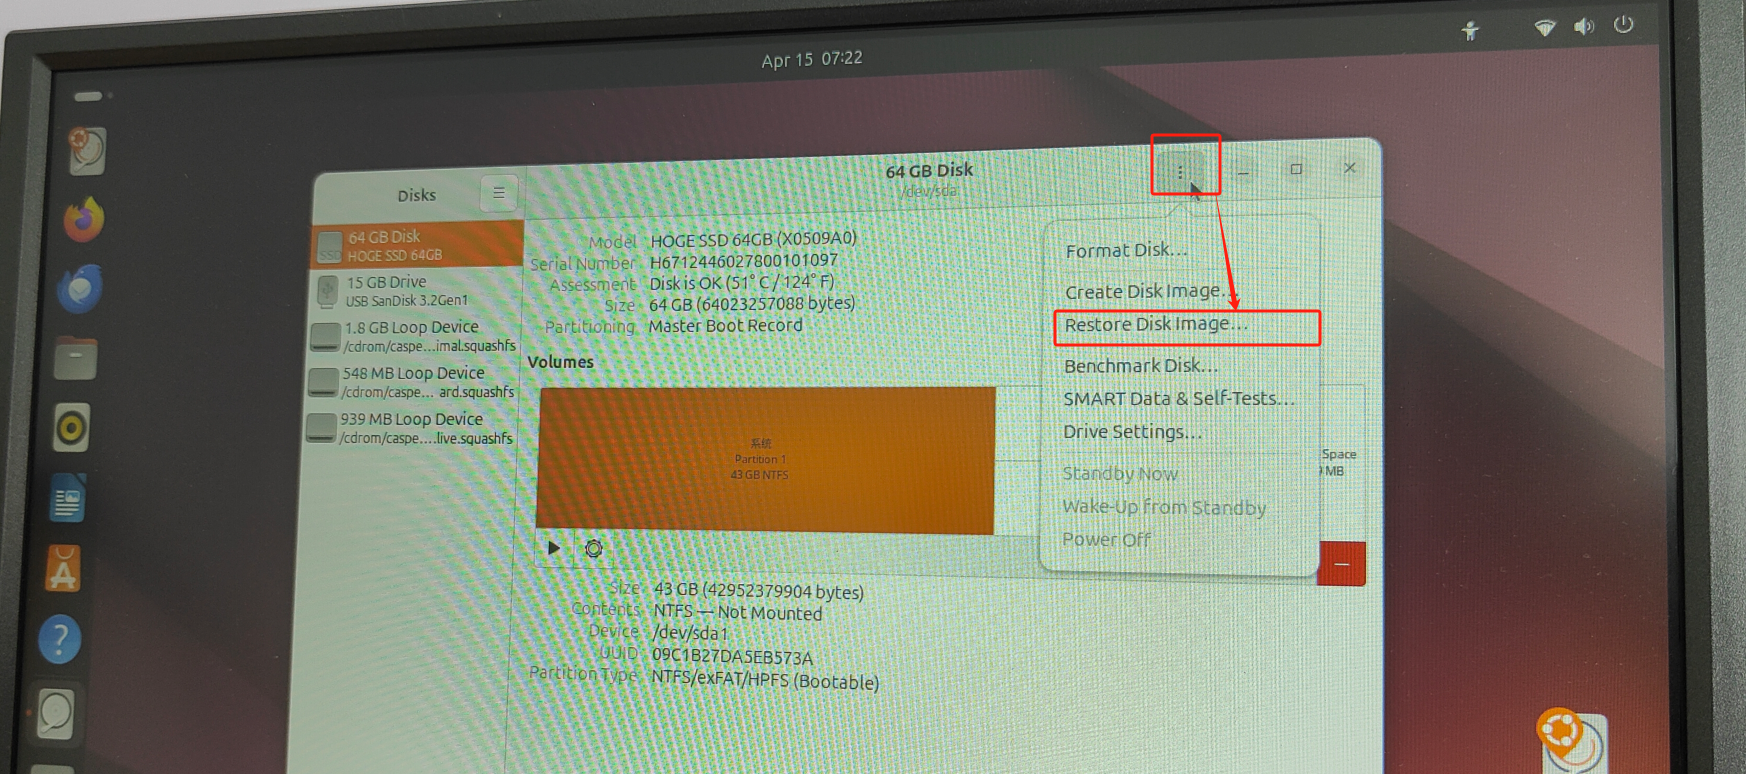 |
|---|
| | | |
|---|
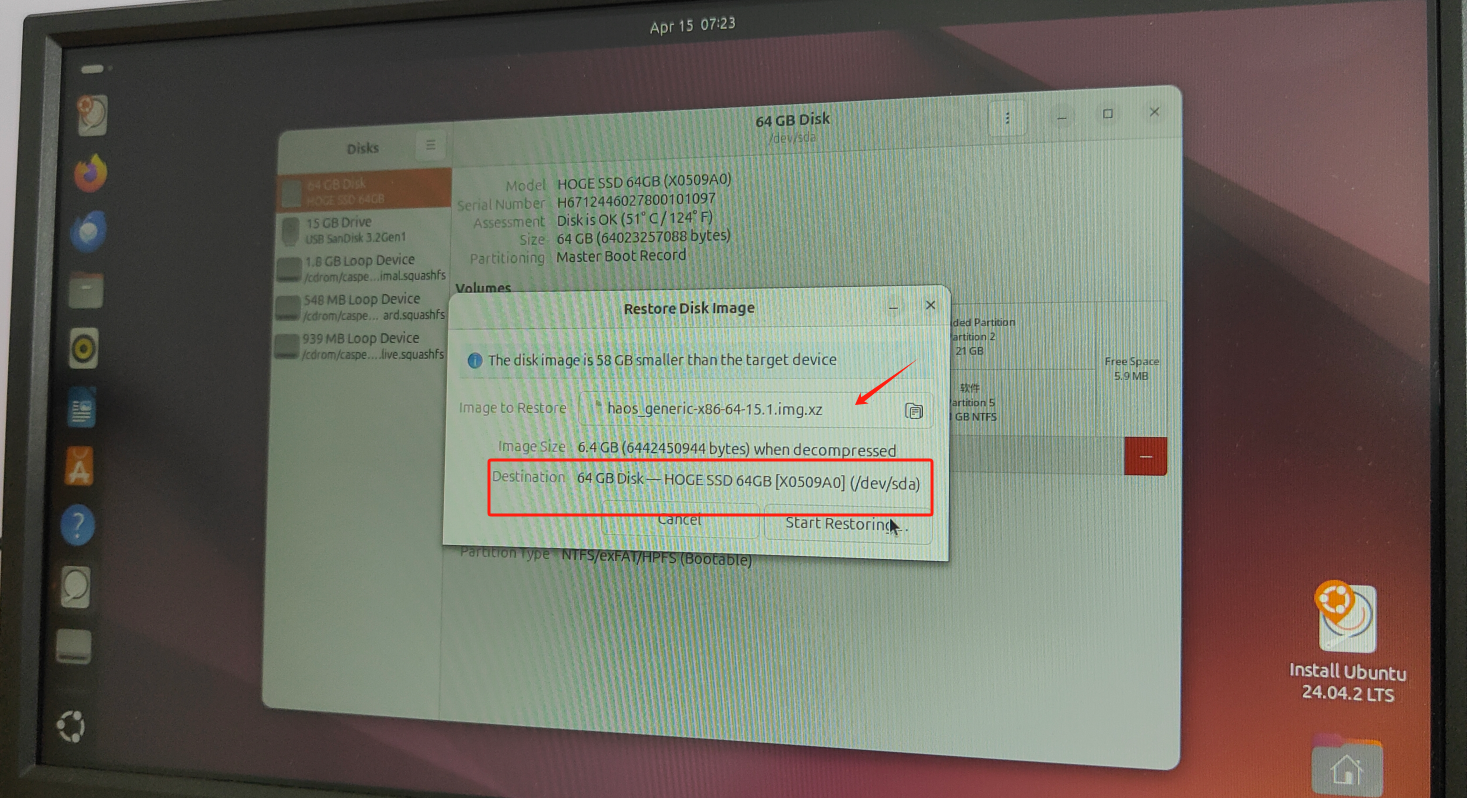
| | | - 浏览并选择你下载的HAOS镜像文件。 |
|---|
| | | |
|---|
| | |  |
|---|
| | | 点击,并浏览到下载的文件 hos_Generic-86-64-15.1.img.xz |
|---|
| | |  |
|---|
| | | |
|---|
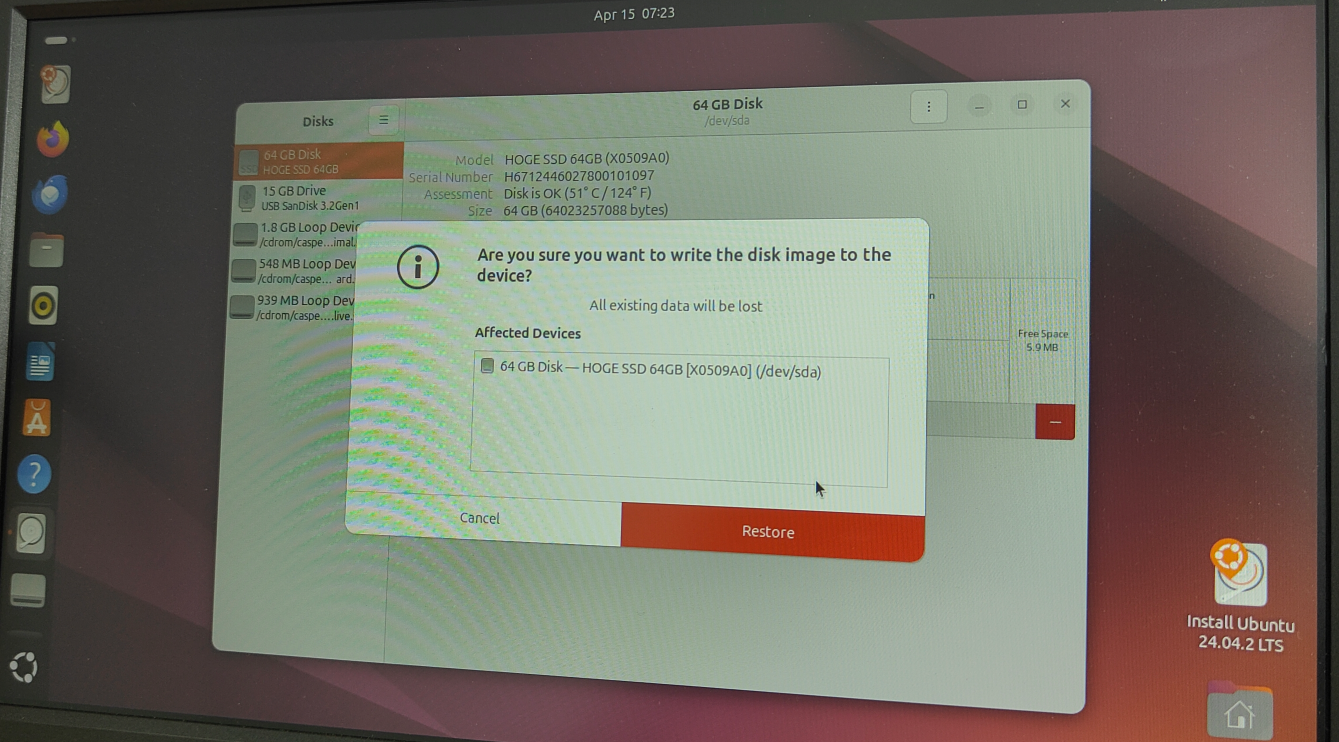
| | | - 确认目标磁盘,并开始镜像恢复过程。 |
|---|
| | | 确认标硬盘正确后,继续 |
|---|
| | |  |
|---|
| | | 提示确认时点击 Restore |
|---|
| | |  |
|---|
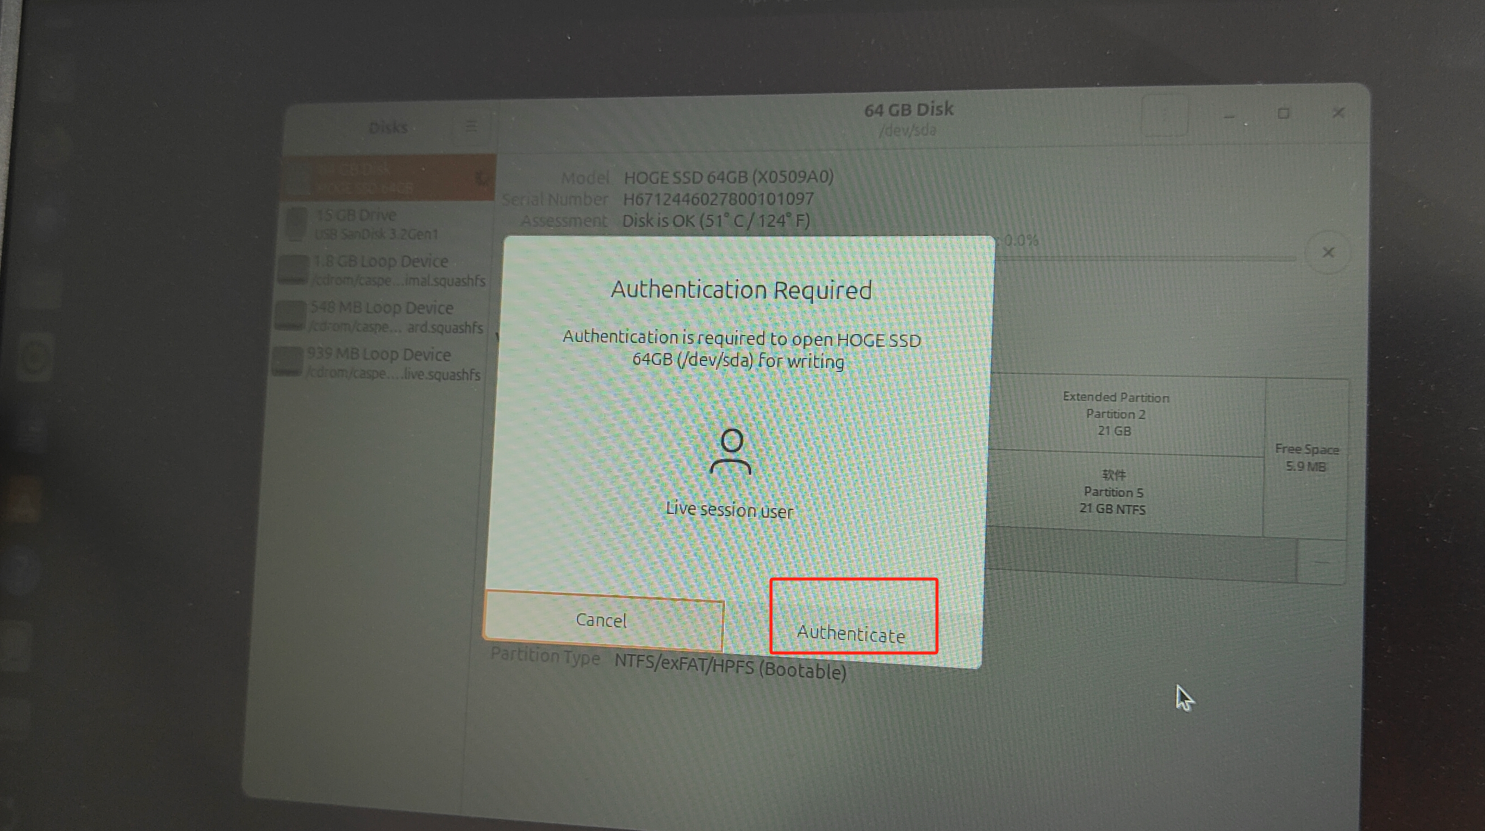
| | | 提示授权时,点击 Authenticate |
|---|
| | |  |
|---|
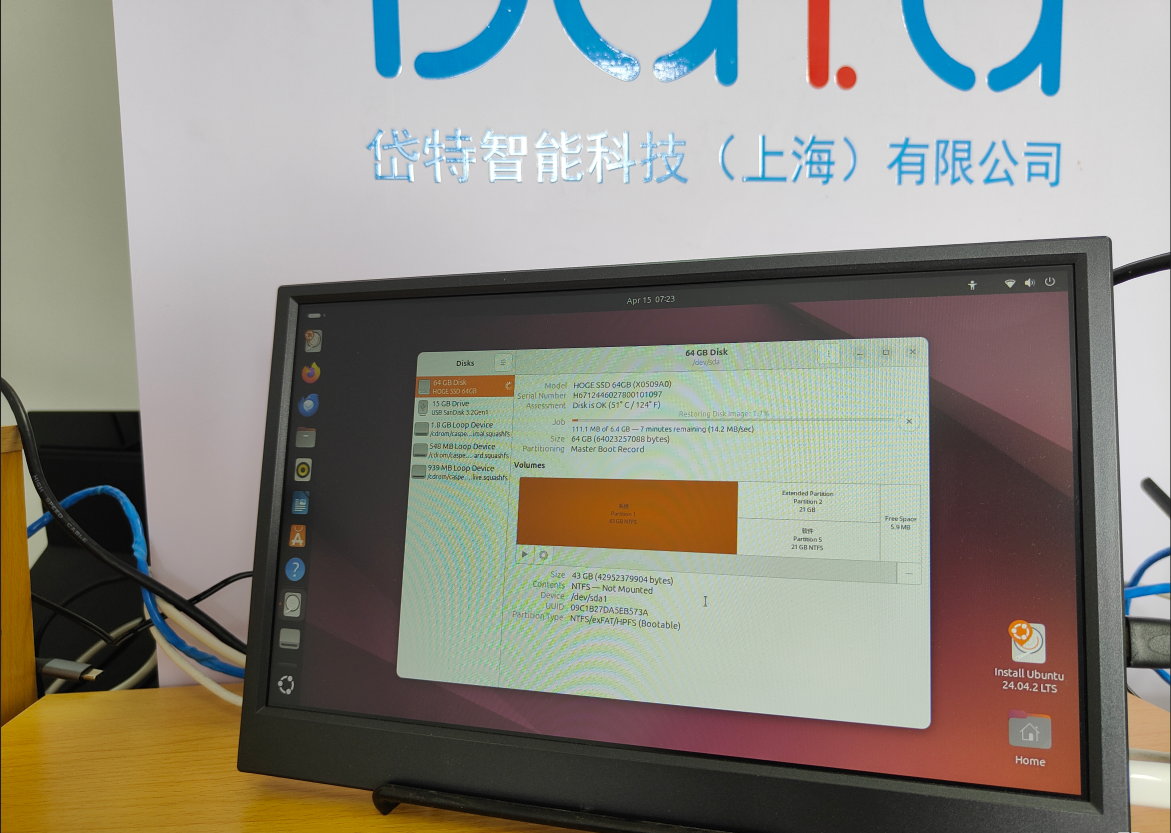
| | | 确定后,就会开始把镜像文件写入硬盘 |
|---|
| | | 请注意,这个过程一将会,清除硬盘上原有的数据,请确保已备份重要数据. |
|---|
| | |  |
|---|
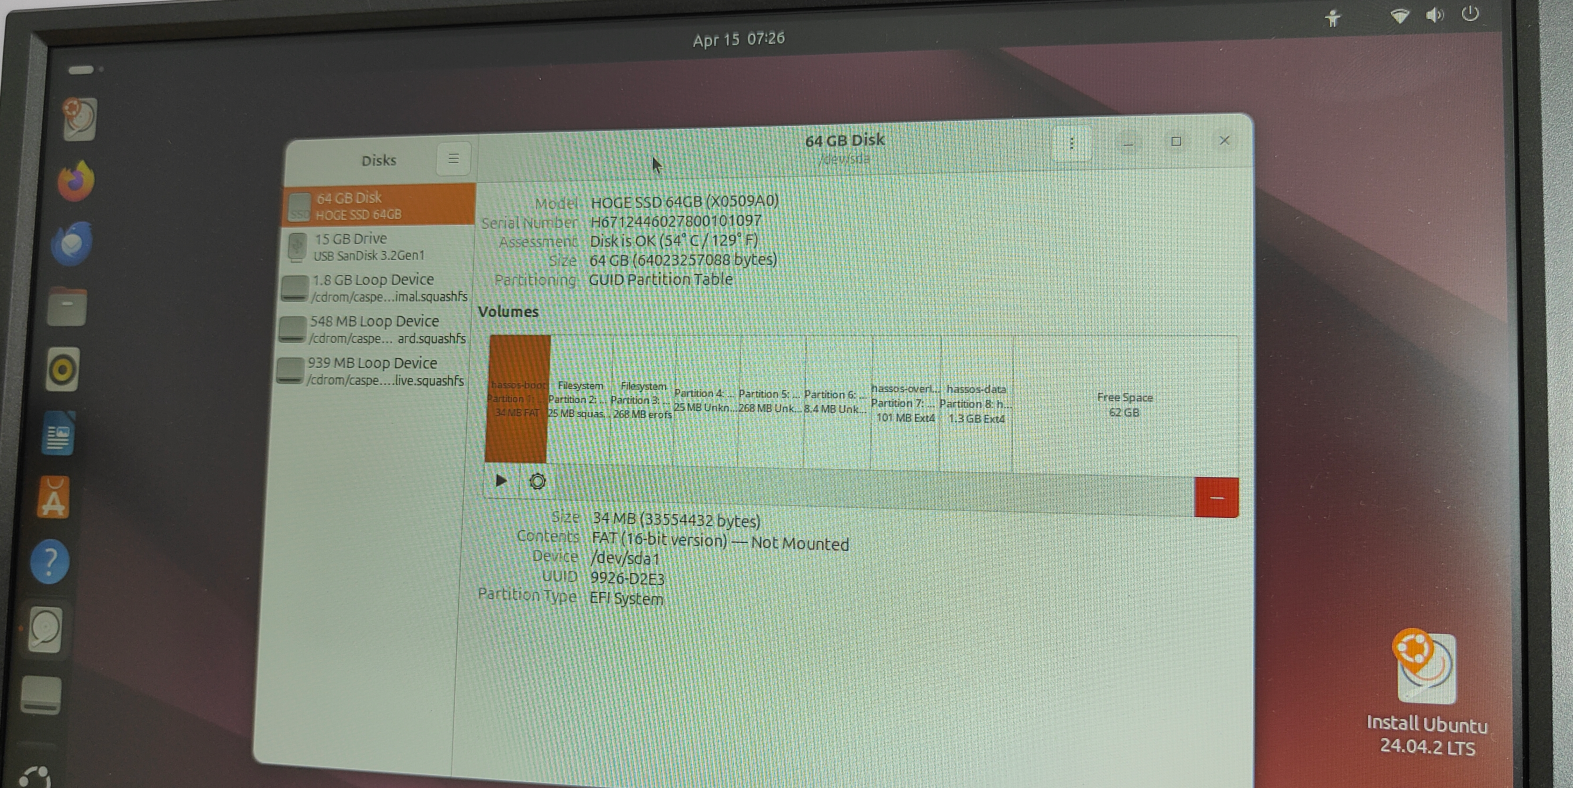
| | | 写入完成后,如下图所示 |
|---|
| | |  |
|---|
| | | 此时,就已经成功的把HA镜像写入到硬和肋中了 |
|---|
| | | |
|---|
| | | 8. 移除U盘 |
|---|
| | | 一旦Home Assistant操作系统安装完成,关闭系统。 |
|---|
| | | 当Ubuntu关闭后,移除USB闪存驱动器(Ubuntu会通知您可以安全移除)。 |
|---|
| | | |
|---|
| | | 9. 重启系统 |
|---|
| | | 9. 重启系统. |
|---|
| | | 现在,您的Home Assistant服务器已经设置完毕,您可以开始使用它。 |
|---|
| | | |
|---|
| | | |
|---|
| | | |
|---|
| | | 10. 进入HA cli界面 |
|---|
| | | |
|---|
| | |  |
|---|
| | | |
|---|
| | | - |
|---|
| | | 系统启动成功后,如下图所示 |
|---|
| | | 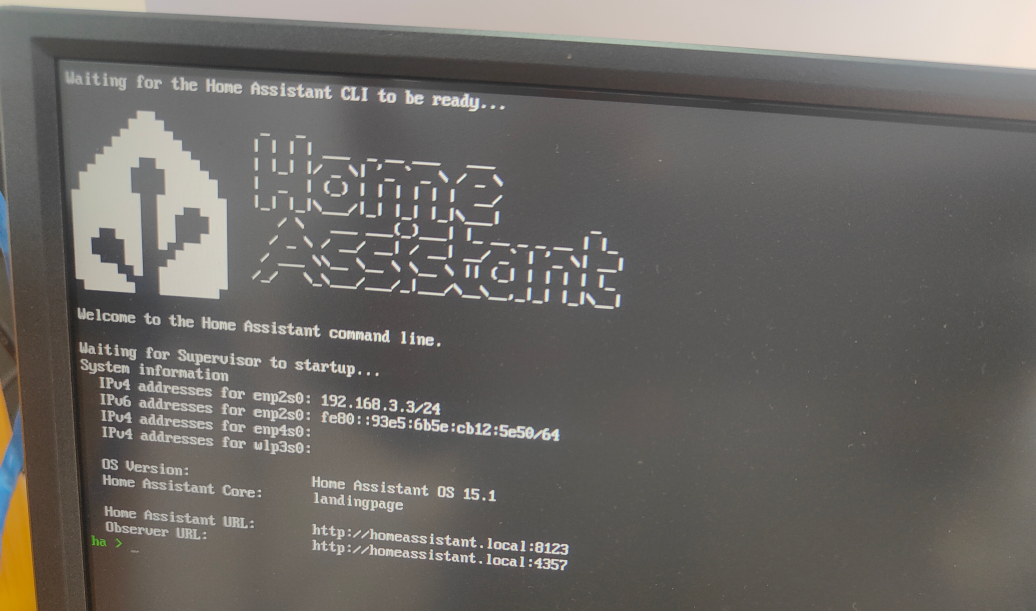 |
|---|
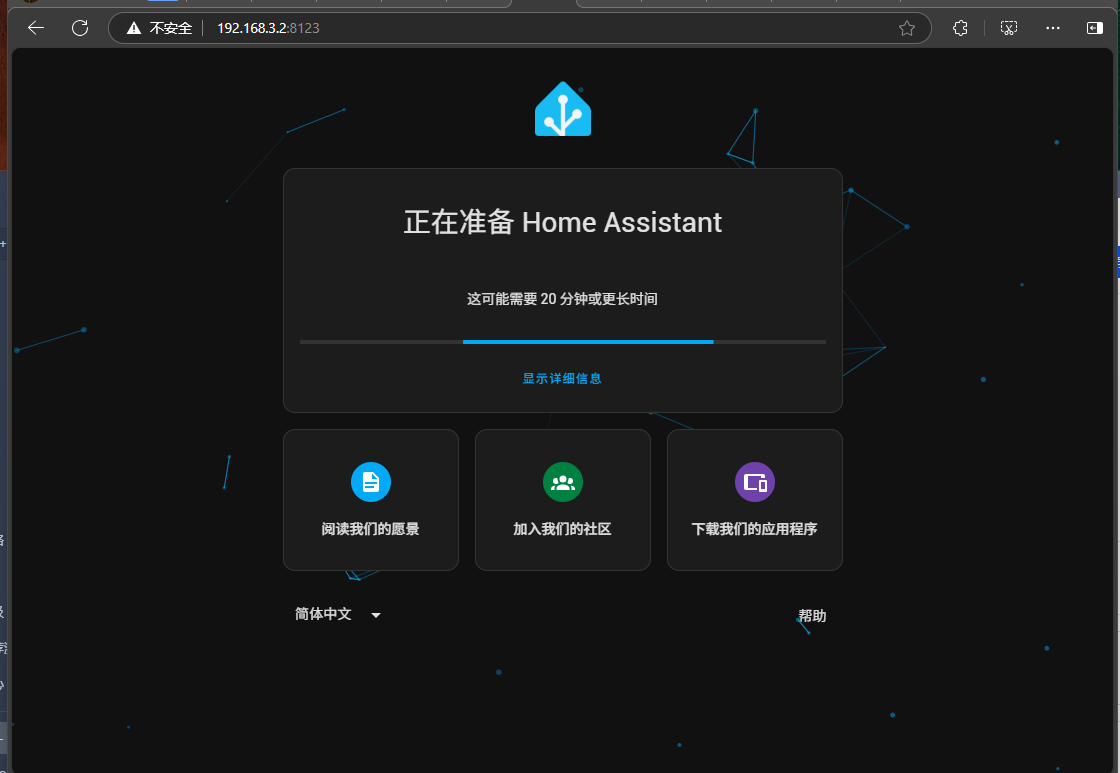
| | | 通过浏览器,输入控制台提示的IP加端口[http://192.168.3:8123](http://192.168.3:8123)即可进入图型化界面,如下 |
|---|
| | |  |
|---|

