### 初始化配置HomeAssistant
#### 首次打开HomeAssistant
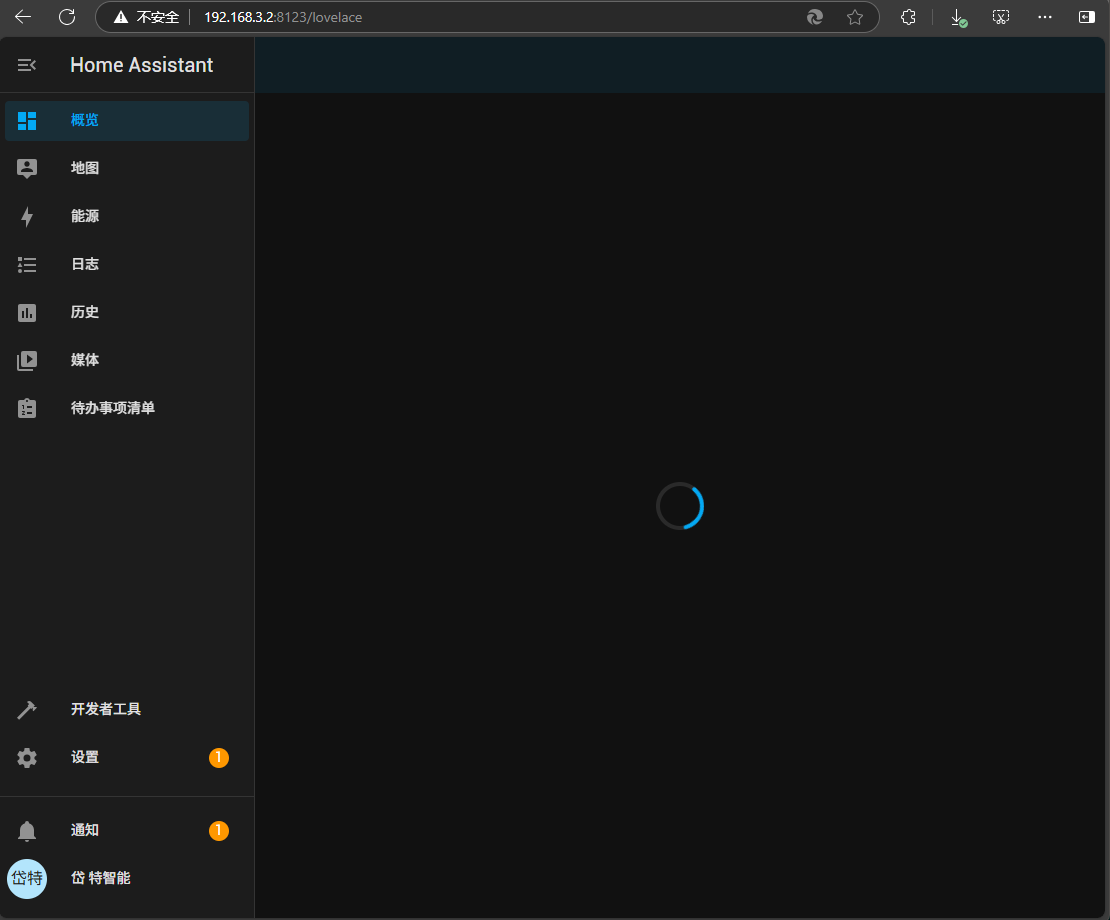
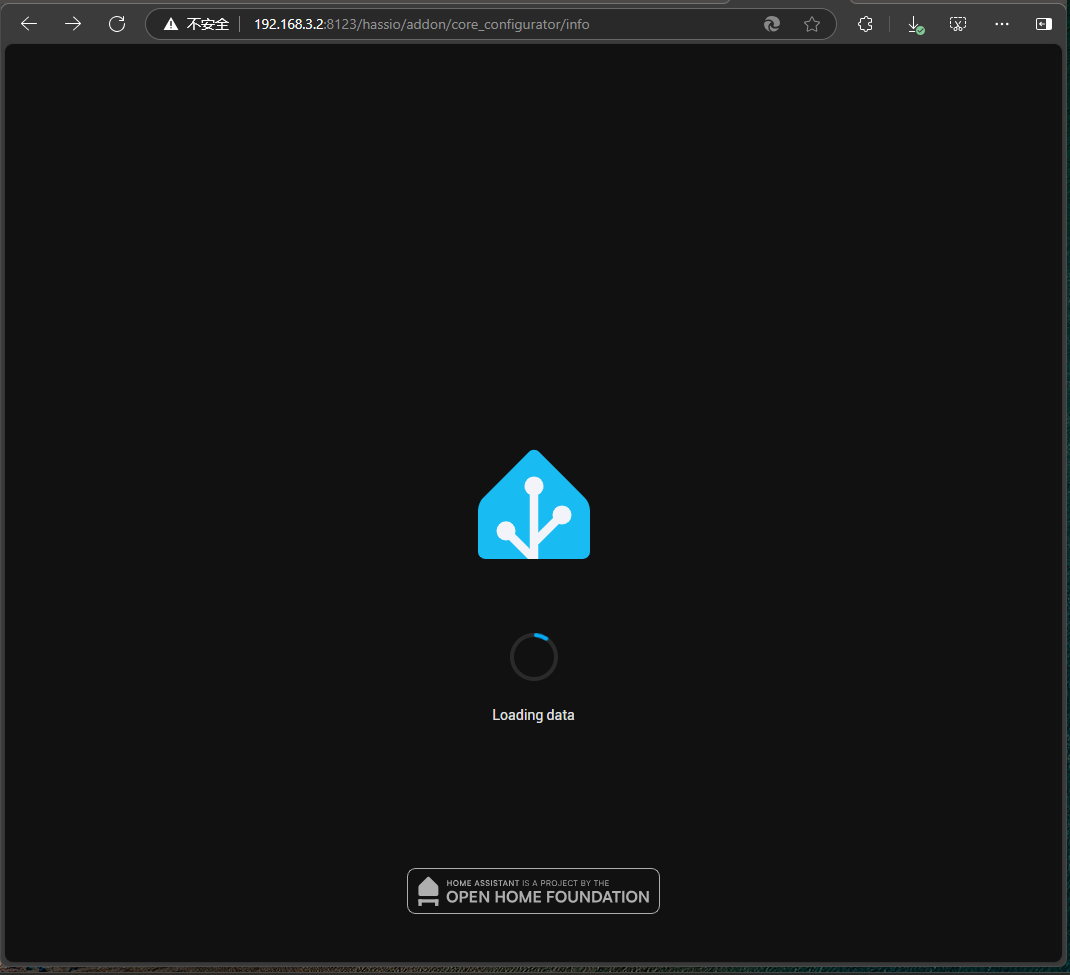
首次打开HomeAssistant通过,路由器为其分配的IP地址加端口号即可进行HomeAssistant.
格式如下:
```
http://Ip:Port
如:http://192.168.3.2:8123
基中:8123为其默认的端口后,当然,系统初始化成功后,可以改.
```
如下图所示:
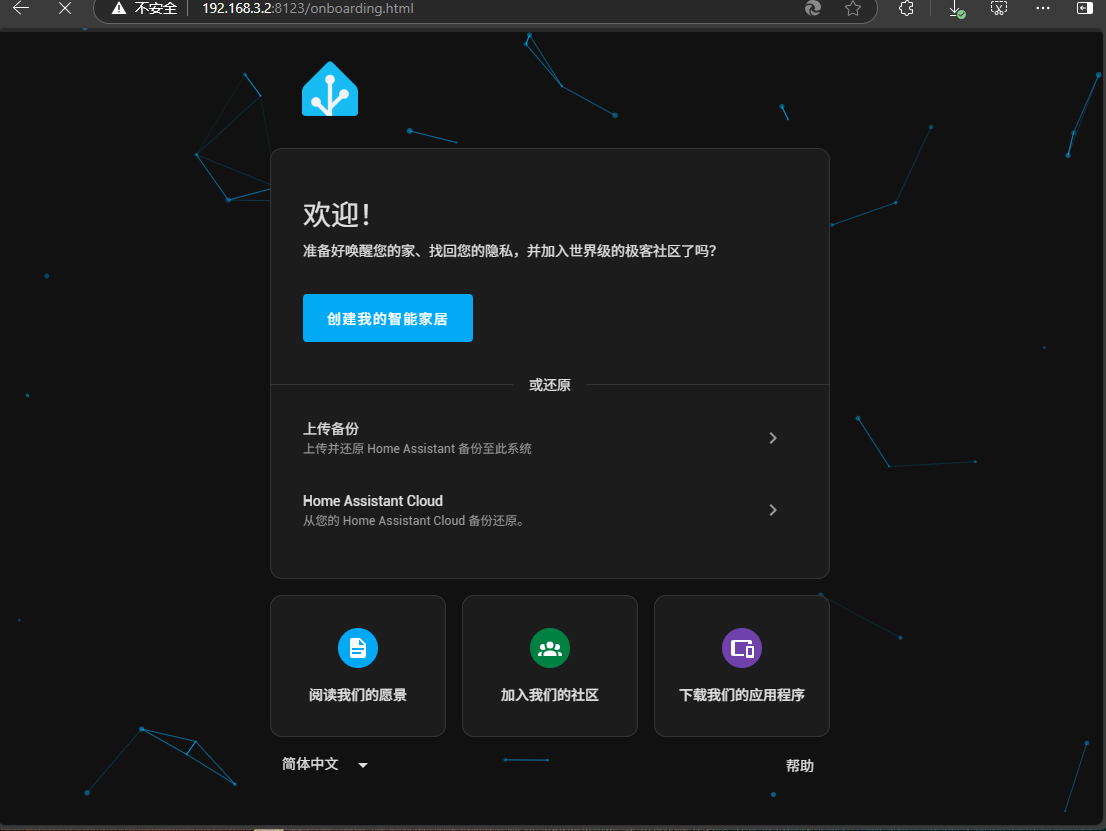 点击"创建我智能家家居"按进行下一步
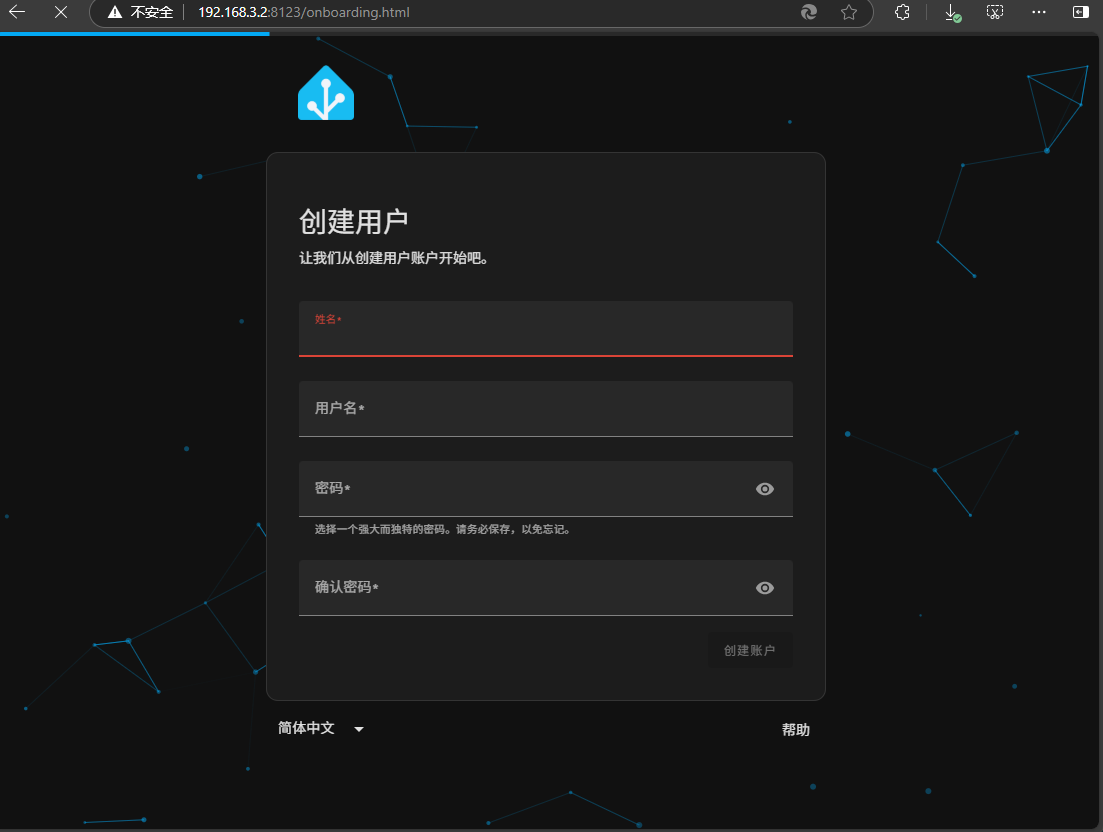 在这里我们输入姓名,用户名,密码,确认密码
这里我们使用统一的信息
```
姓名:岱特智能
用户名:dtuser
密码:******
确认密码:*****
```
**注意:上述密码为了安全,没有显示,请咨询系统管理员获取真正的密码.**
在这里我们输入姓名,用户名,密码,确认密码
这里我们使用统一的信息
```
姓名:岱特智能
用户名:dtuser
密码:******
确认密码:*****
```
**注意:上述密码为了安全,没有显示,请咨询系统管理员获取真正的密码.**
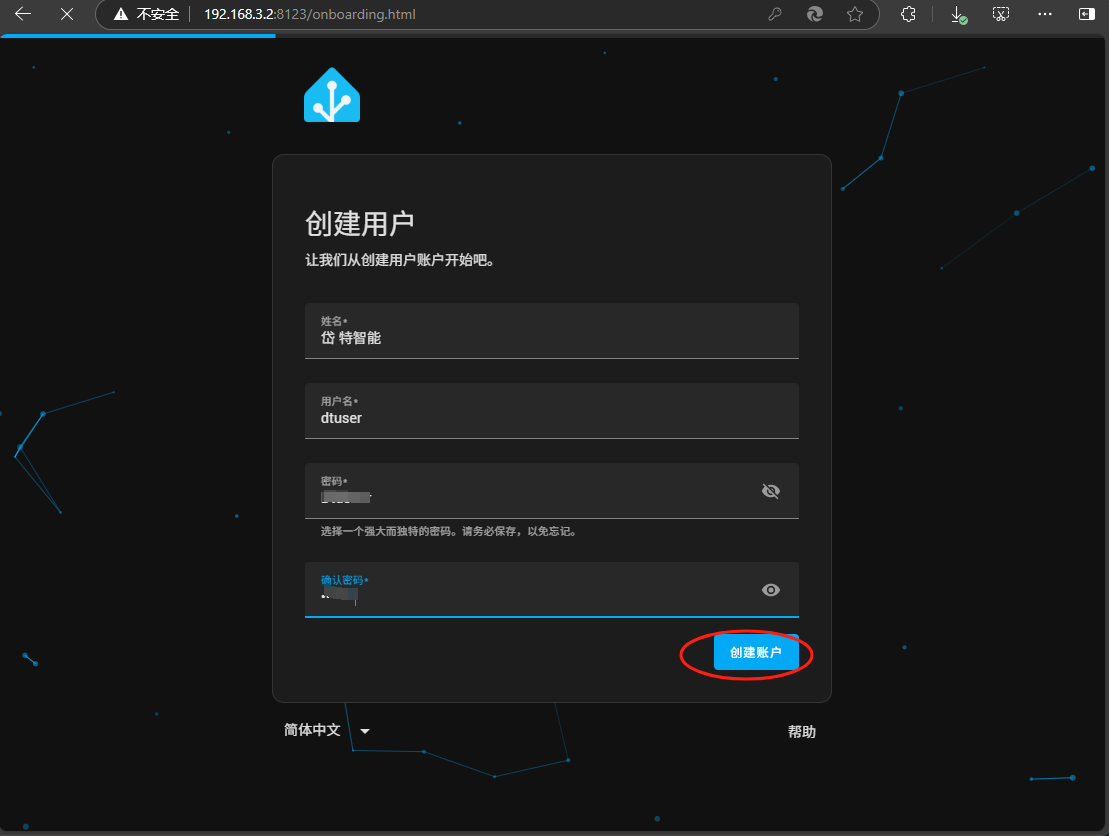 点击"创建帐户",
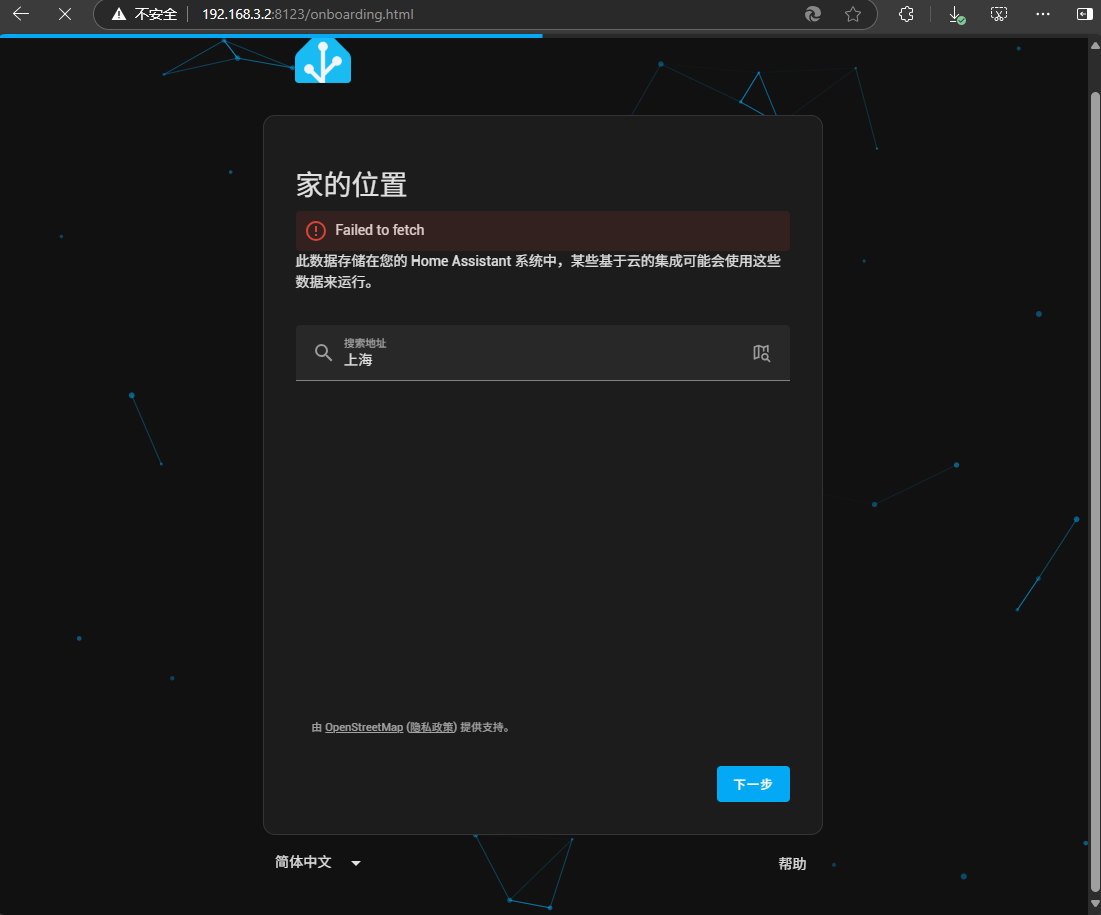 这一步,会要求你输入位置,输入城市点获取,如果取下到会报错.没关系,直接下一步即可,系统配置完成后,还可更改.
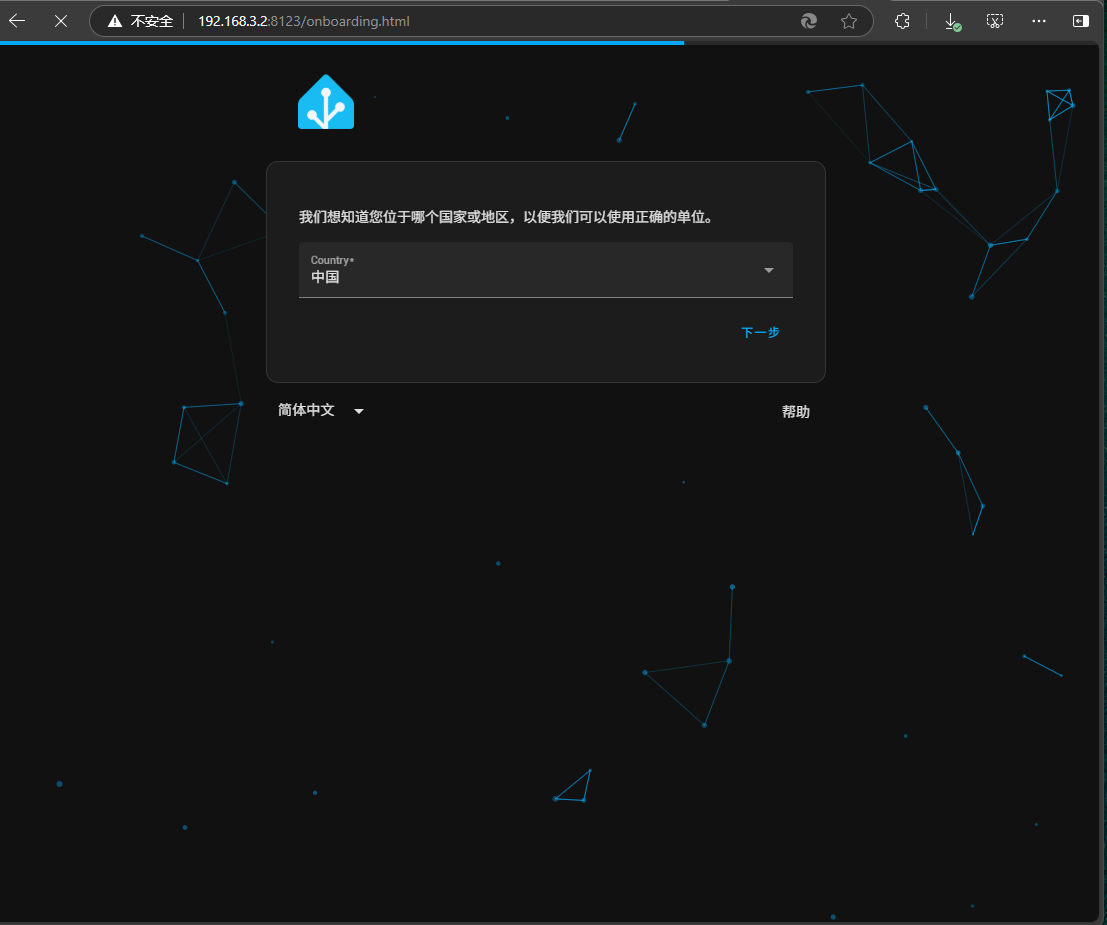 这一步是要求,你输下所属的国家与地区,它会自动判断出来,国家,直接点下一步即可.
此时,它可能还会弹出一个对话框框,帮你检测位置 ,点确定即可
这一步是要求,你输下所属的国家与地区,它会自动判断出来,国家,直接点下一步即可.
此时,它可能还会弹出一个对话框框,帮你检测位置 ,点确定即可
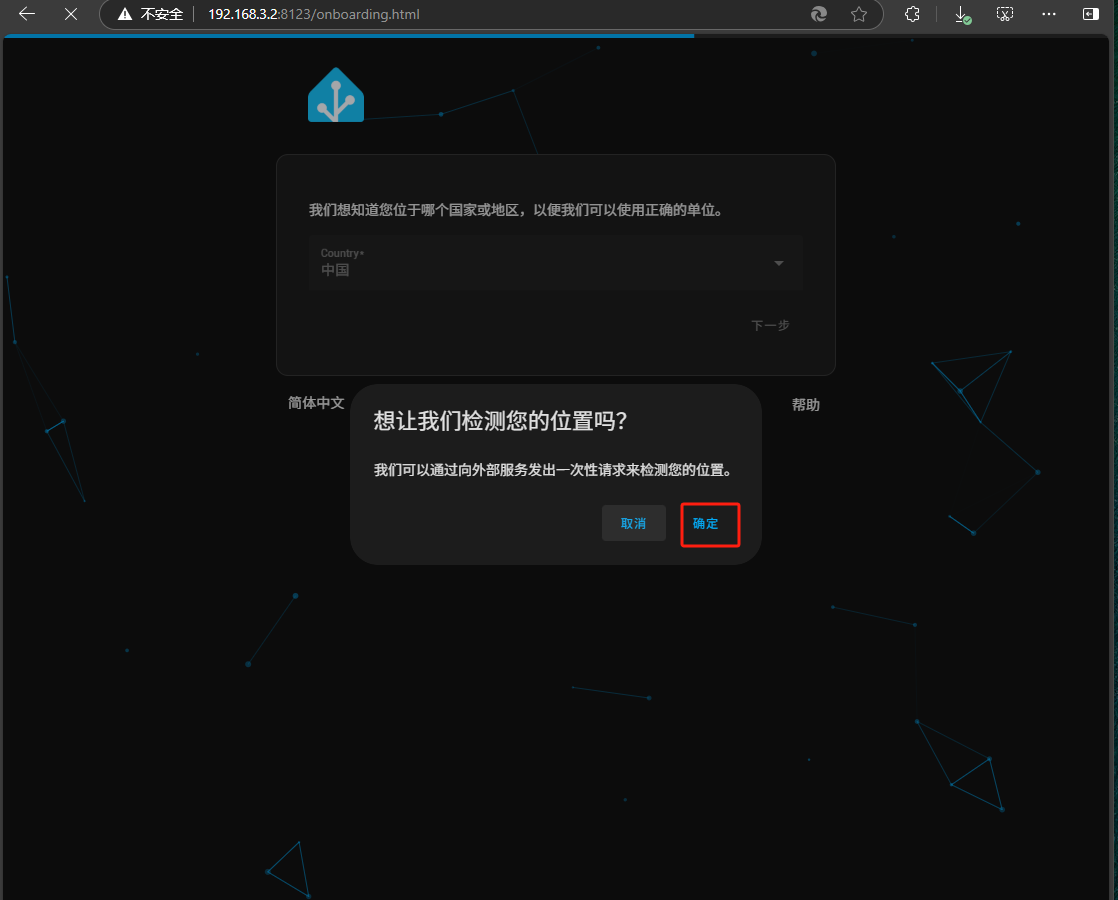 如果不想让其检测,直接点取消即可,因为其检测折可能很慢,所以,直接点取消,选择中国即可.
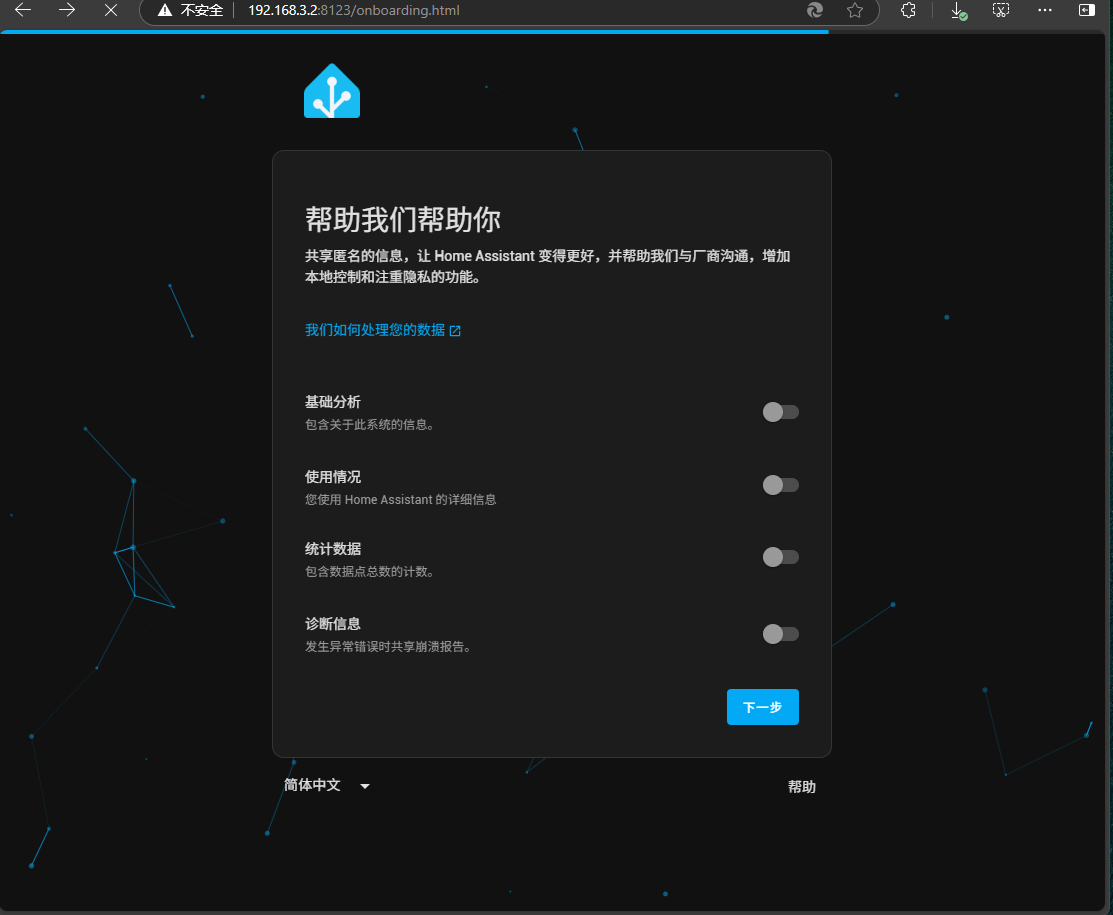 这里的几项,全部不用选,直接下一步
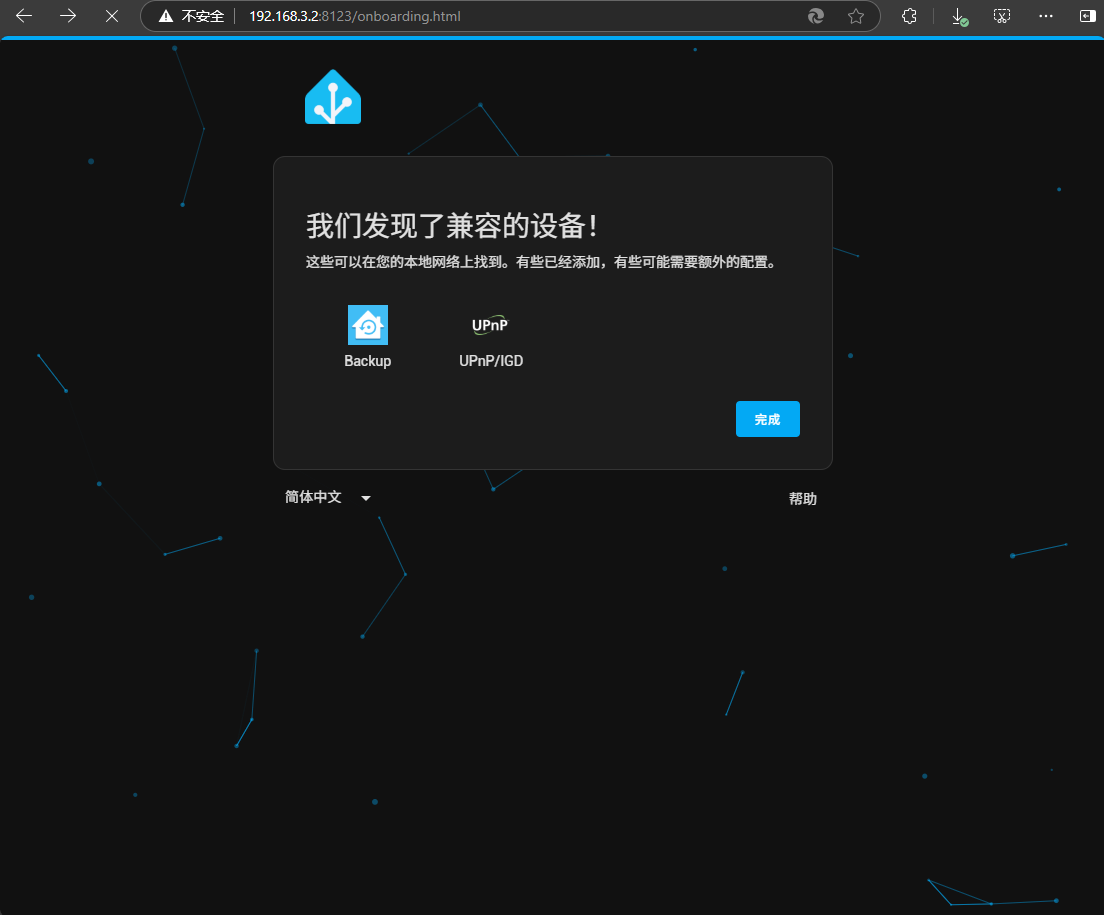 这一步,系统会自动扫描局域网中的能直接入的设备.直接点击完成,
然后,系统会转到如下界面
这一步,系统会自动扫描局域网中的能直接入的设备.直接点击完成,
然后,系统会转到如下界面
 可能要持续一阵,等待其完成即可.
 开始第一次,可能很慢
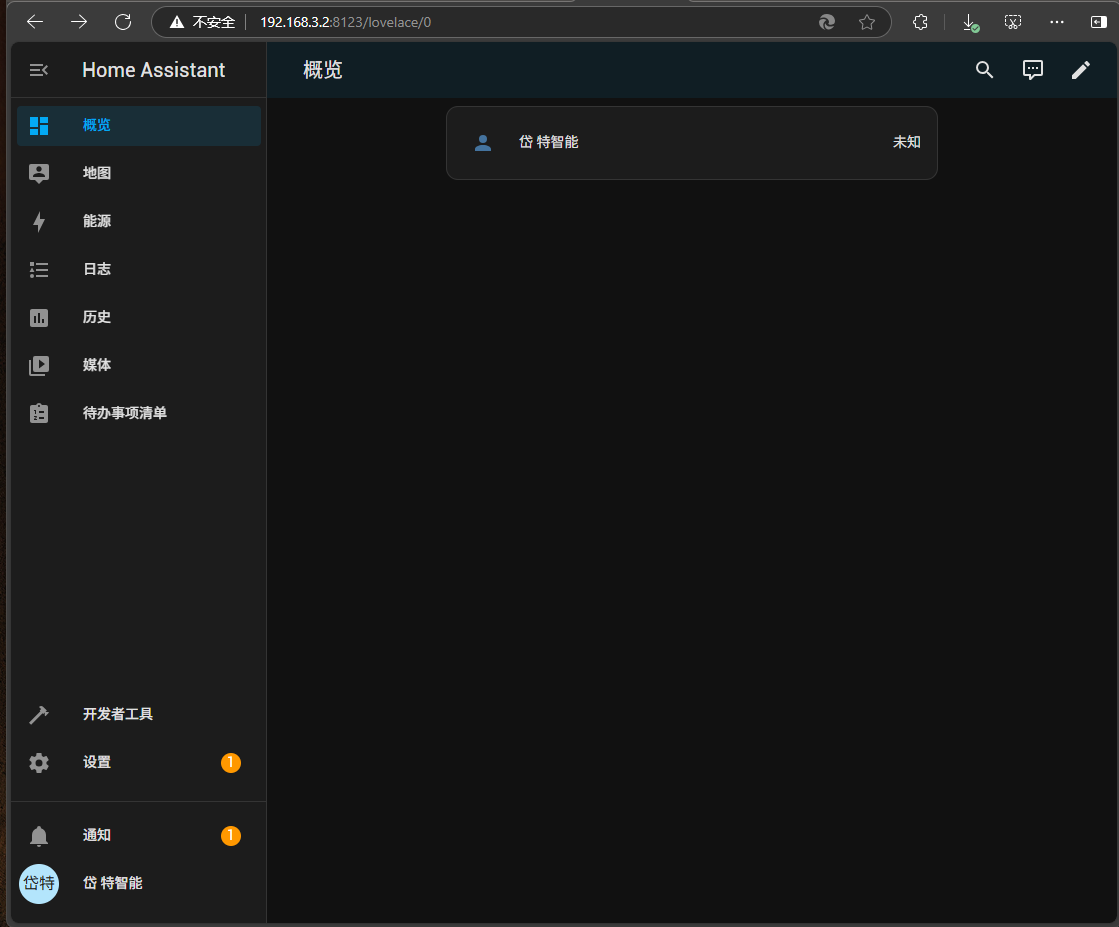
首次完成如下显示
开始第一次,可能很慢
首次完成如下显示
 #### 更新必要的组件
首次登录,可能会显示更新,如此时显示
#### 更新必要的组件
首次登录,可能会显示更新,如此时显示
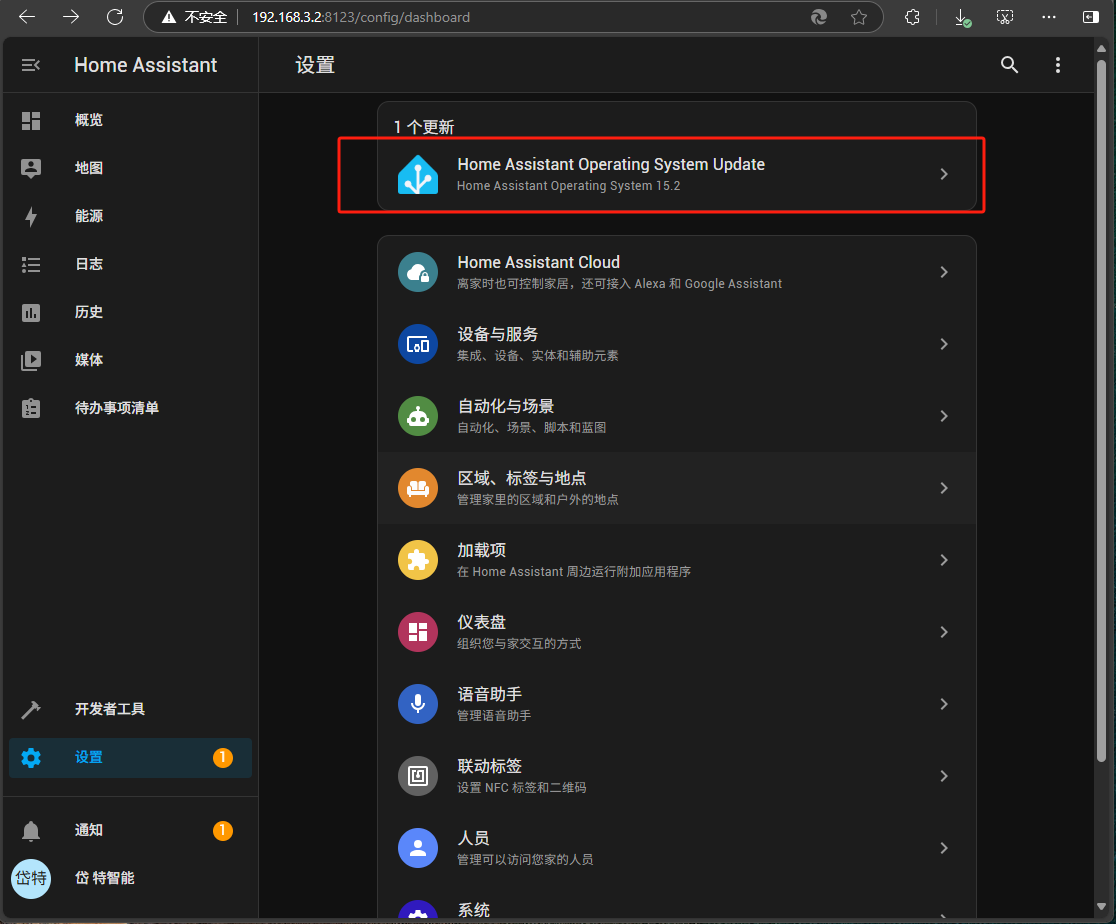 提示更新Home Assistnat Operating System Update,点击如下按钮,以弹出的对话框中,点更新按钮
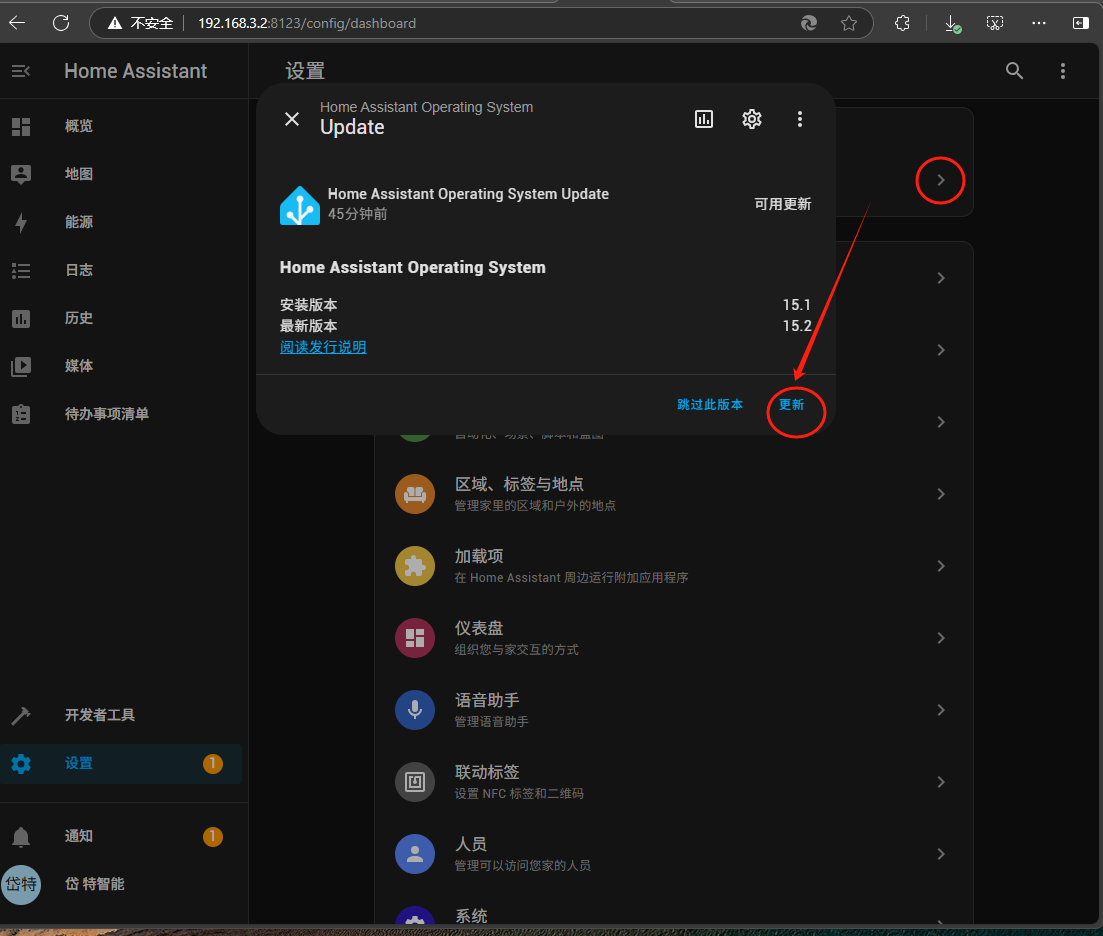 如下图所示,系统将会,进行更新
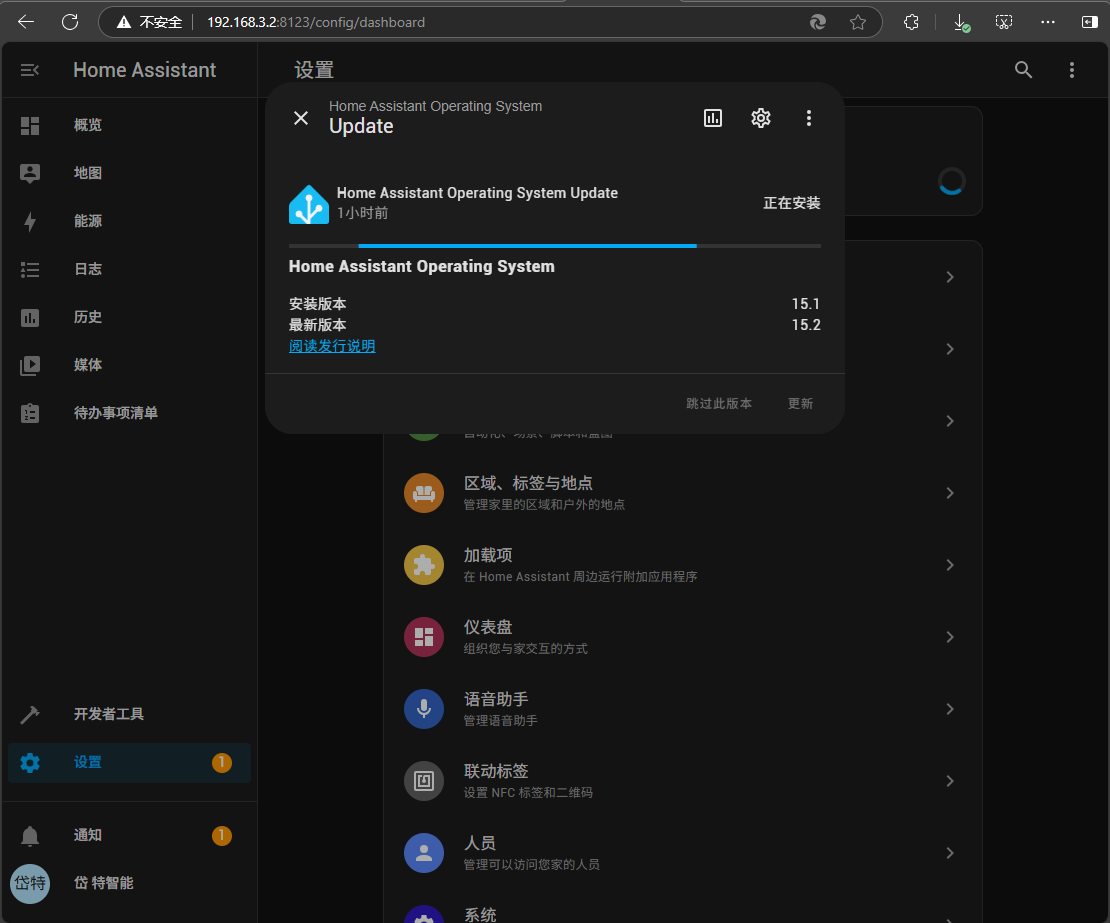 注意,这个操作,一般是从两个地方获取更新包,一是github一个是docker的仓库,所以,**要保持科学上网的畅通**。这个过程 ,估计要几分钟,需要耐心等等,也有可能会更新失败,然后,再次更新。
更新时,如果网络有问题可能会出在日志 中报出如下错误
```
aiodns.error.DNSError: (12, 'Timeout while contacting DNS servers')
2025-04-16 17:26:15.438 ERROR (MainThread) [homeassistant] Error doing job: Future exception was never retrieved (None)
aiodns.error.DNSError: (12, 'Timeout while contacting DNS servers')
2025-04-16 17:26:15.438 ERROR (MainThread) [homeassistant] Error doing job: Future exception was never retrieved (None)
aiodns.error.DNSError: (12, 'Timeout while contacting DNS servers')
2025-04-16 17:26:15.438 ERROR (MainThread) [homeassistant] Error doing job: Future exception was never retrieved (None)
aiodns.error.DNSError: (12, 'Timeout while contacting DNS servers')
2025-04-16 17:26:15.438 ERROR (MainThread) [homeassistant] Error doing job: Future exception was never retrieved (None)
aiodns.error.DNSError: (12, 'Timeout while contacting DNS servers')
2025-04-16 17:26:15.438 ERROR (MainThread) [homeassistant] Error doing job: Future exception was never retrieved (None)
aiodns.error.DNSError: (12, 'Timeout while contacting DNS servers')
2025-04-16 17:26:15.439 ERROR (MainThread) [homeassistant] Error doing job: Future exception was never retrieved (None)
aiodns.error.DNSError: (12, 'Timeout while contacting DNS servers')
2025-04-16 17:26:15.440 ERROR (MainThread) [homeassistant] Error doing job: Future exception was never retrieved (None)
aiodns.error.DNSError: (12, 'Timeout while contacting DNS servers')
2025-04-16 17:26:15.440 ERROR (MainThread) [homeassistant] Error doing job: Future exception was never retrieved (None)
aiodns.error.DNSError: (12, 'Timeout while contacting DNS servers')
2025-04-16 17:26:15.440 ERROR (MainThread) [homeassistant] Error doing job: Future exception was never retrieved (None)
aiodns.error.DNSError: (12, 'Timeout while contacting DNS servers')
[09:26:17] INFO: Home Assistant Core finish process exit code 0
[09:26:17] INFO: Home Assistant Core service shutdown
s6-rc: info: service legacy-services successfully stopped
s6-rc: info: service legacy-cont-init: stopping
s6-rc: info: service legacy-cont-init successfully stopped
s6-rc: info: service fix-attrs: stopping
s6-rc: info: service fix-attrs successfully stopped
s6-rc: info: service s6rc-oneshot-runner: stopping
s6-rc: info: service s6rc-oneshot-runner successfully stopped
s6-rc: info: service s6rc-oneshot-runner: starting
s6-rc: info: service s6rc-oneshot-runner successfully started
s6-rc: info: service fix-attrs: starting
s6-rc: info: service fix-attrs successfully started
s6-rc: info: service legacy-cont-init: starting
s6-rc: info: service legacy-cont-init successfully started
s6-rc: info: service legacy-services: starting
services-up: info: copying legacy longrun home-assistant (no readiness notification)
s6-rc: info: service legacy-services successfully started
2025-04-16 17:28:26.876 ERROR (MainThread) [homeassistant.components.homeassistant_alerts.coordinator] Timeout fetching homeassistant_alerts data
2025-04-16 17:51:56.276 WARNING (MainThread) [homeassistant.helpers.translation] Failed to load integration for translation: Invalid domain hassio.update
2025-04-16 17:51:56.278 WARNING (MainThread) [homeassistant.helpers.translation] Failed to load integration for translation: Invalid domain cloud.tts
2025-04-16 17:51:56.278 WARNING (MainThread) [homeassistant.helpers.translation] Failed to load integration for translation: Invalid domain mobile_app.notify
2025-04-16 17:51:56.278 WARNING (MainThread) [homeassistant.helpers.translation] Failed to load integration for translation: Invalid domain backup.sensor
2025-04-16 17:51:56.279 WARNING (MainThread) [homeassistant.helpers.translation] Failed to load integration for translation: Invalid domain energy.sensor
2025-04-16 17:51:56.279 WARNING (MainThread) [homeassistant.helpers.translation] Failed to load integration for translation: Invalid domain sun.sensor
2025-04-16 17:51:56.279 WARNING (MainThread) [homeassistant.helpers.translation] Failed to load integration for translation: Invalid domain homeassistant.scene
2025-04-16 17:51:56.279 WARNING (MainThread) [homeassistant.helpers.translation] Failed to load integration for translation: Invalid domain hassio.binary_sensor
2025-04-16 17:51:56.280 WARNING (MainThread) [homeassistant.helpers.translation] Failed to load integration for translation: Invalid domain hassio.sensor
```
上述错误多是由于网络问题引起的,要去检是科学上网是否还正常.
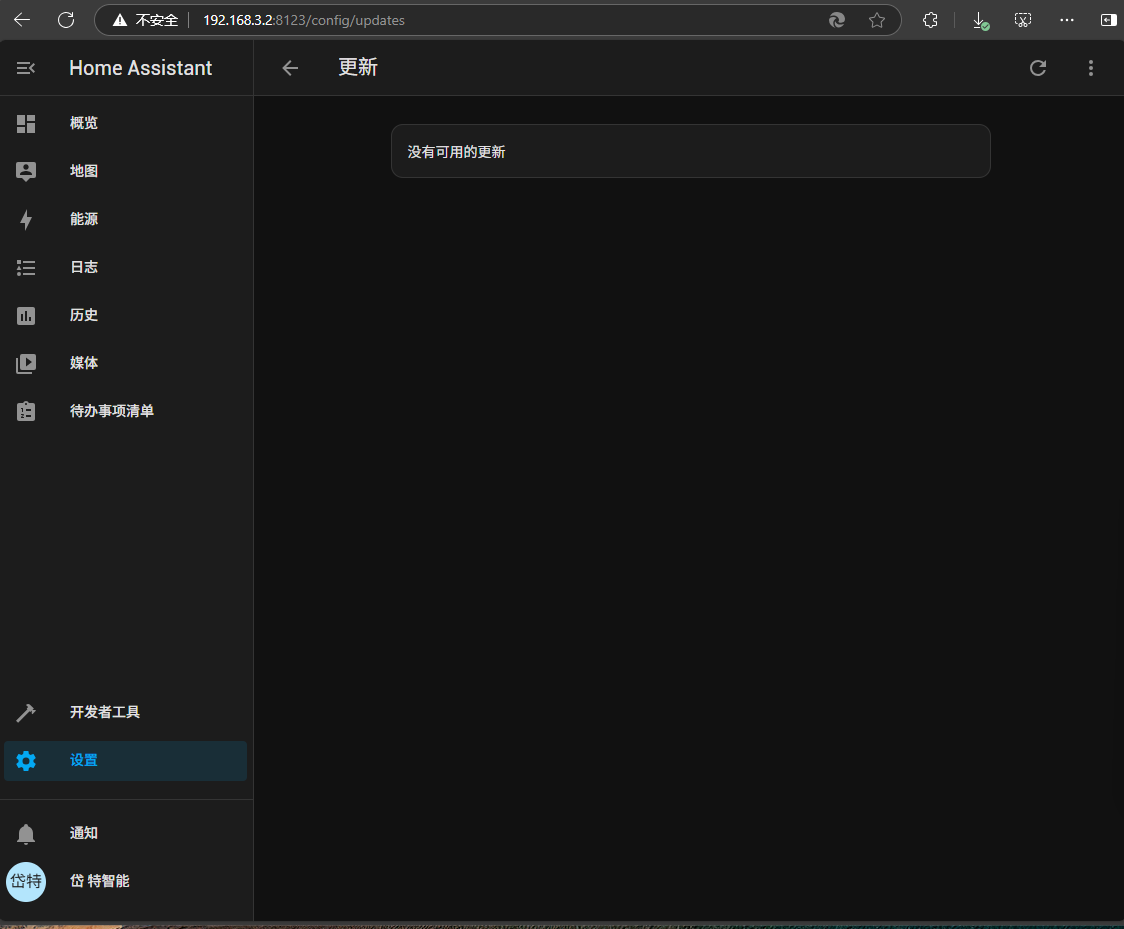
更完完成后,再次启动后,会显示没有可用的更新
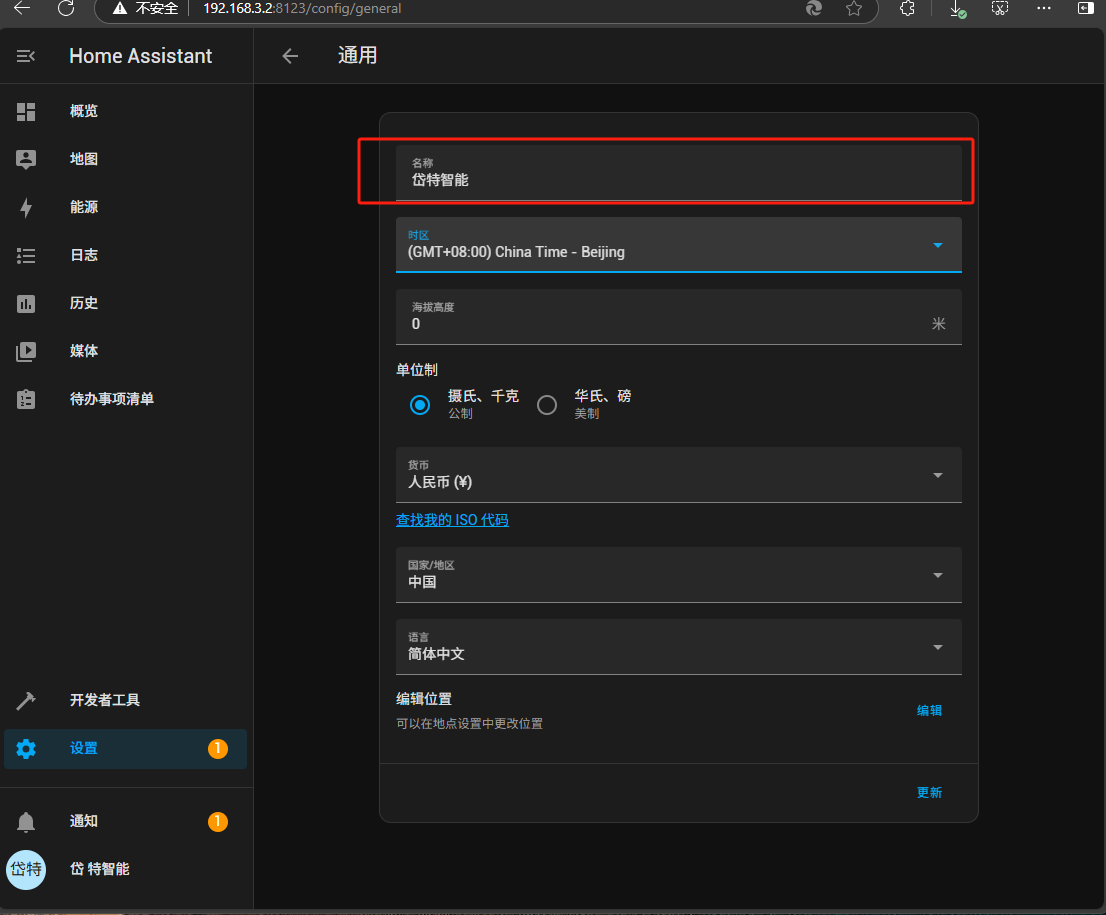
#### 配置-通用
点击,开始,通用

更改名称为:岱特智能
其它的不变
#### 配置-网络-主机名
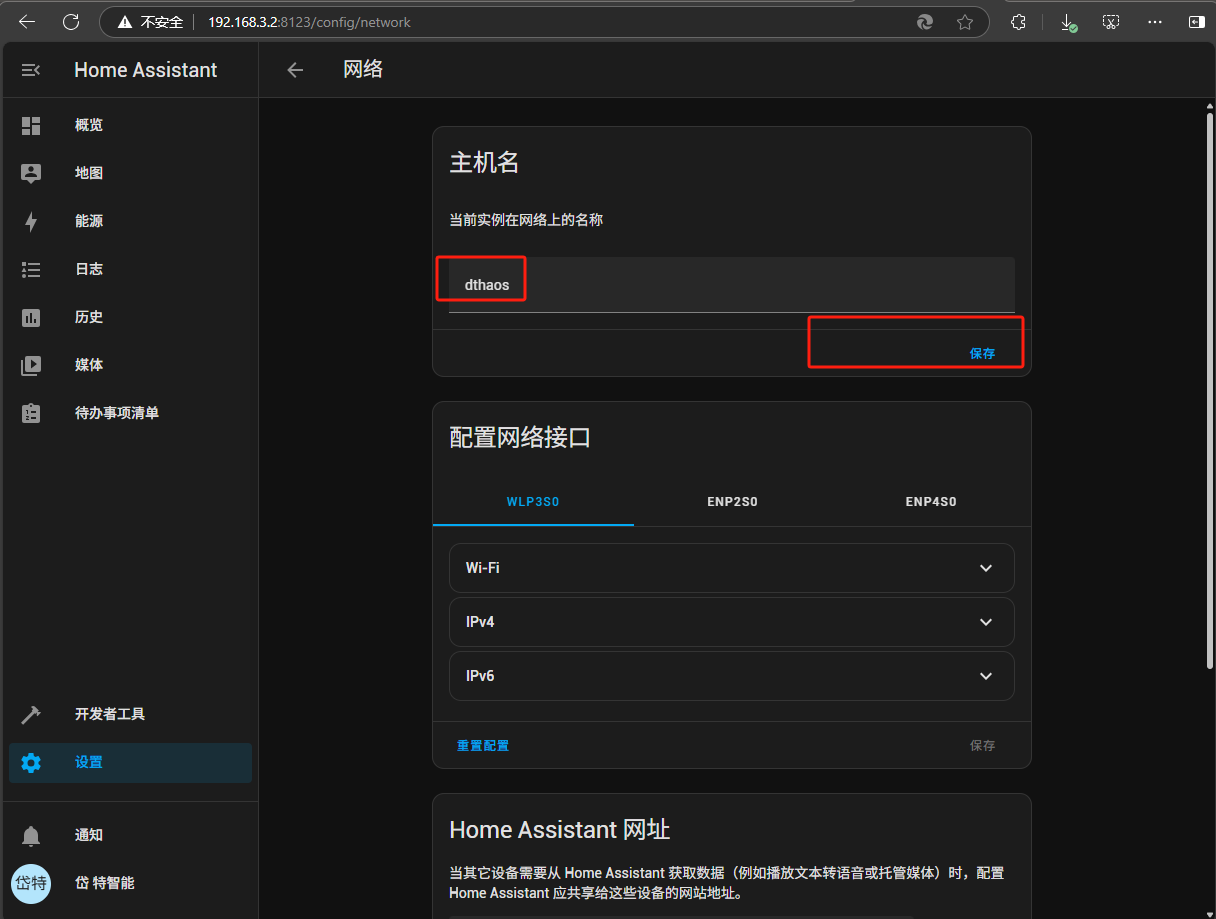
把主机名配置成为局域网中唯一的,实际让就是计算机名,因为同一局域网中,计算机名,不允许相同
#### 配置-设置-加载项
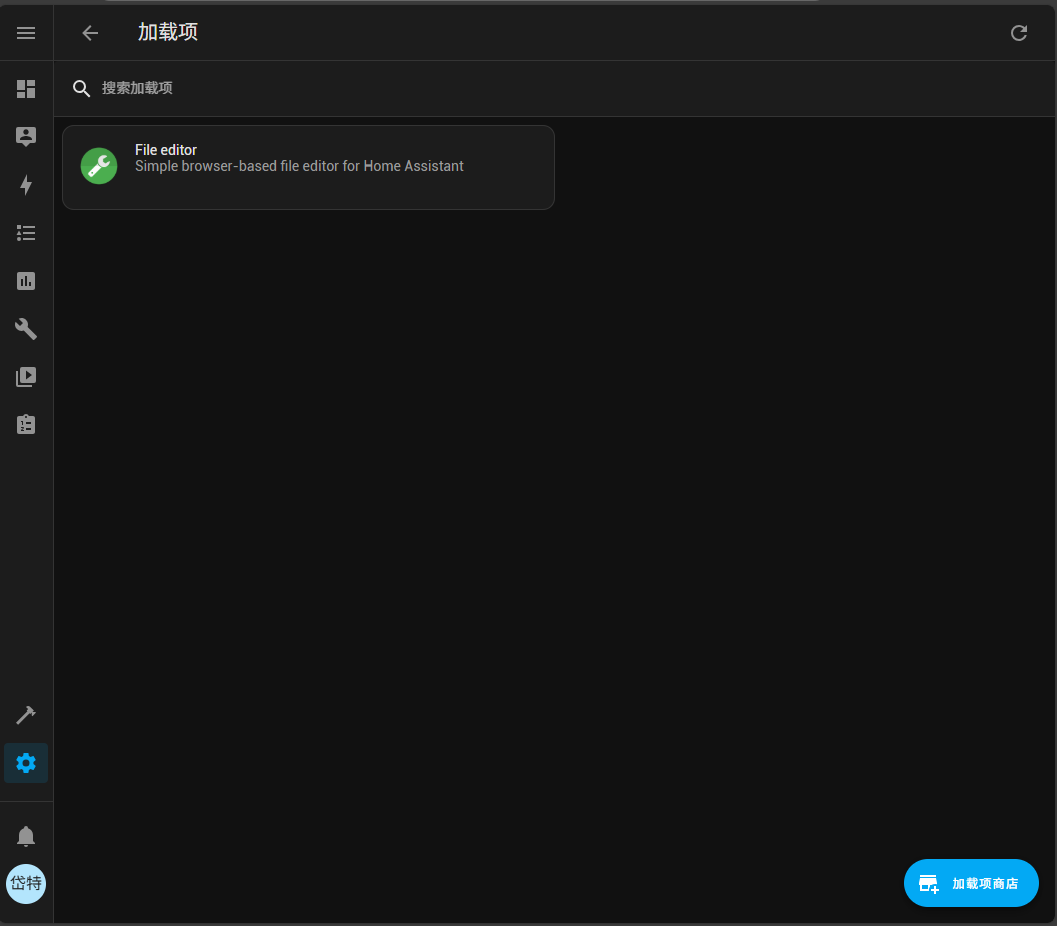
加载项中有许多必装组件,需要一一安装,首次进入时,可能会显示如下页面
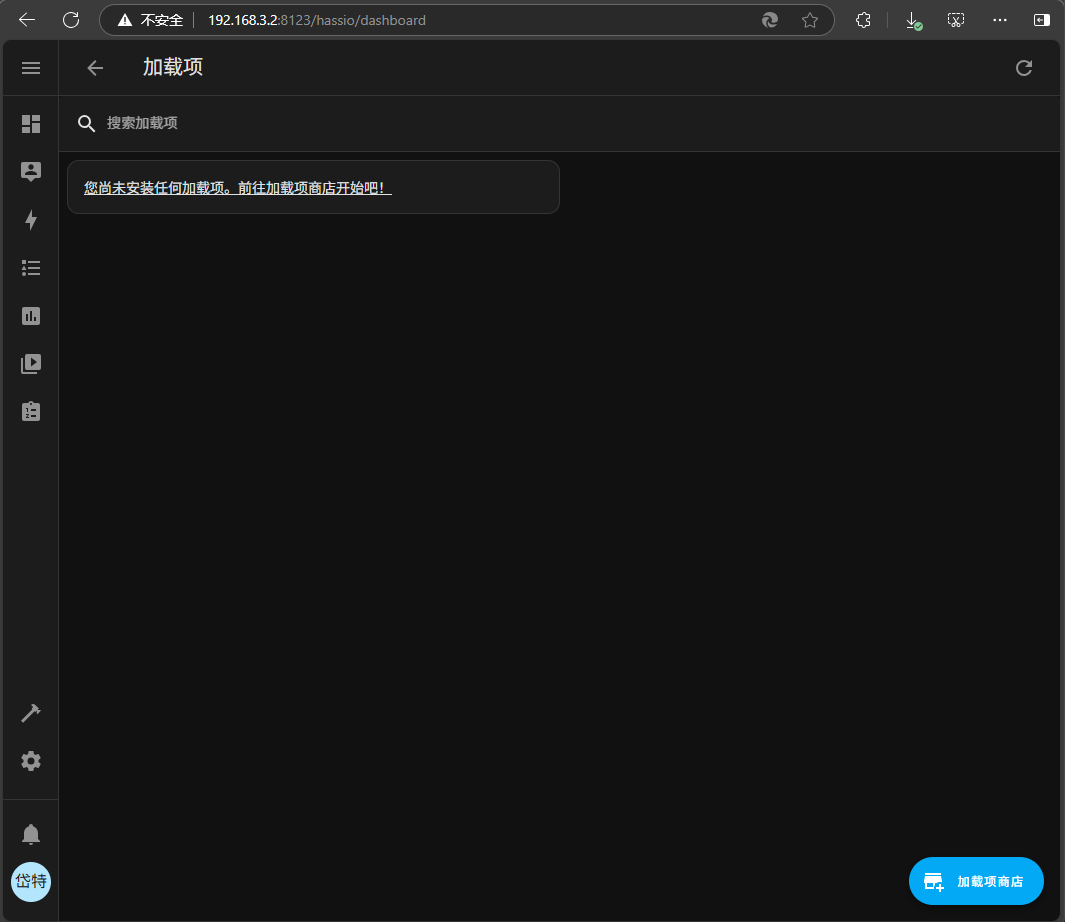
点击下角的"加载项商店"
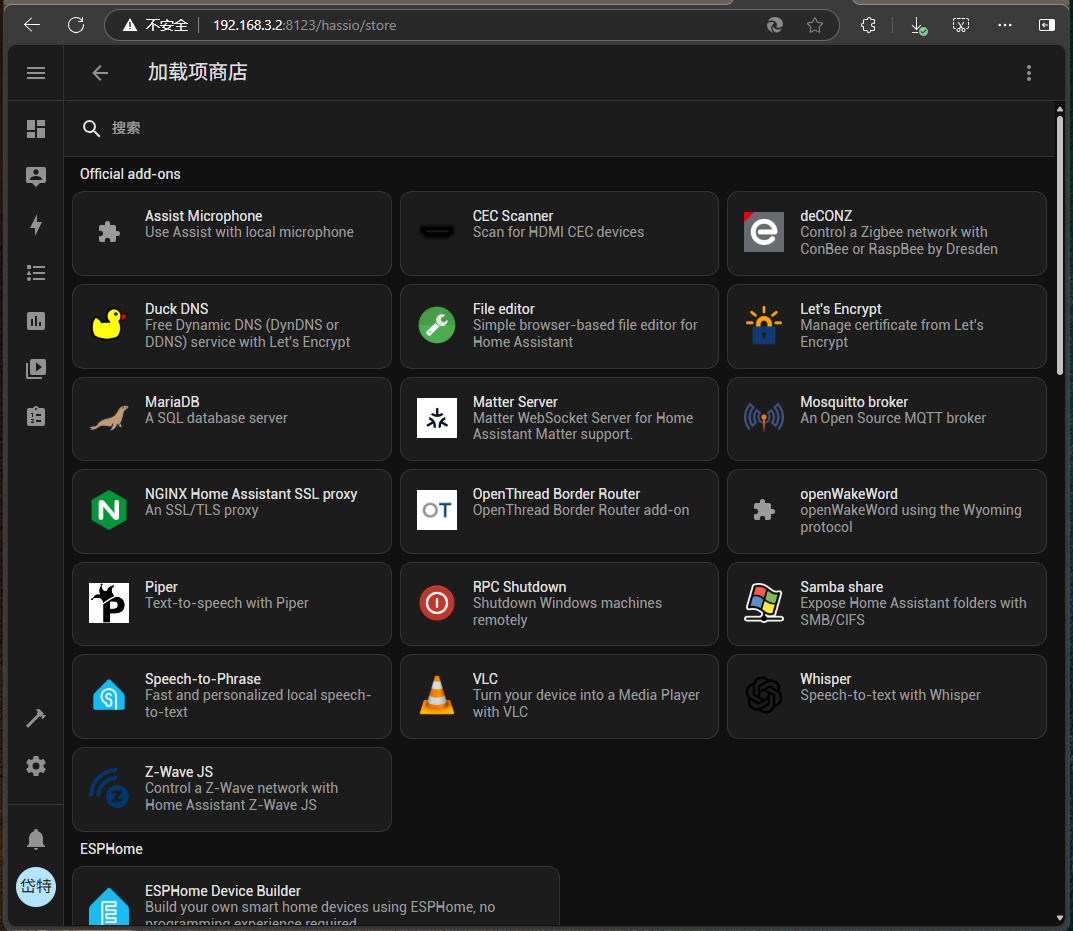
##### 安装File editor
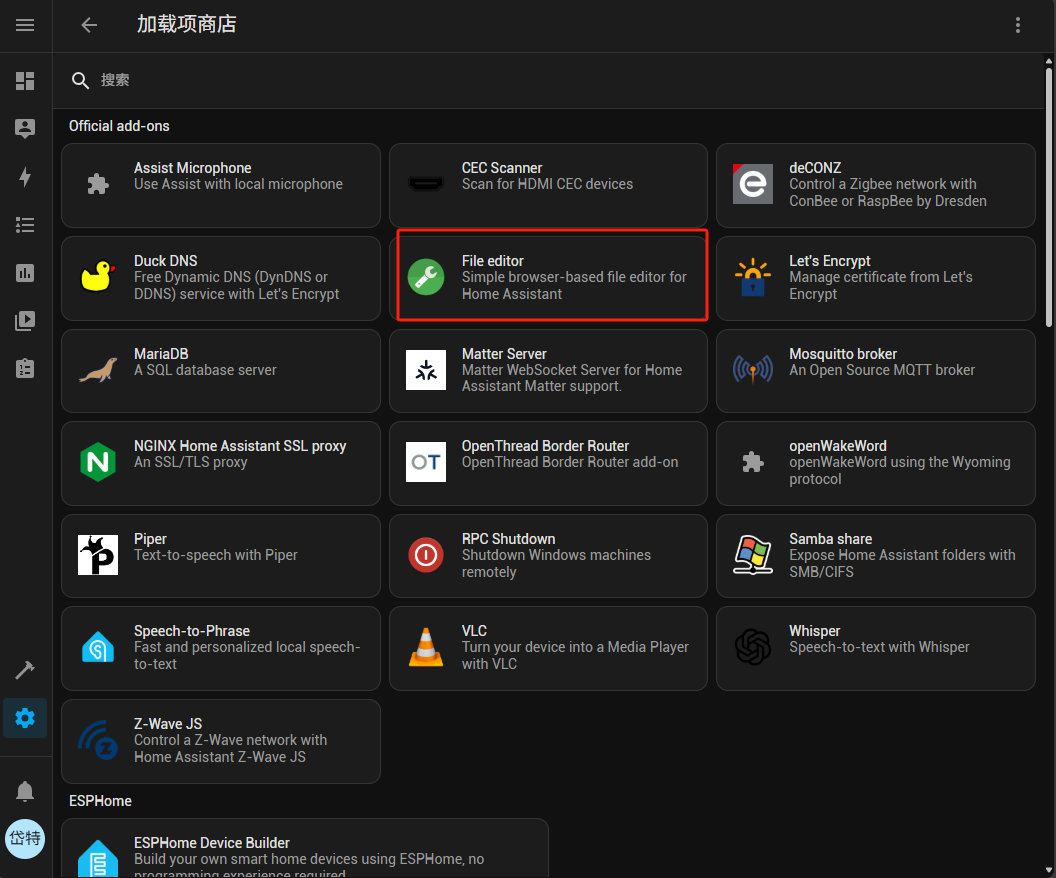
File editor 是一个用于修改HA的配置文件的集成工具,属必装项,点击安装
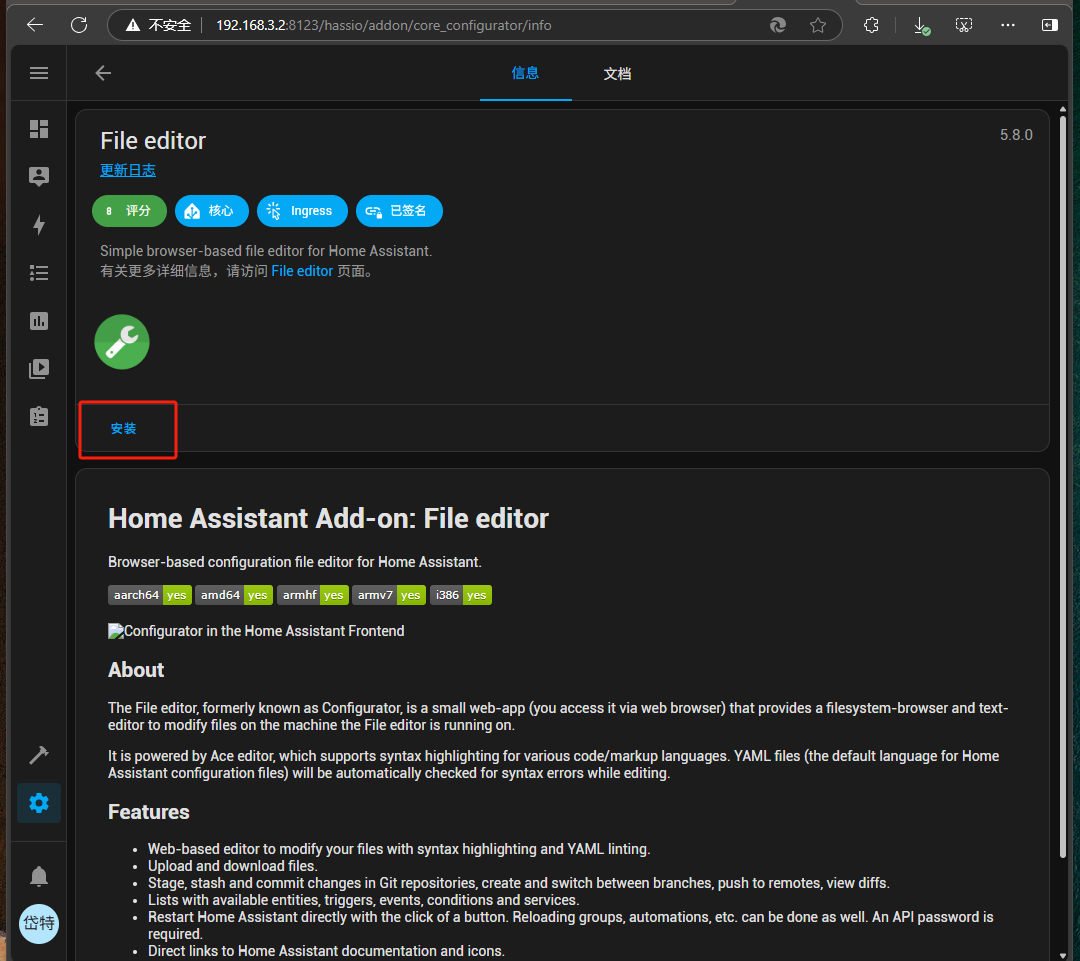
点击安装,系统会在后台自动安装此插件,
安装完成后,会自动重启
有时也会提示安装失败
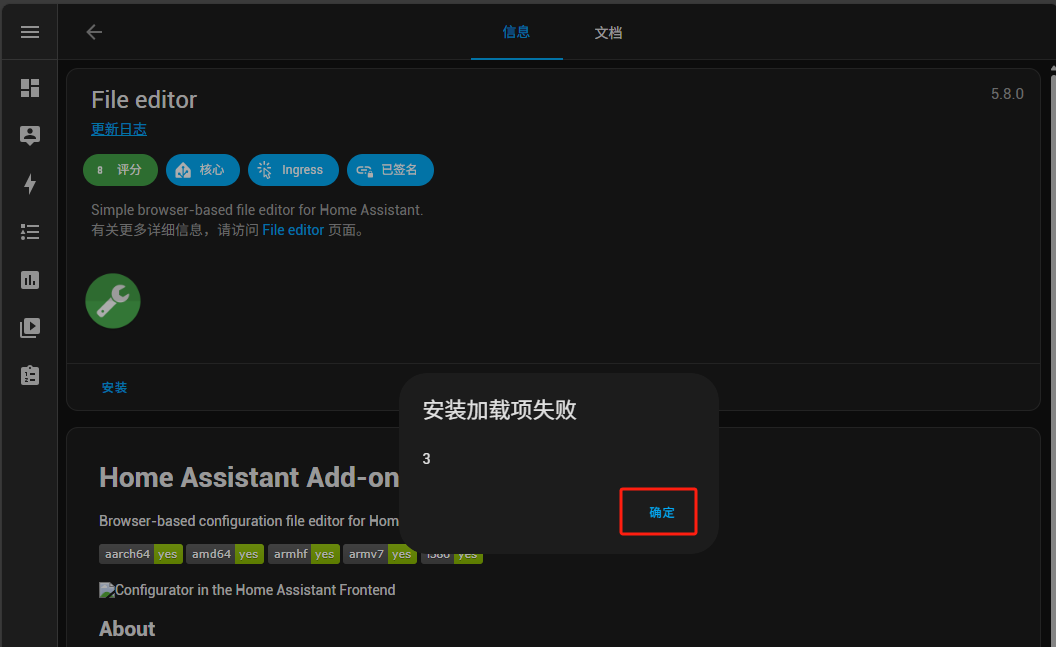
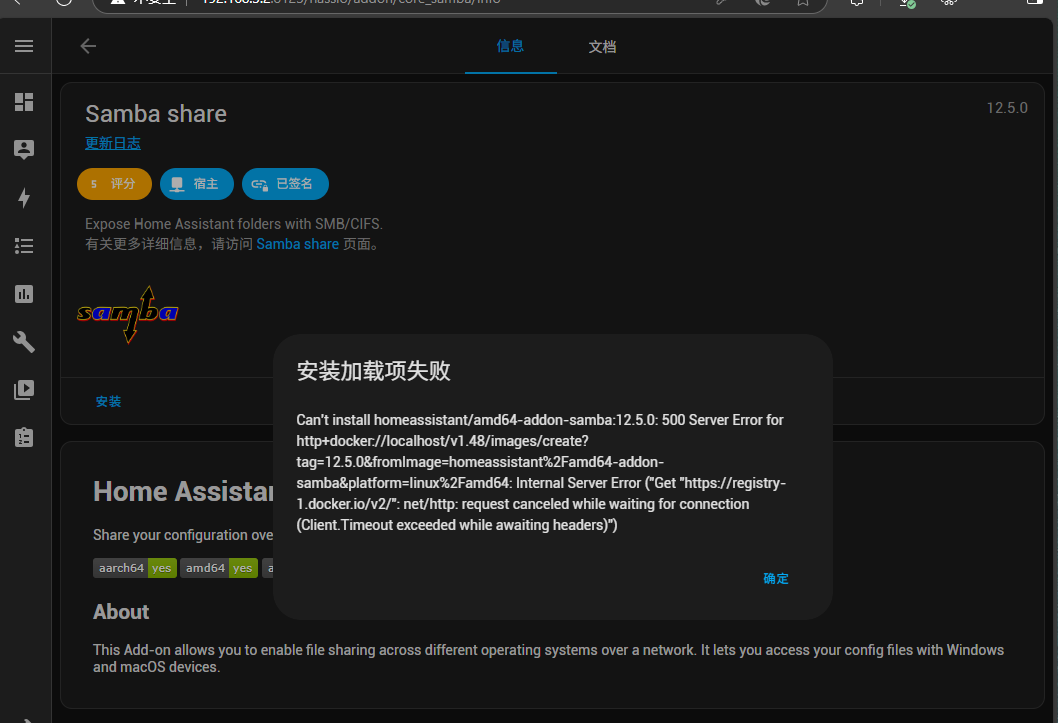
这种经查看日志 多为网强行问题无法访问.docker.io,这是因为科学上风的原因,重点排查网络,安装成功后,再次进入会显示如下界面
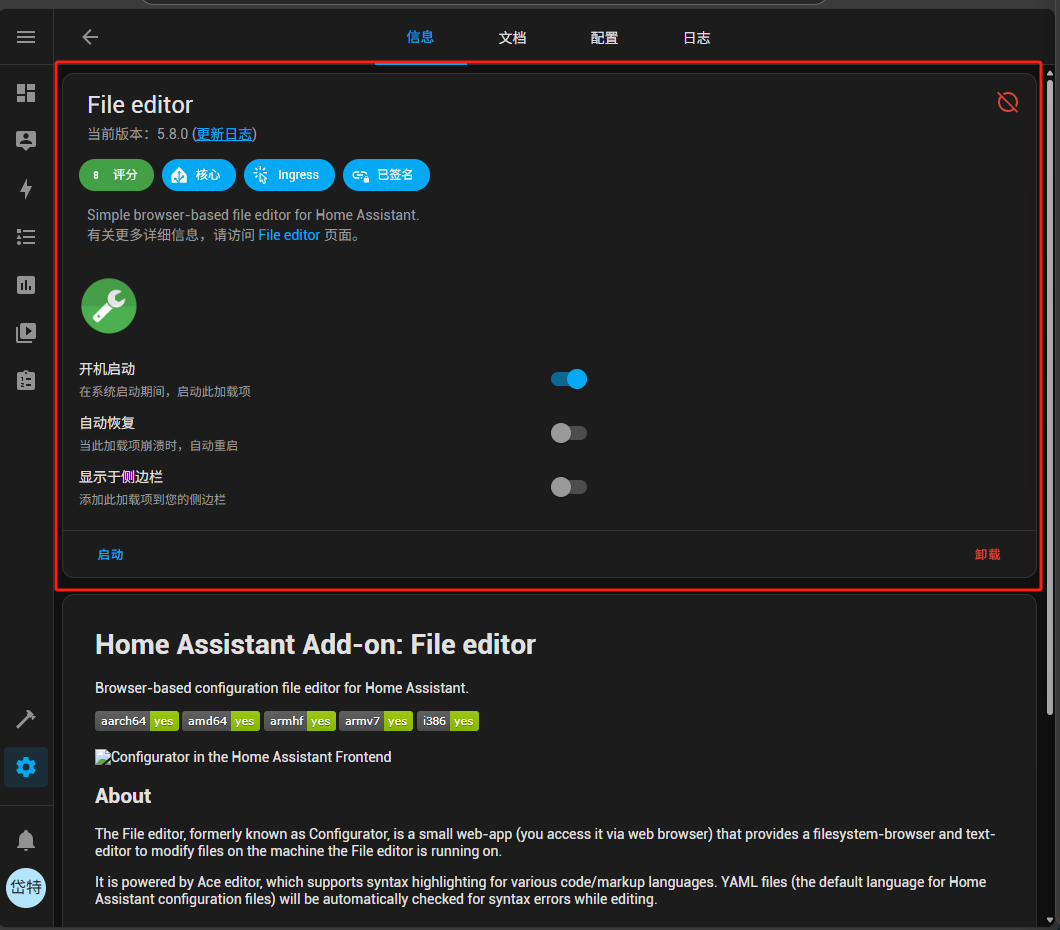
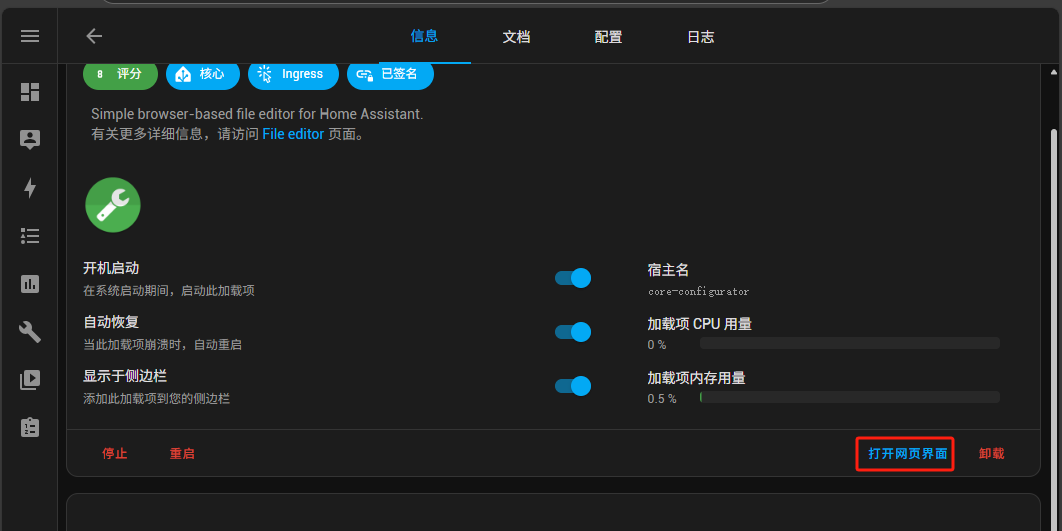
勾选,开机启动,自动恢复,显示于侧边栏
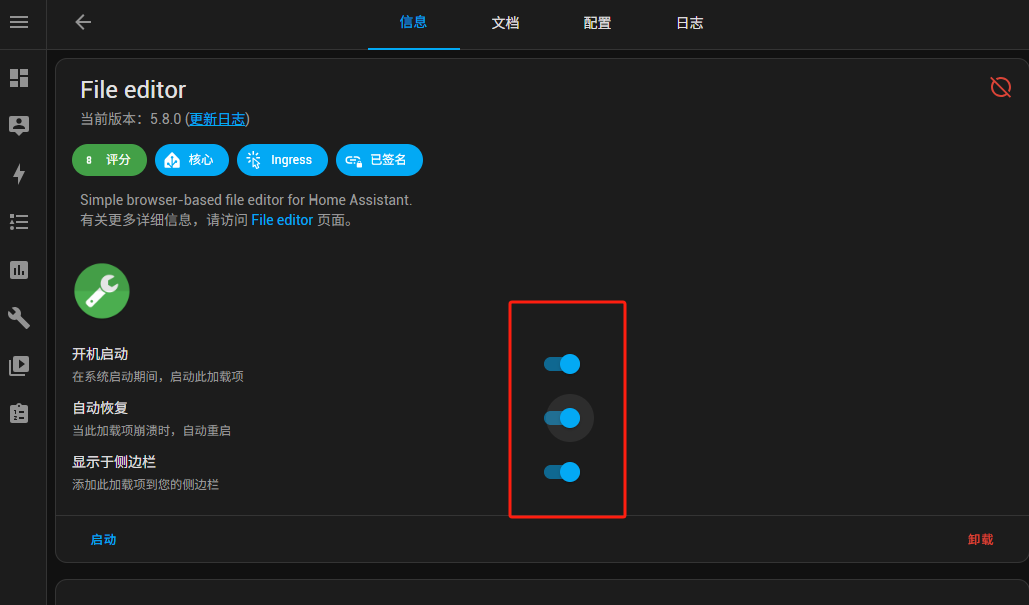
点击启动,或重启,将会在侧边栏看到此图标,点击打开网页界面
能看到如下界面,说明安装成功
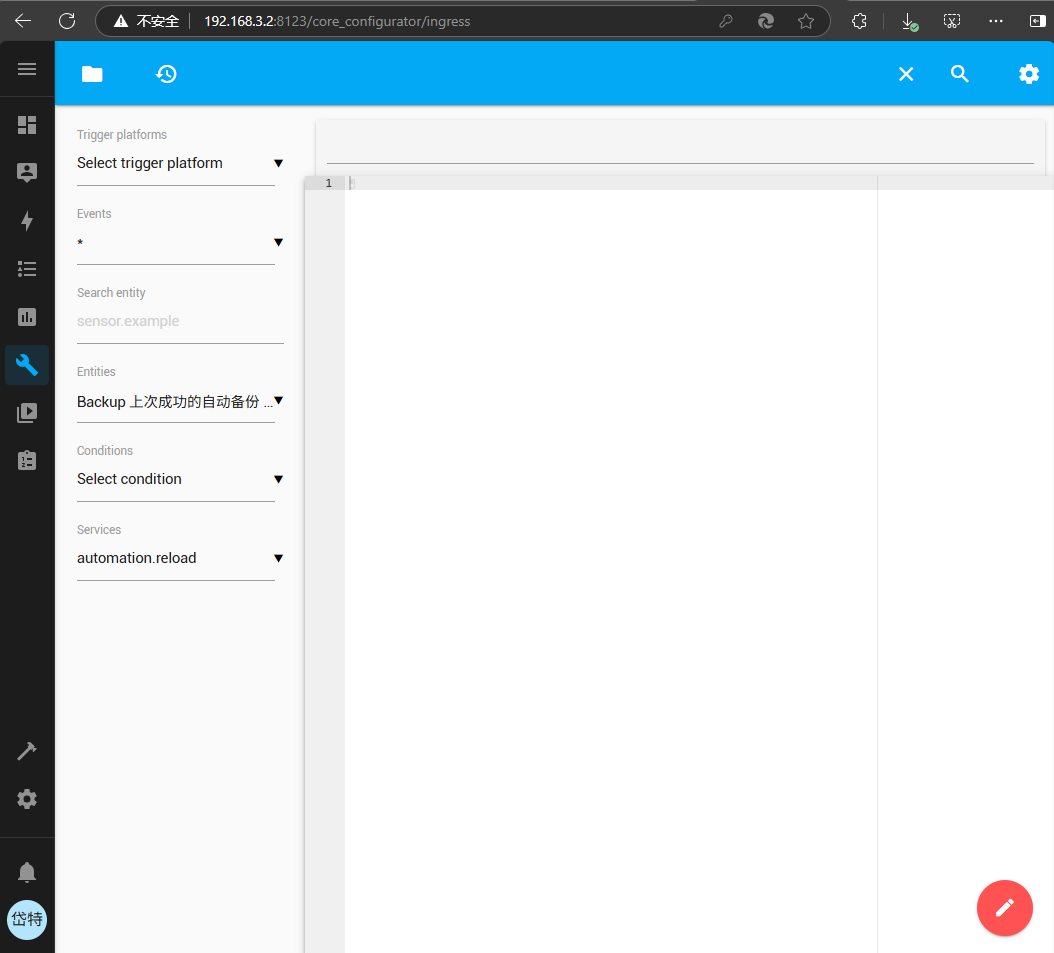
此时加载项中,就多出了File editor选项
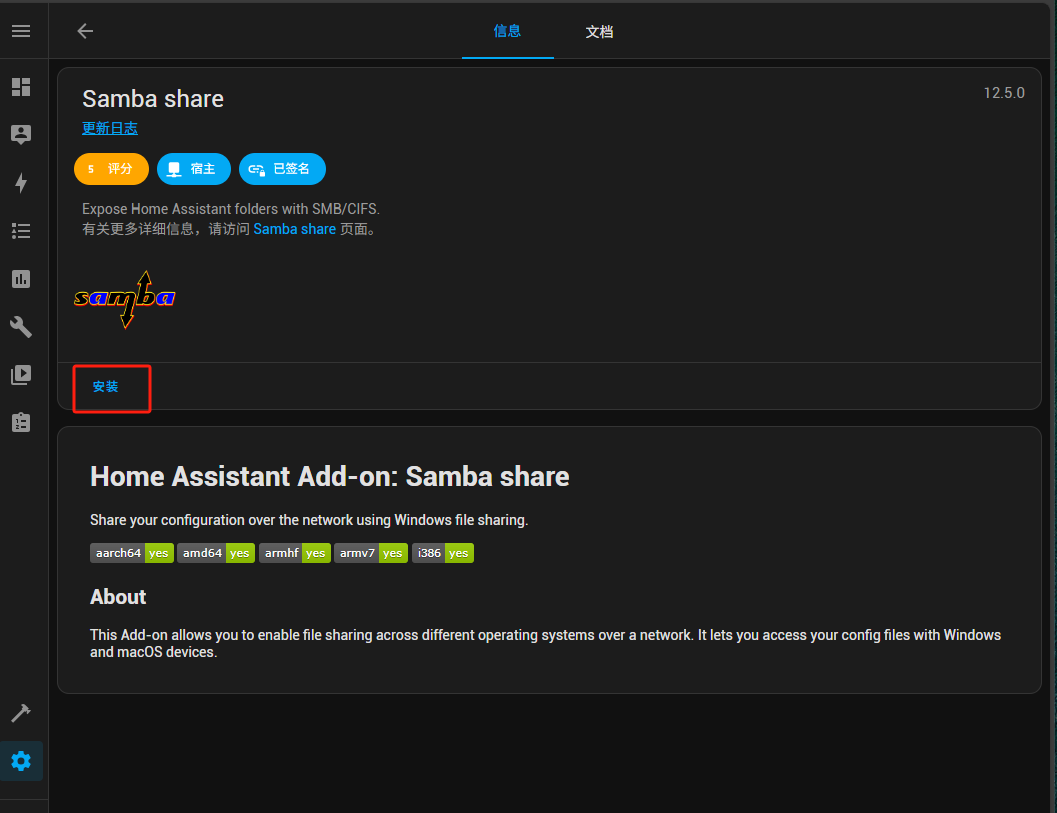
##### 安装Samba share插件
Samba share插件是一个提供共享目录的方式允行其它计算机用这种方式查看编辑ha的文件的组件.
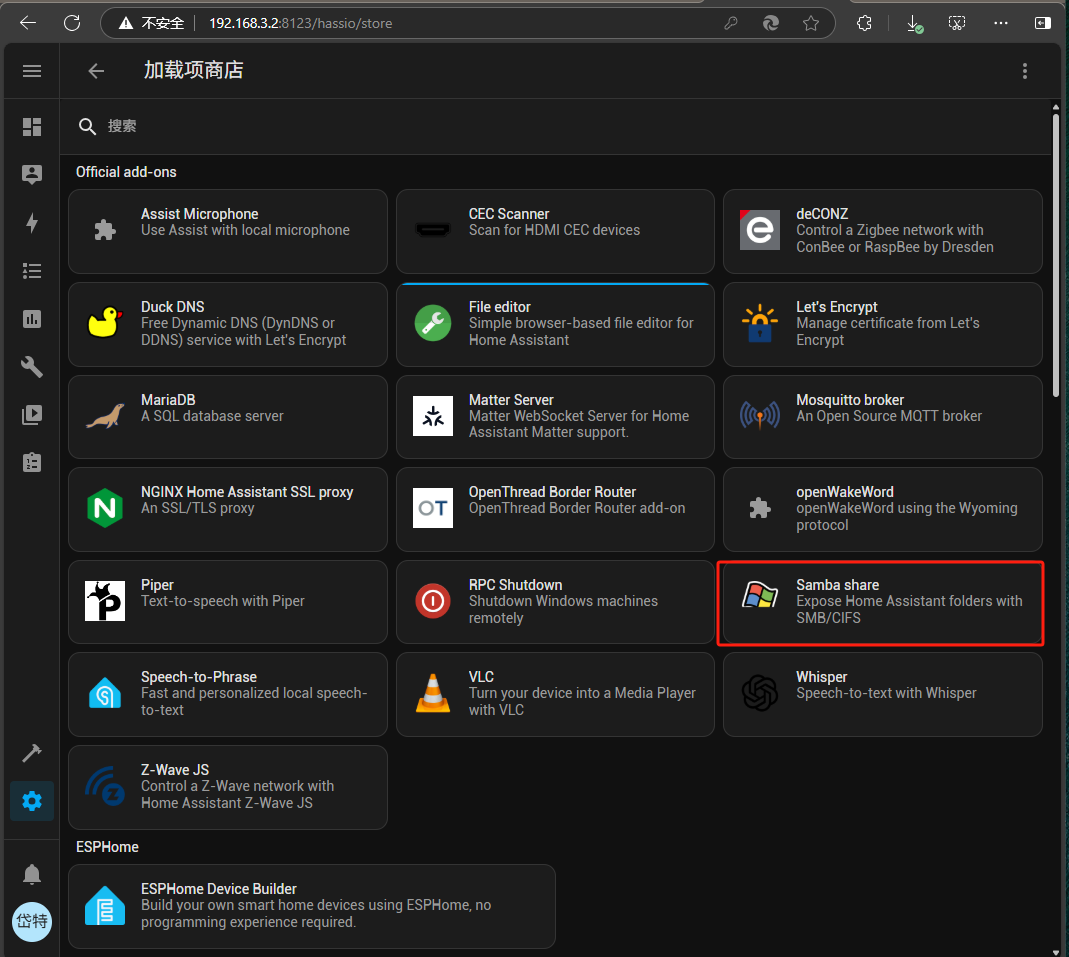
点击安装
安装失败时,会有如下提下提示
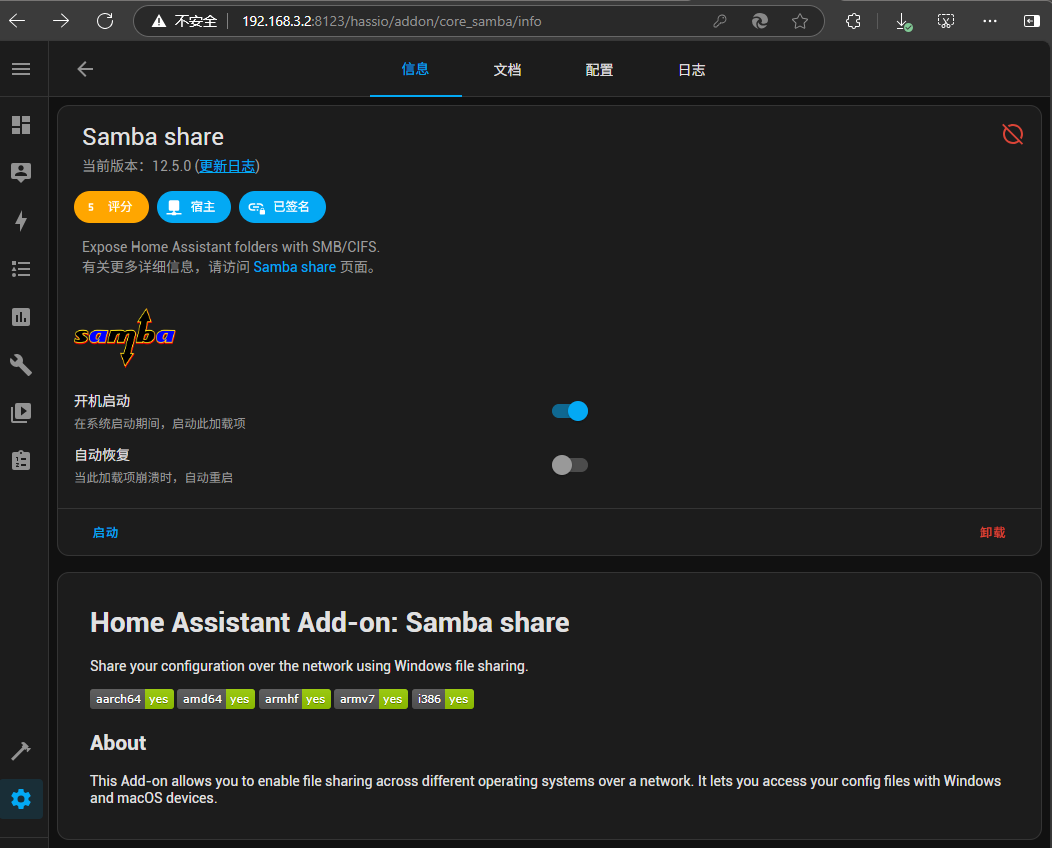
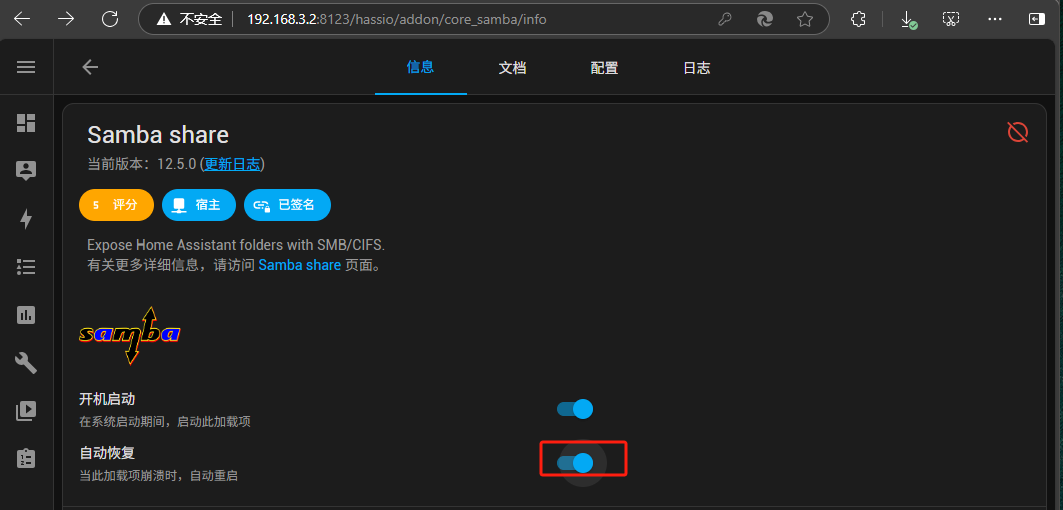
打开自动恢复
接下来我们需要到配置选项中
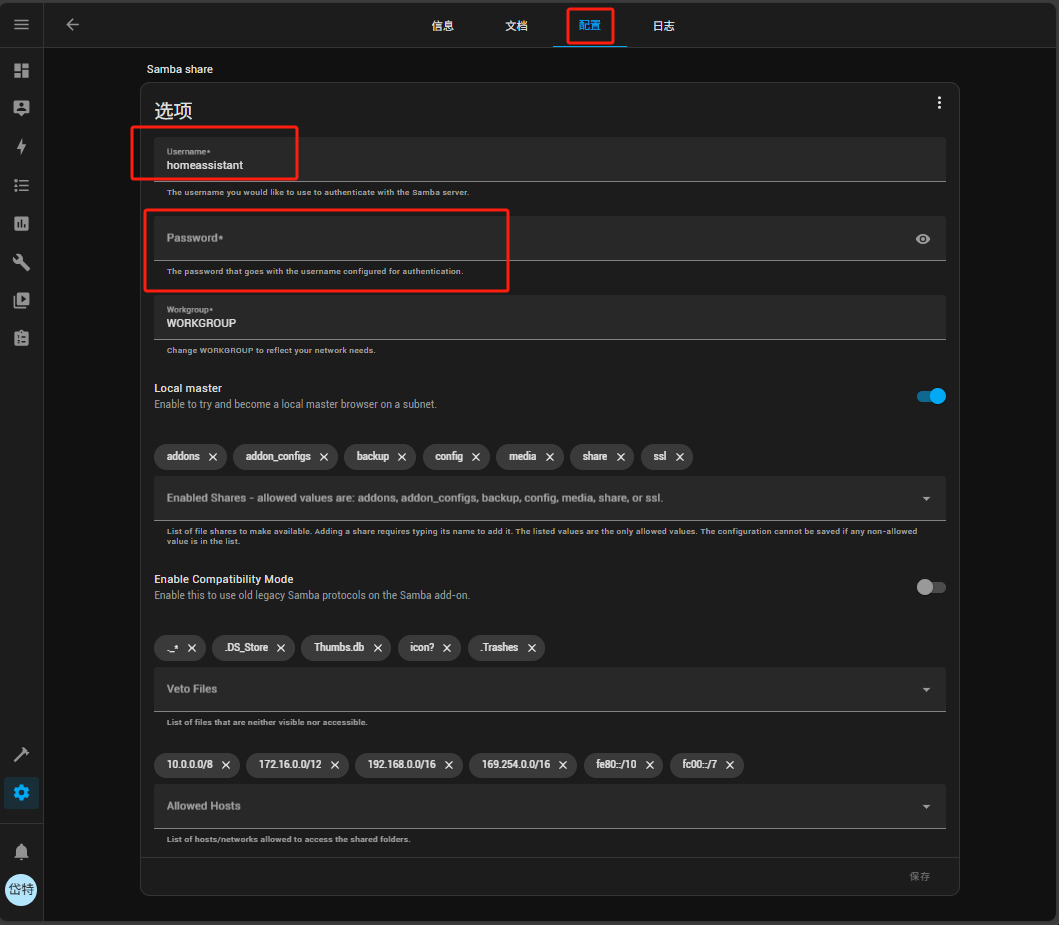
此处我们设置如下信息
```
Username:dtuser
Password:***** # 此处请咨询管理员
Workgroup:WORKGROUP # 保持不变
```
更改完成后,有如下配置
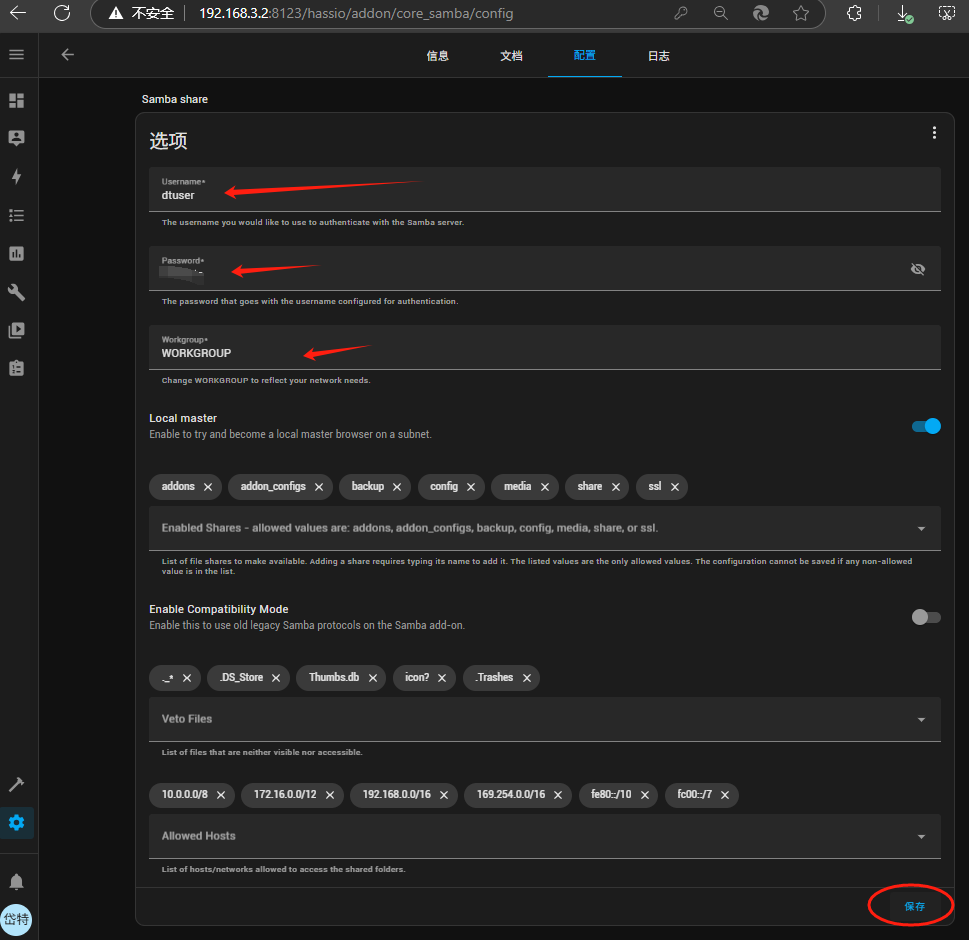
配置 完成后,点击启动
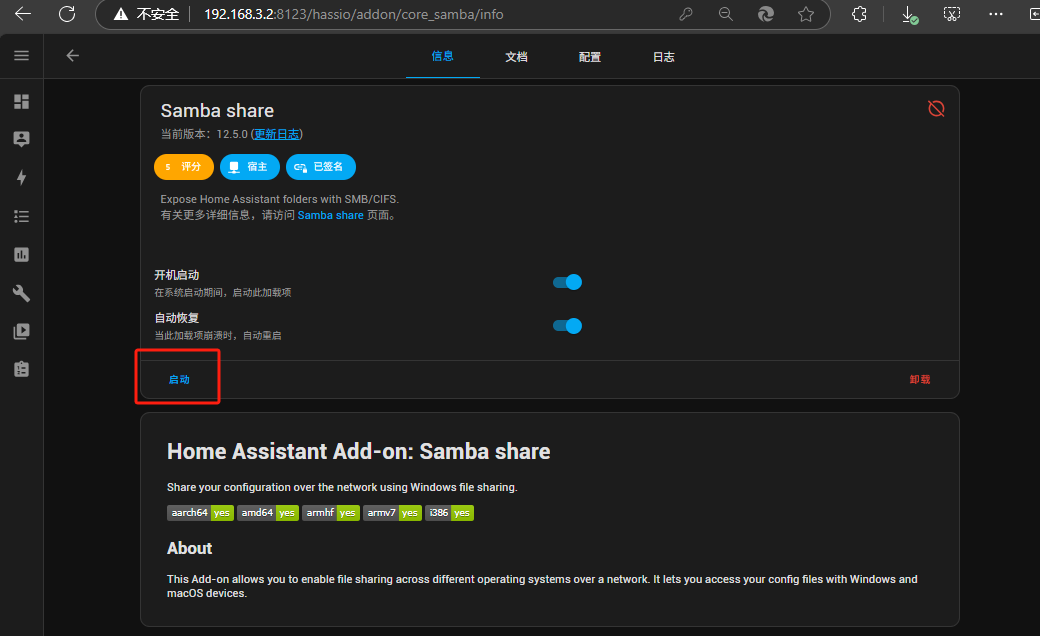
启动成功后,会出下图显示
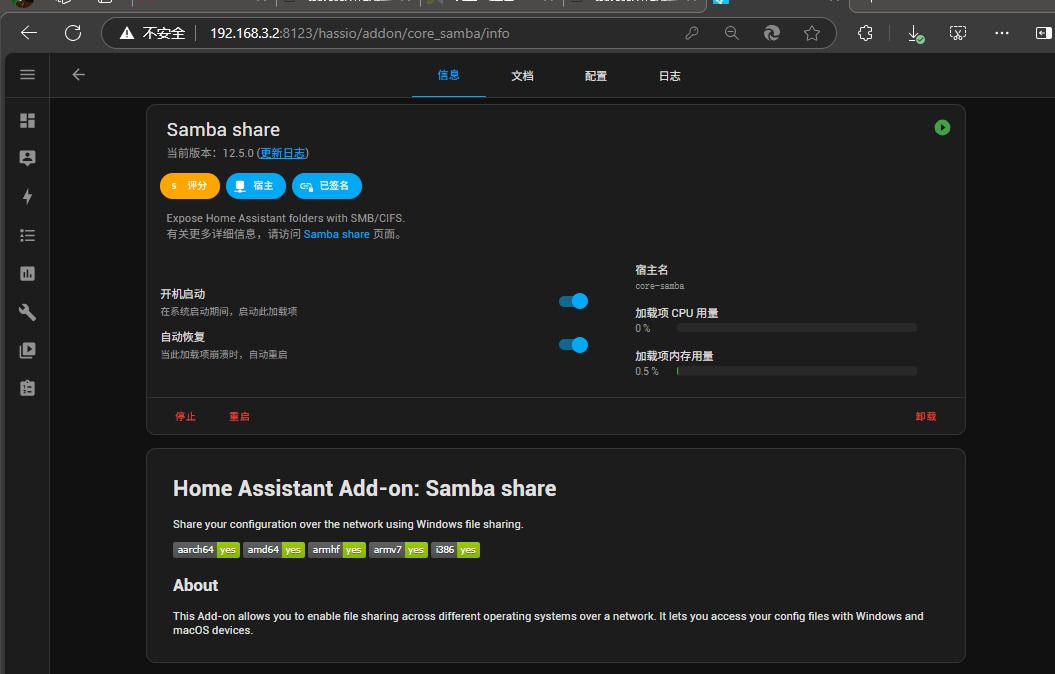
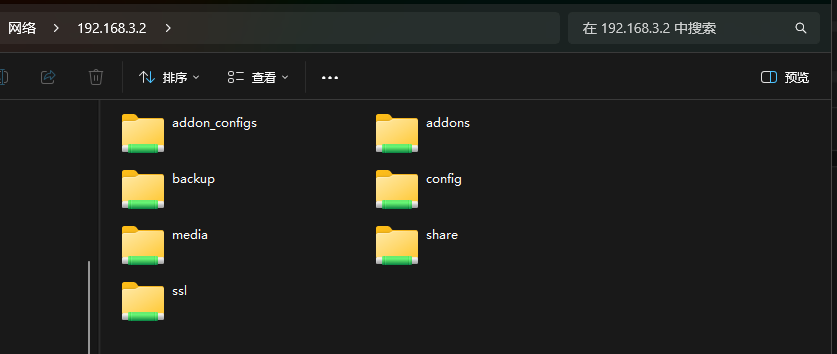
此时,如果,与HA在同一局域网,我们可以使用如下方式查看HA的文件目录
在地址栏输入\\HA的IP
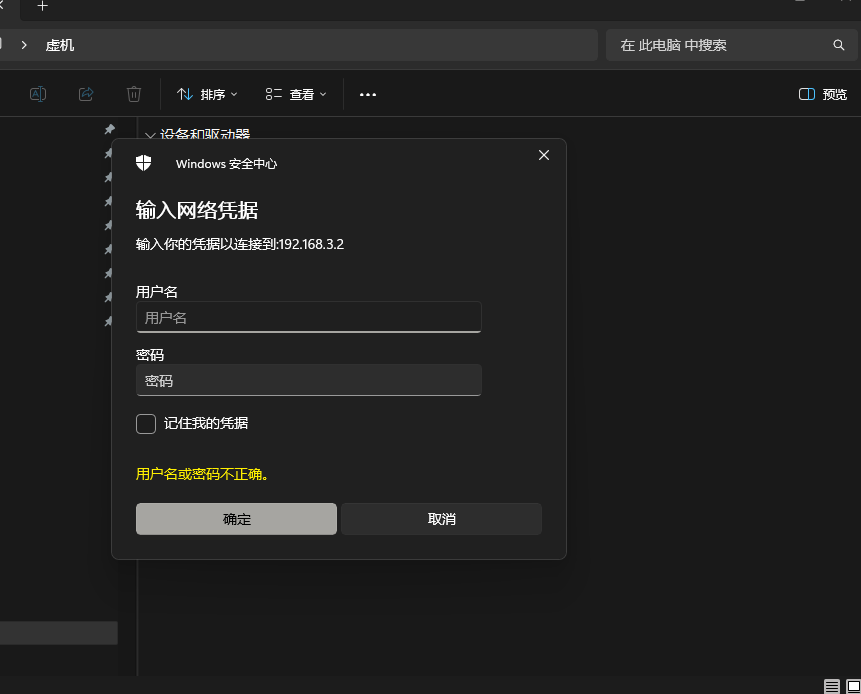
输入预设的用户名与密码,即可查看,编辑HA的各种文件。
##### 安装Terminal & SSH
Terminal & SSH 插件为HA提供了在web端使用控制台终端功能,及开启了ssh服务,使之可以远程使用SSH访问HA终端。
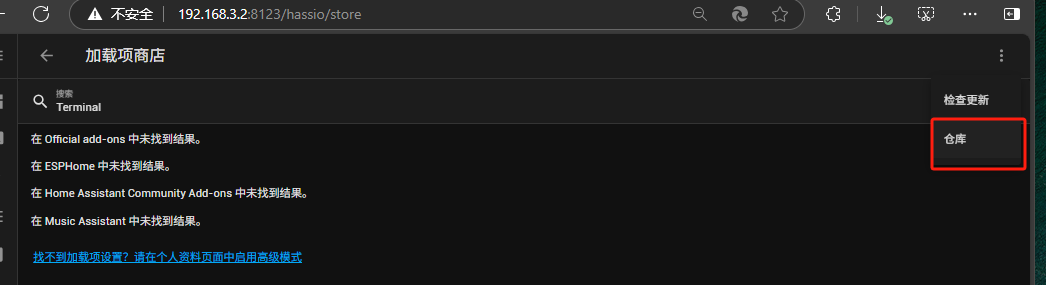
在搜索中输入Terminal & SSH
结果有可能显示
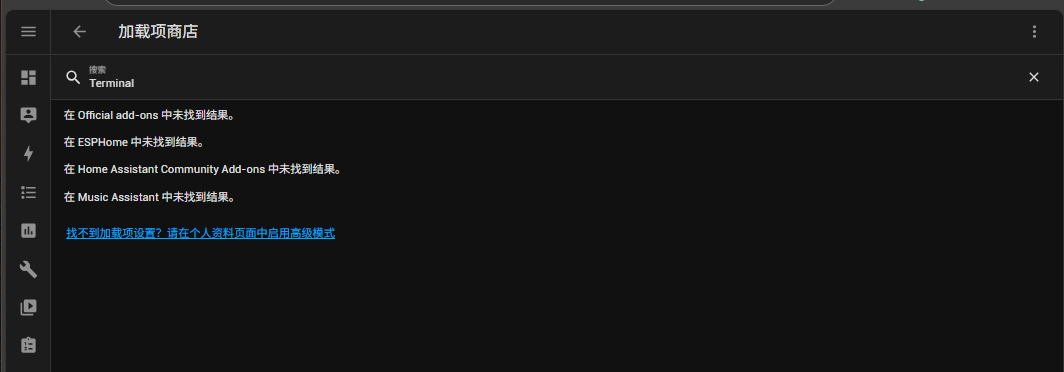
搜索不到,这时,可能是因为仓库没有配置,还是使用的默认的仓库,我们可以增加一下仓库,如下:
```
https://github.com/AlexxIT/hassio-addons
```
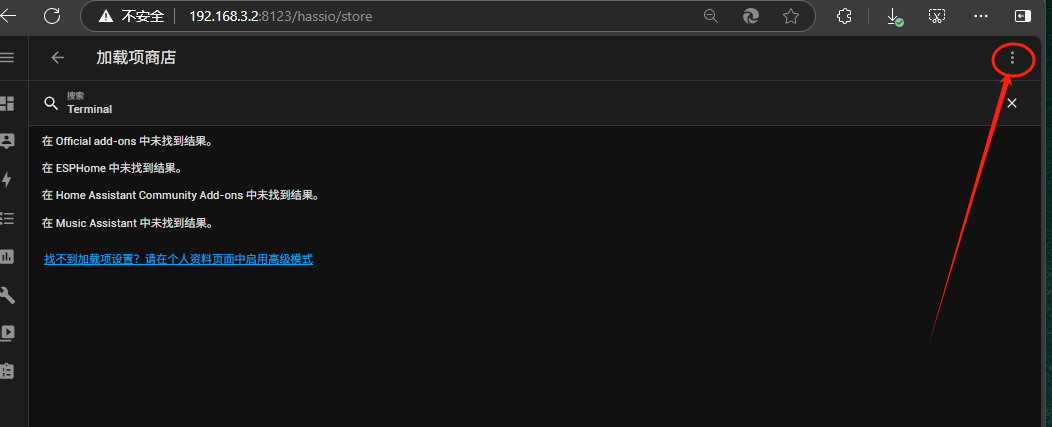
点击右上解的三个点,选中仓库
在弹出折对话框中输入,我们记录的仓库地址,然后点添加
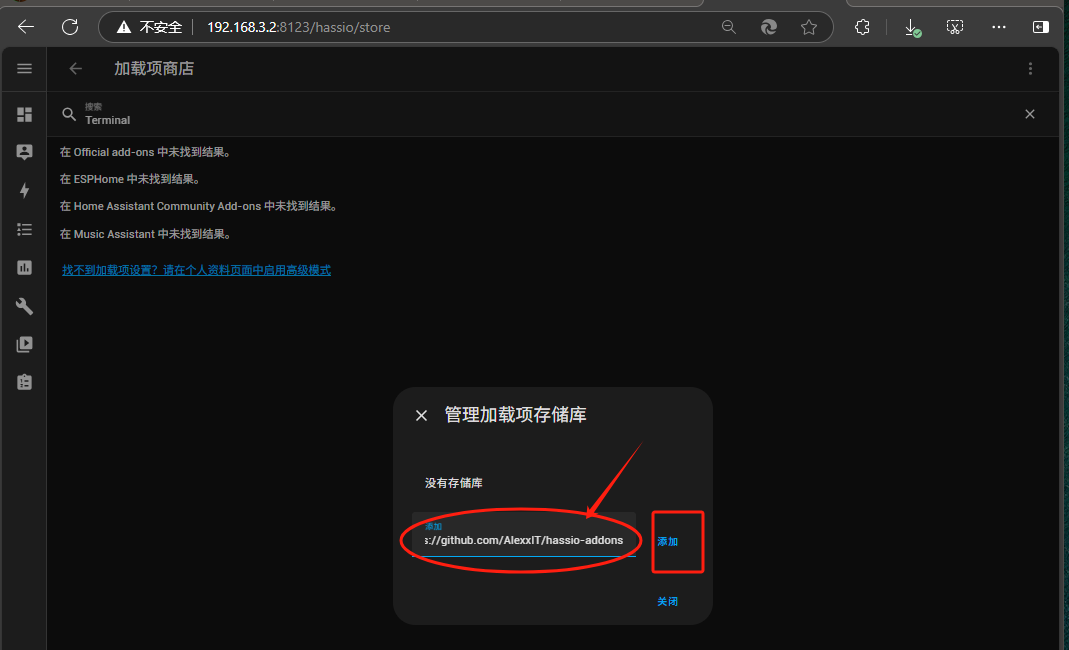
完成后,点击关闭.
然后,点击返回,重新搜索
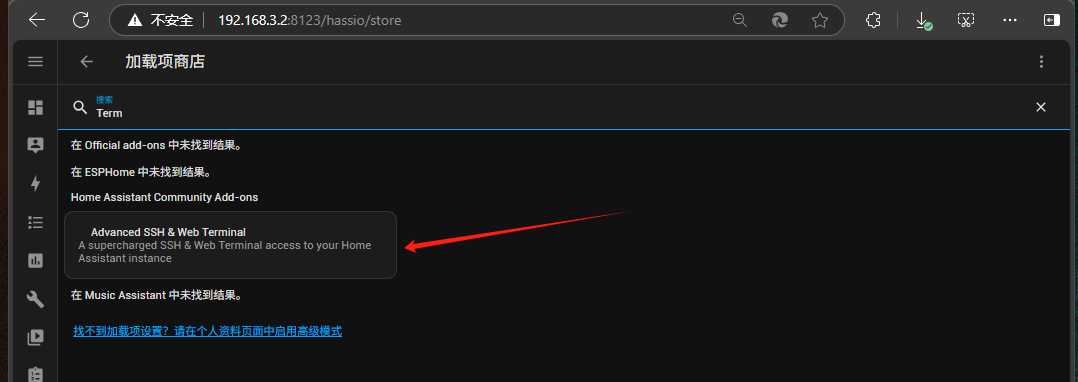
这次找到了Advance SSH & Web Terminal

点击安装,打开如下页面
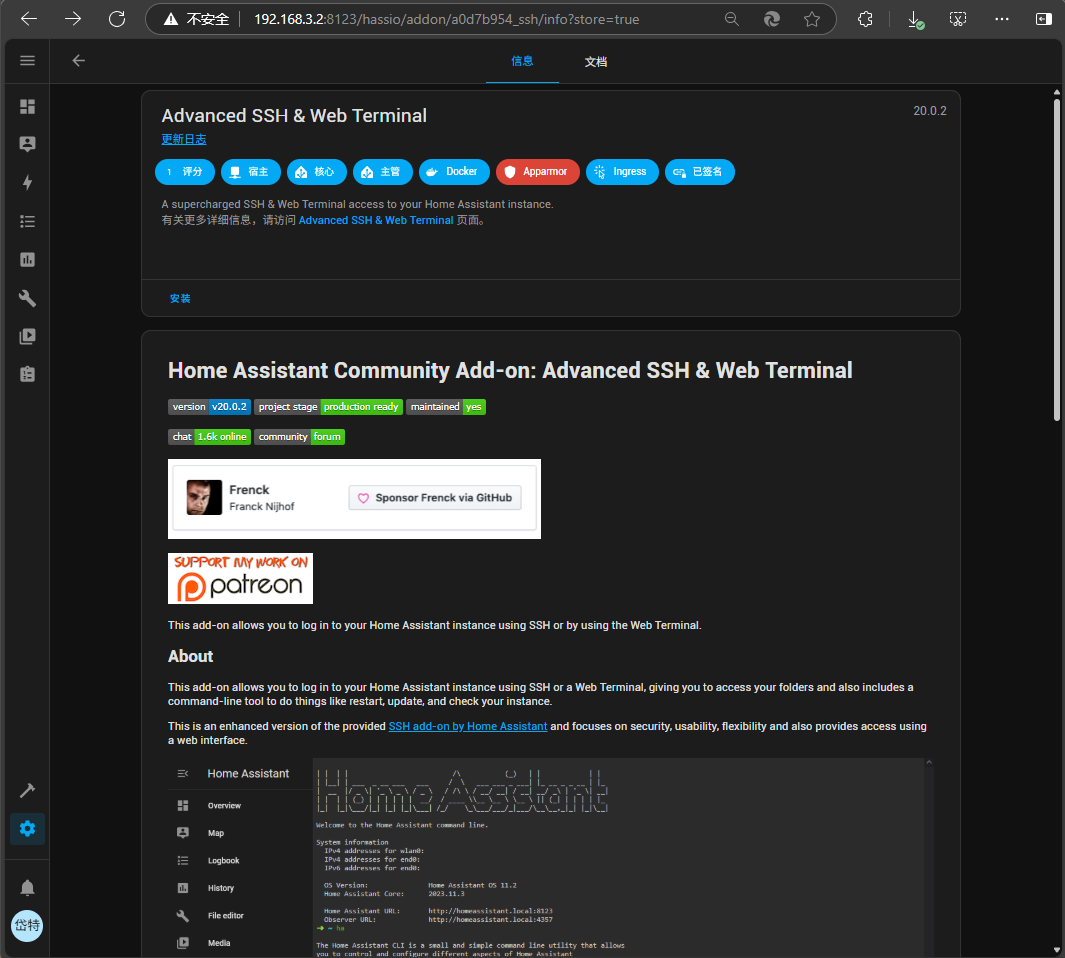
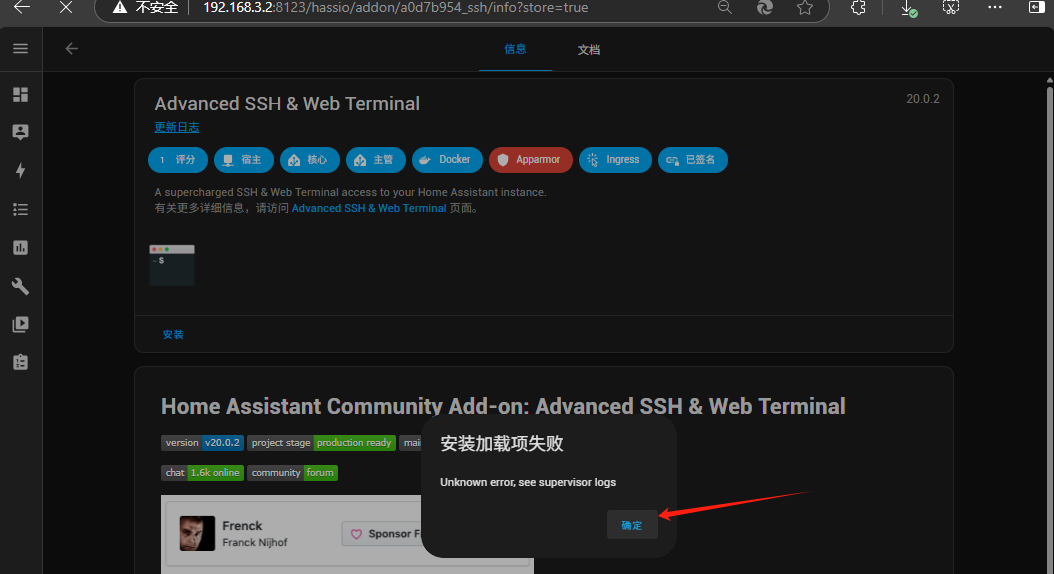
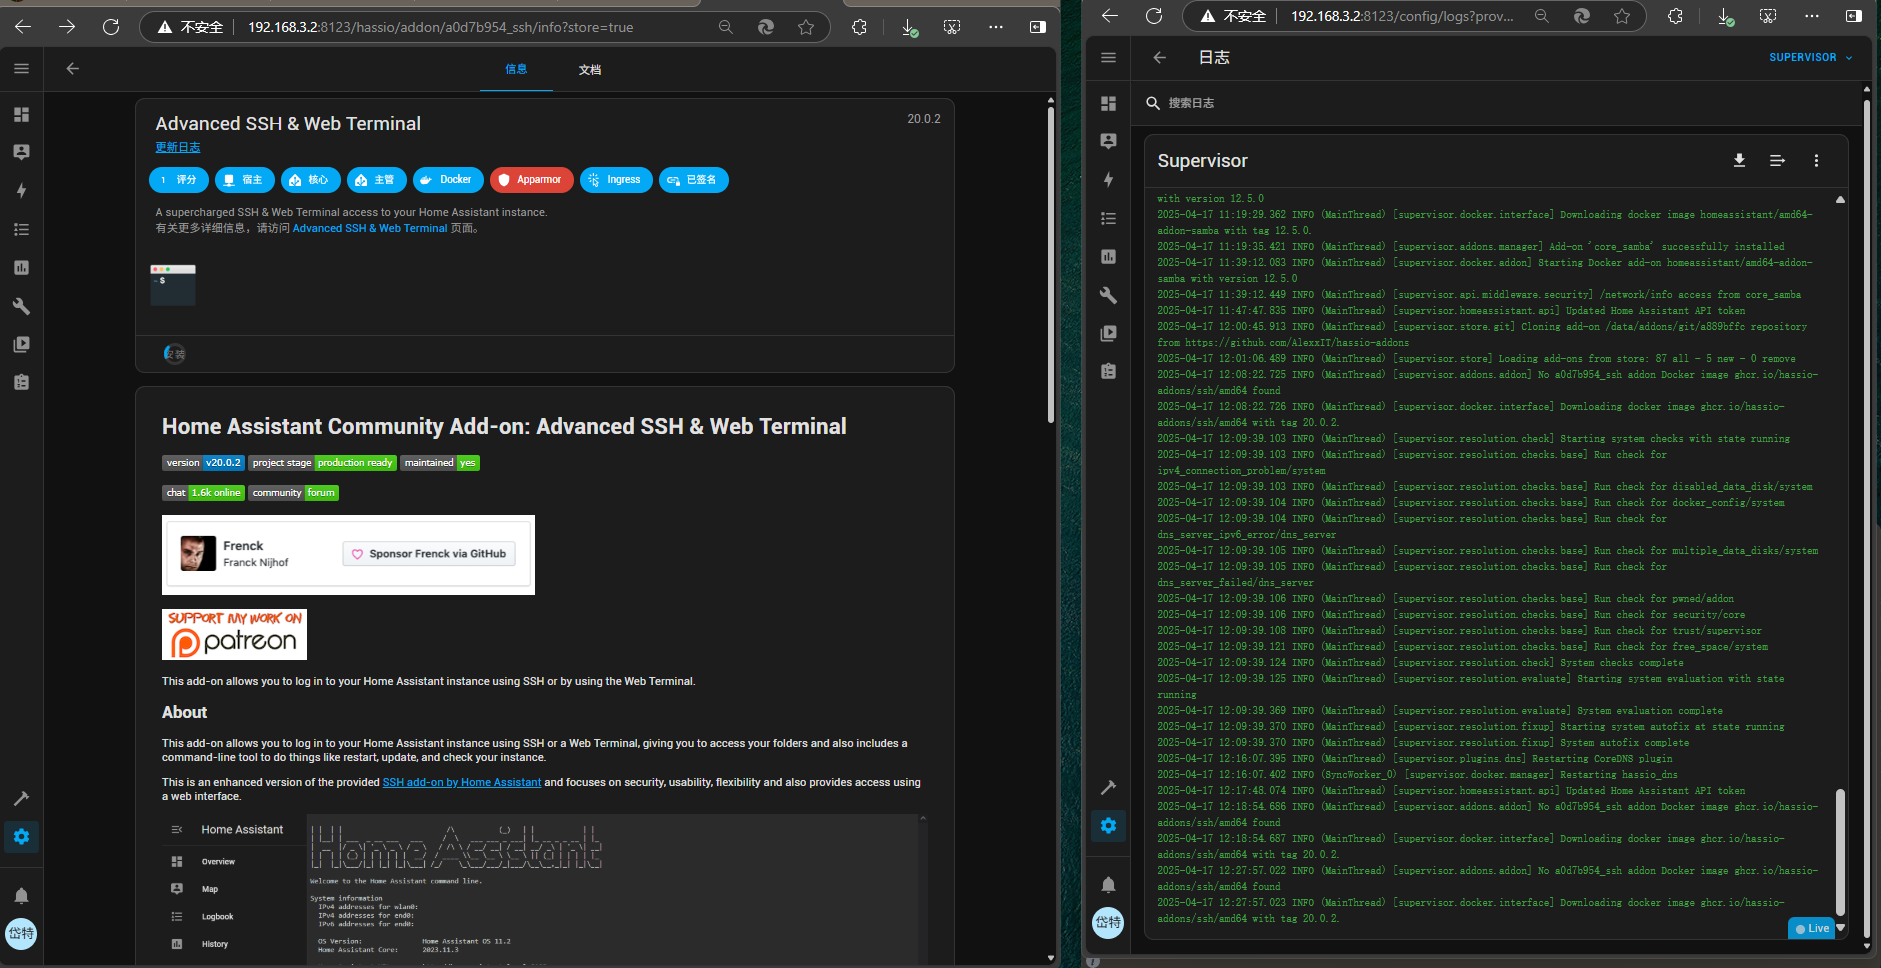
点击安装,有时会安装失败,
失败后,需再次安装,同时检查日志中提到的哪个网址无法访问 ,把其加科学上网的代理名单中.
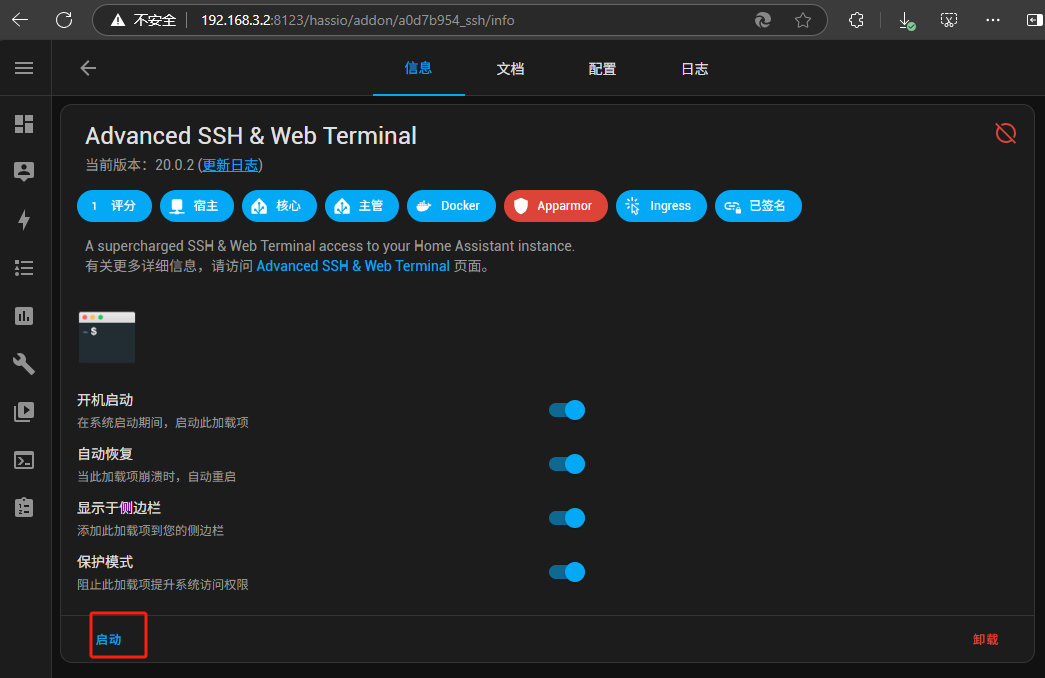
安装完成后,就变成如下
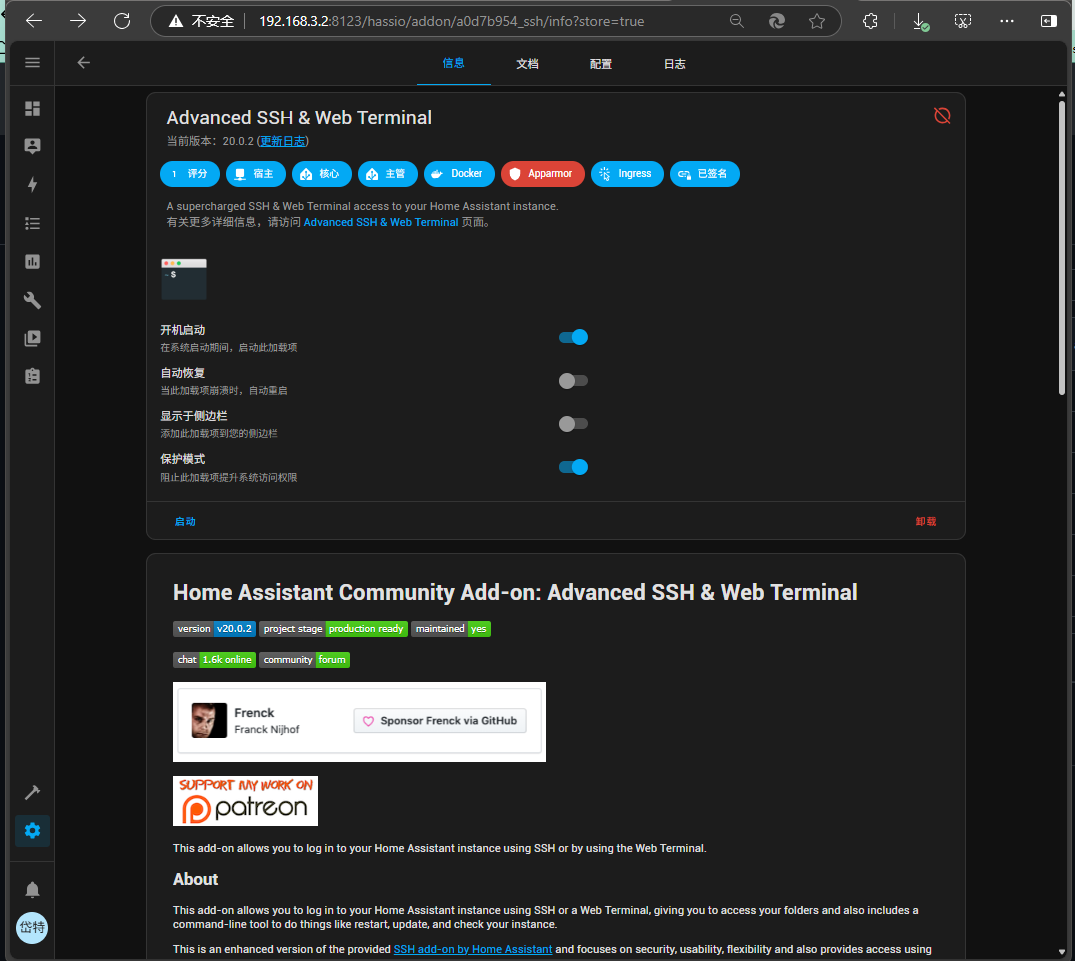
开启自动恢得,显示侧边栏

接下来,我们配置ssh的登录信息,如下
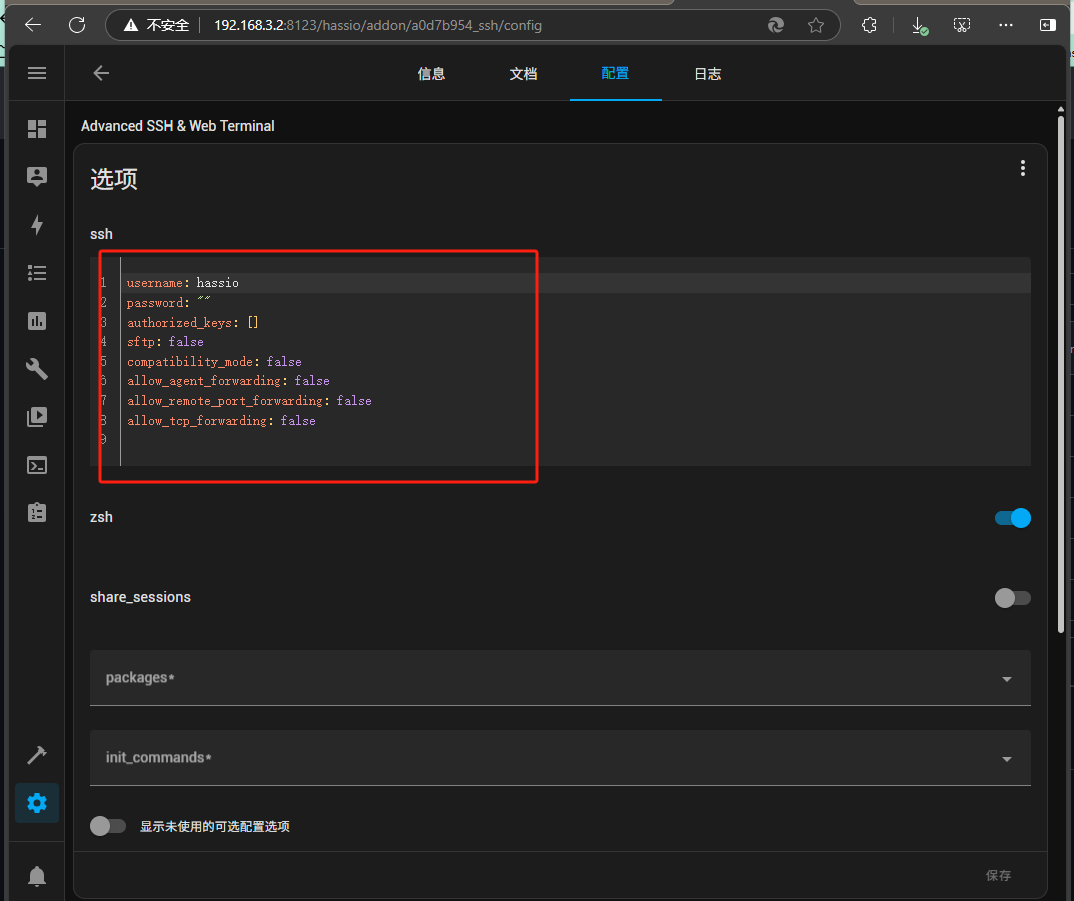
相关信息如下:
```
username:dtuser
passsword:**** # 此处需要咨询管理员
```
其它配置选项如下,注意选项,选错了ssh可能启不起来,sftp关闭,zsh关闭.compatibility_mode要开启
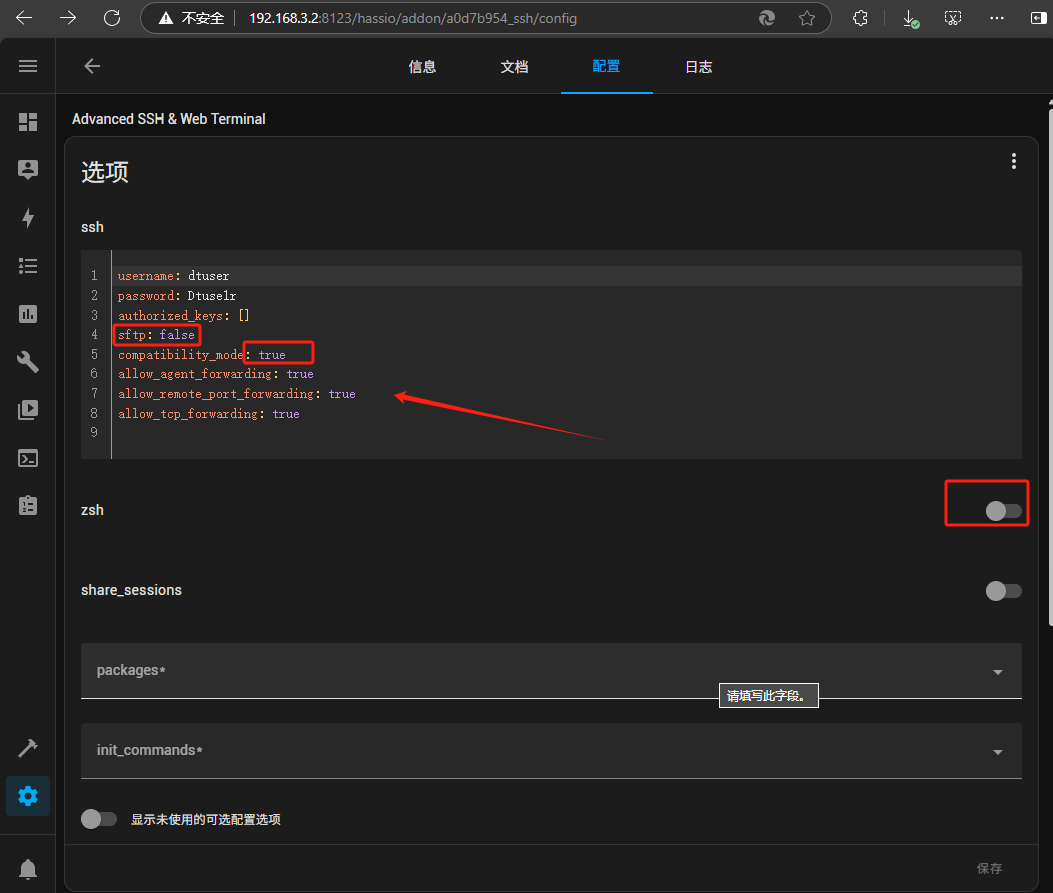
然后,点击启动按钮
启动后如下
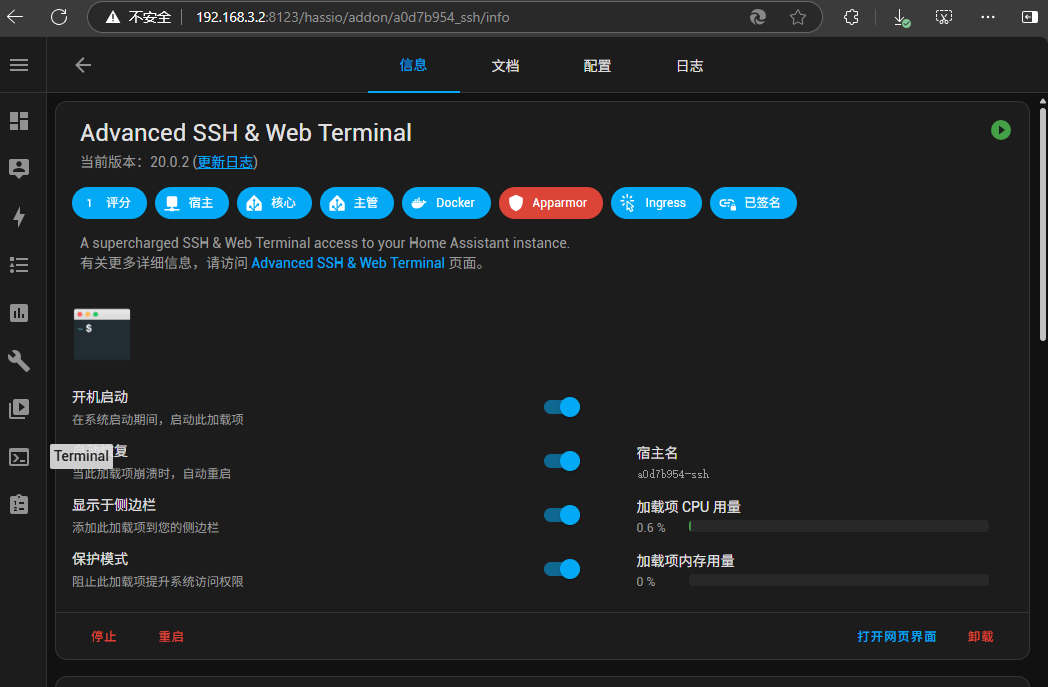
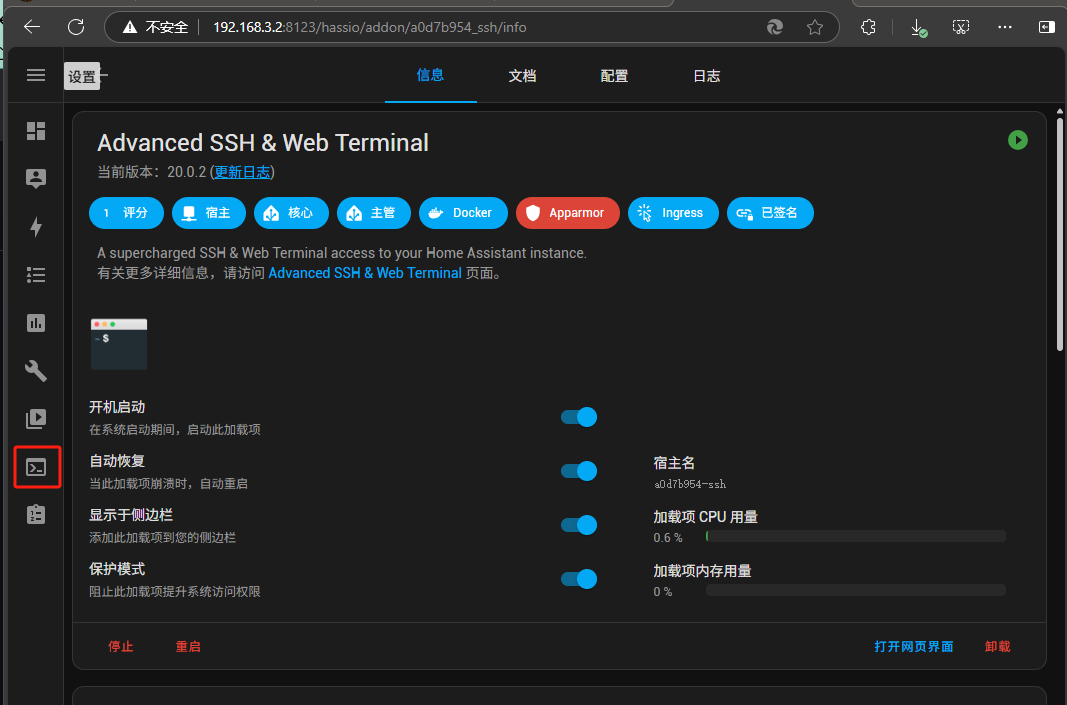
我们可以通过两个地方进入
在日志 端能看到 ssh已启动成功
```
s6-rc: info: service base-addon-banner successfully started
s6-rc: info: service fix-attrs: starting
s6-rc: info: service base-addon-log-level: starting
s6-rc: info: service fix-attrs successfully started
s6-rc: info: service base-addon-log-level successfully started
s6-rc: info: service legacy-cont-init: starting
s6-rc: info: service legacy-cont-init successfully started
s6-rc: info: service init-ssh: starting
s6-rc: info: service init-mysql: starting
s6-rc: info: service init-mosquitto: starting
s6-rc: info: service init-docker: starting
s6-rc: info: service init-docker successfully started
s6-rc: info: service init-mysql successfully started
s6-rc: info: service init-mosquitto successfully started
[14:51:05] WARNING:
[14:51:05] WARNING: Logging in with a SSH password is security wise, a bad idea!
[14:51:05] WARNING: Please, consider using a public/private key pair.
[14:51:05] WARNING: What is this? https://kb.iu.edu/d/aews
[14:51:05] WARNING:
[14:51:05] NOTICE: RSA host key missing, generating one...
Generating public/private rsa key pair.
Your identification has been saved in /data/ssh_host_rsa_key
Your public key has been saved in /data/ssh_host_rsa_key.pub
The key fingerprint is:
SHA256:+9pEl2QvyUqsu4B3gnPjhL/Ab71iBIDjWRdYvgZeg0c root@a0d7b954-ssh
The key's randomart image is:
+---[RSA 3072]----+
| . oE. |
|o .o+. |
|..o+.= o |
| o. = o . + + |
| . + S + * . |
| ..+. = o . |
| B.B.+ o |
| X+=.= |
| o=o=+o |
+----[SHA256]-----+
[14:51:08] NOTICE: ED25519 host key missing, generating one...
Generating public/private ed25519 key pair.
Your identification has been saved in /data/ssh_host_ed25519_key
Your public key has been saved in /data/ssh_host_ed25519_key.pub
The key fingerprint is:
SHA256:MgbUsAJ+23skjVTwD0pWVRBCmZ0BjU3jwV/99gGnNVc root@a0d7b954-ssh
The key's randomart image is:
+--[ED25519 256]--+
|. o+o*%O*. . E|
|.. . .=+o*o o =.|
| ...o+ o .. . = +|
| ..*.+ o . . .o|
| . =+oS. .o|
| .+o .|
| . . |
| . |
| |
+----[SHA256]-----+
s6-rc: info: service init-ssh successfully started
s6-rc: info: service init-user: starting
[14:51:08] NOTICE: Session sharing has been disabled!
s6-rc: info: service init-user successfully started
s6-rc: info: service ttyd: starting
s6-rc: info: service sshd: starting
s6-rc: info: service sshd successfully started
s6-rc: info: service ttyd successfully started
s6-rc: info: service legacy-services: starting
[14:51:09] INFO: Starting the ttyd daemon...
[14:51:09] INFO: Starting the SSH daemon...
s6-rc: info: service legacy-services successfully started
Server listening on 0.0.0.0 port 22.
Server listening on :: port 22.
```
配置成功后,可以通过如下命令来测试是否可以远程SSH连入
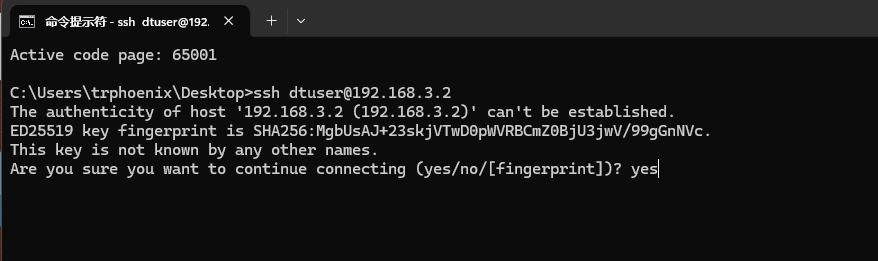
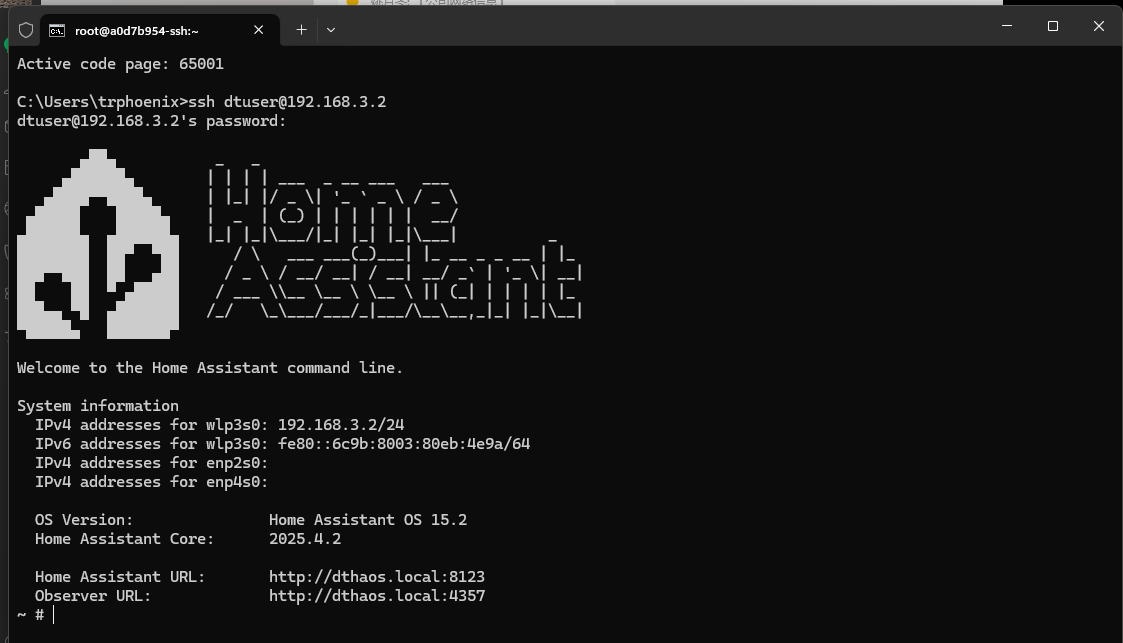
输入yes后会要求 输入密码,验证正确后,会进入看到如个图,就说明ssh已正常的开启成功了
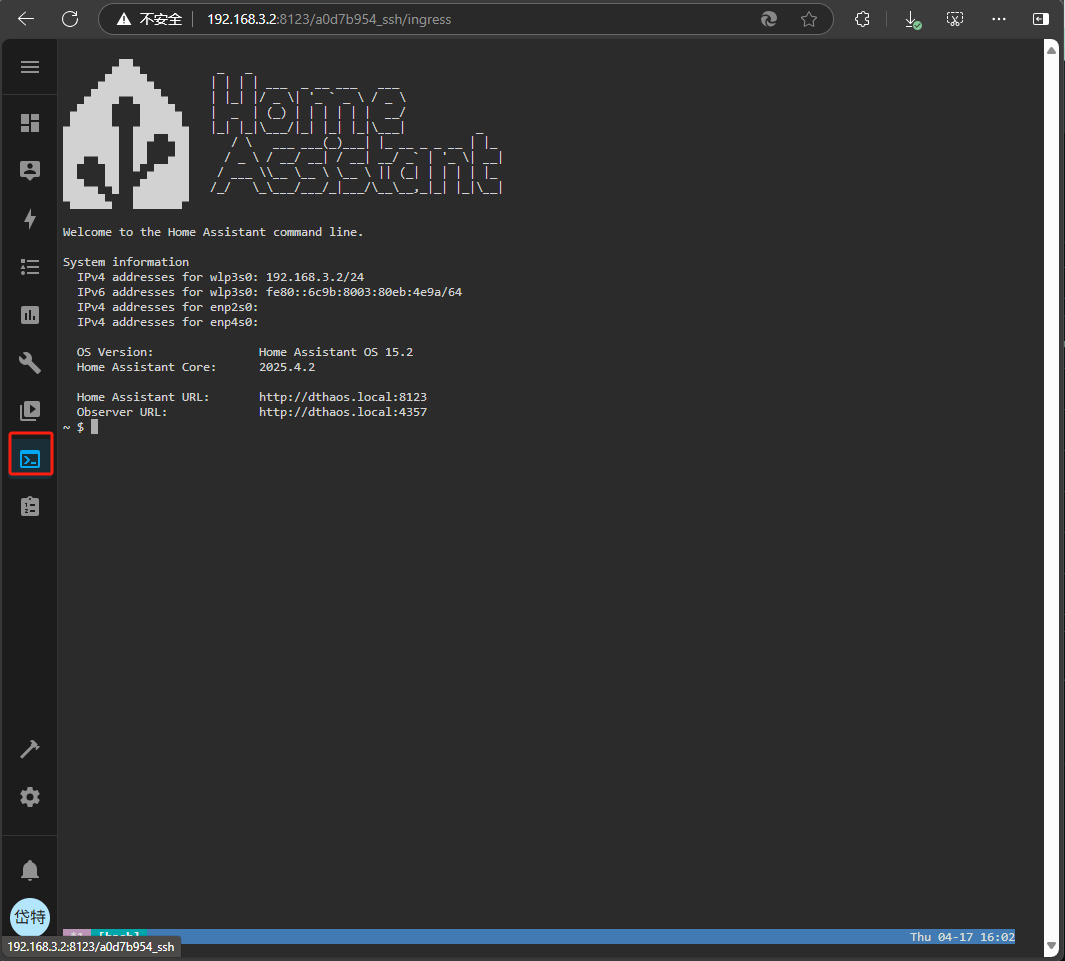
以下界面是在ha中看到的内置的ssh
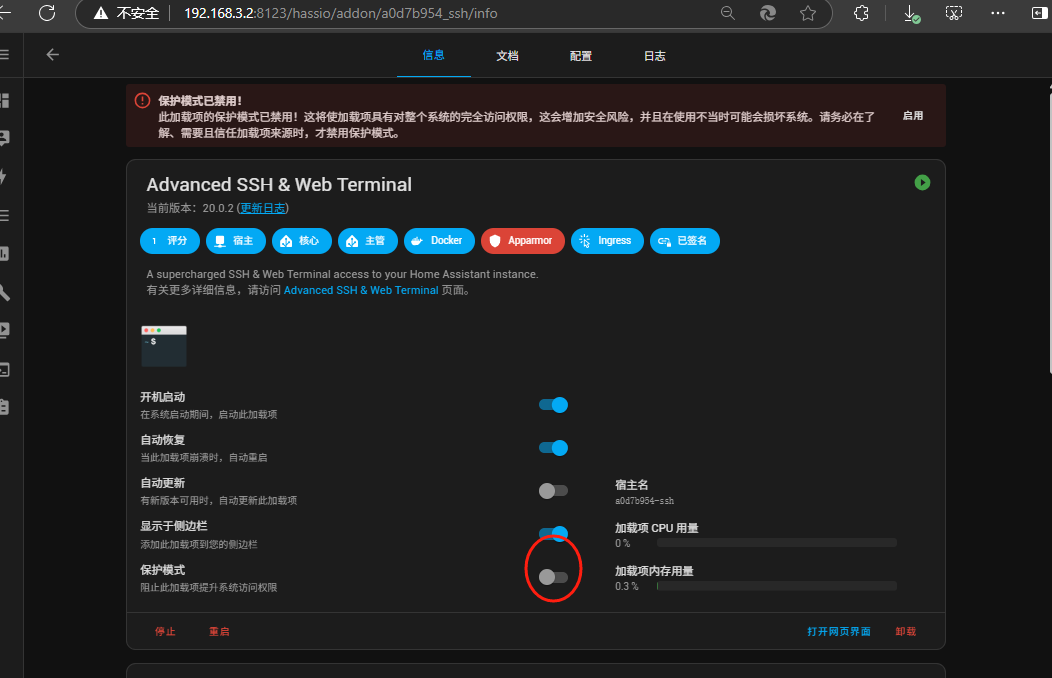
其它,当访问一些系统操作无权限时,可以关闭保护开关
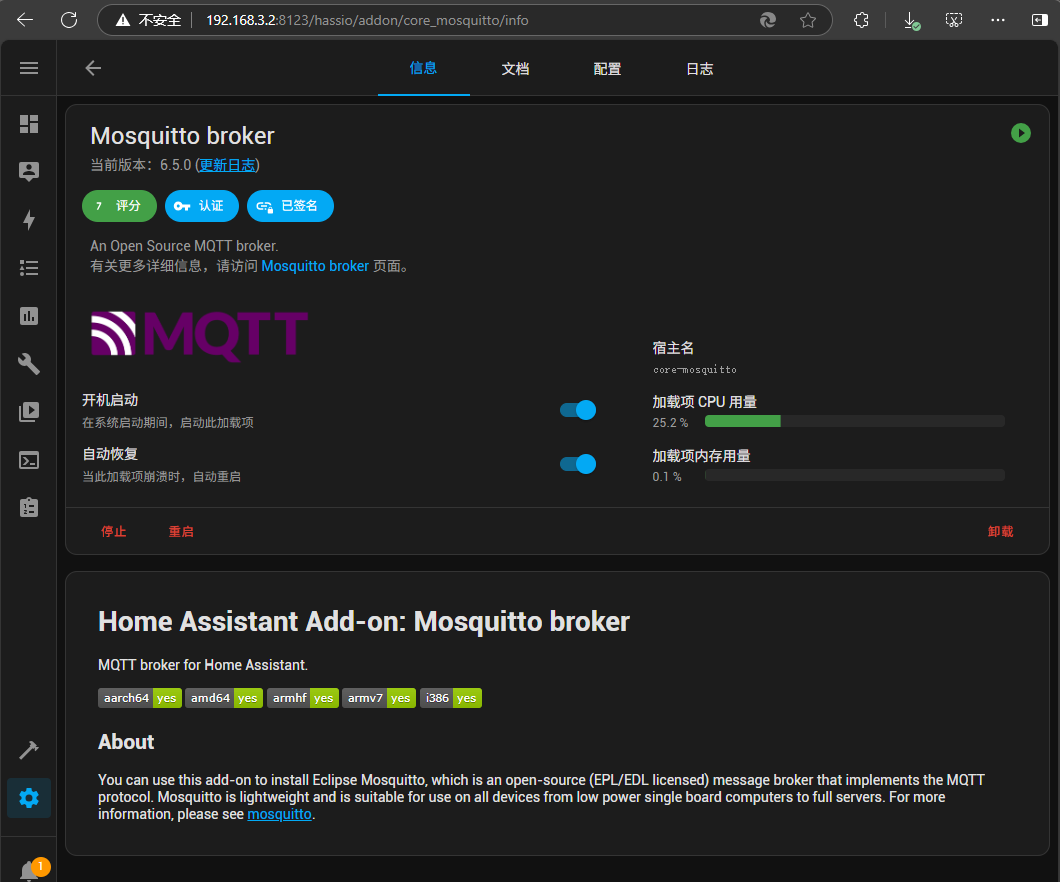
##### 安装Mosquitto broker
Mosquitto broker是一个重要的插件,其提供的MQTT 服务为公司大多数数设备折集成,mqtt通信通道,所以,此为必装插件。
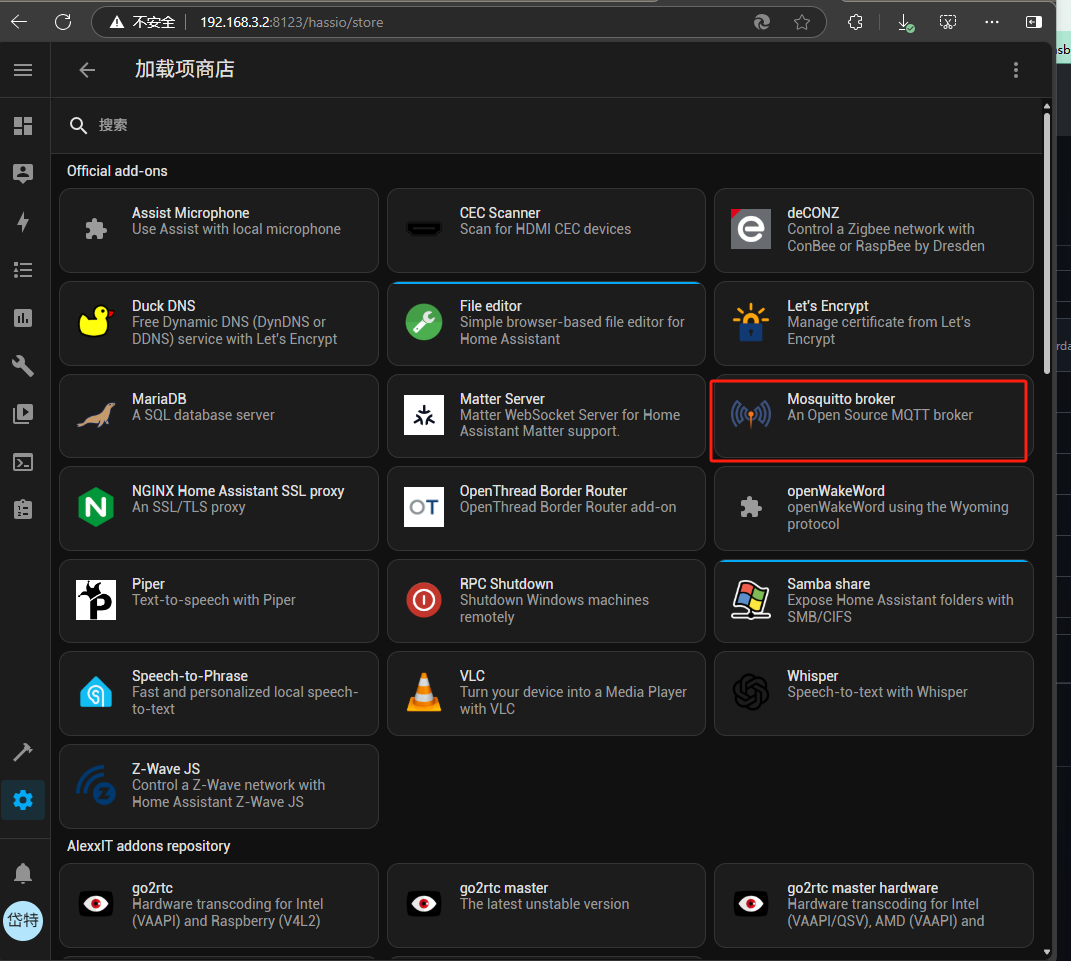
点击安装
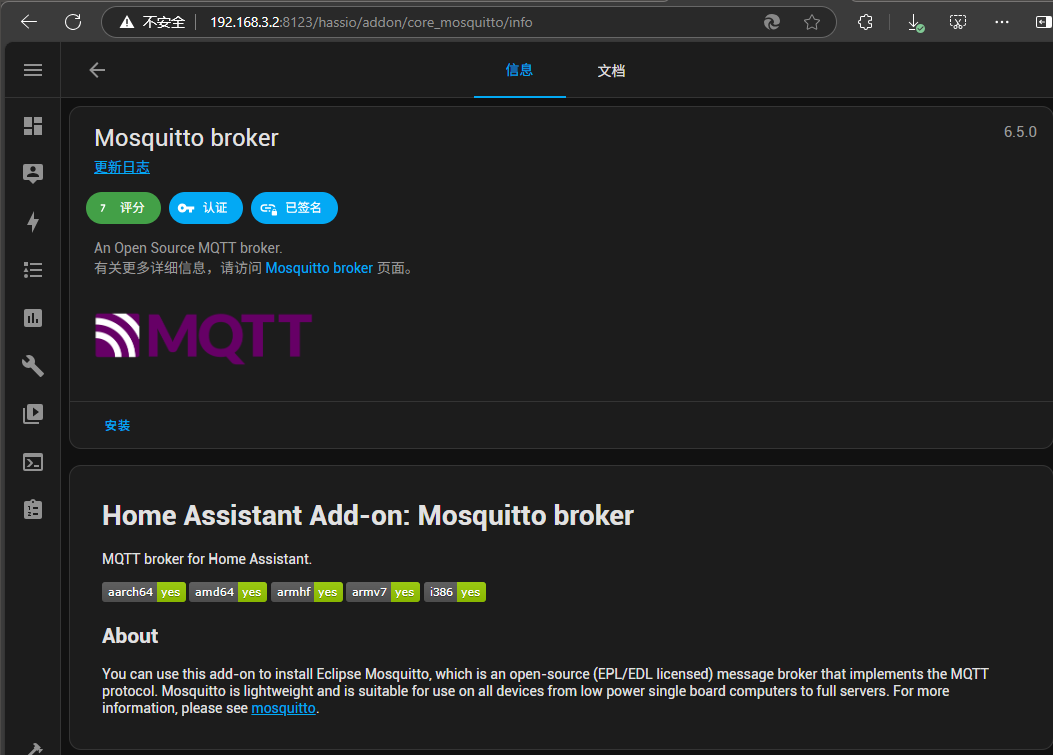
看到如下界面,说明安装成功,
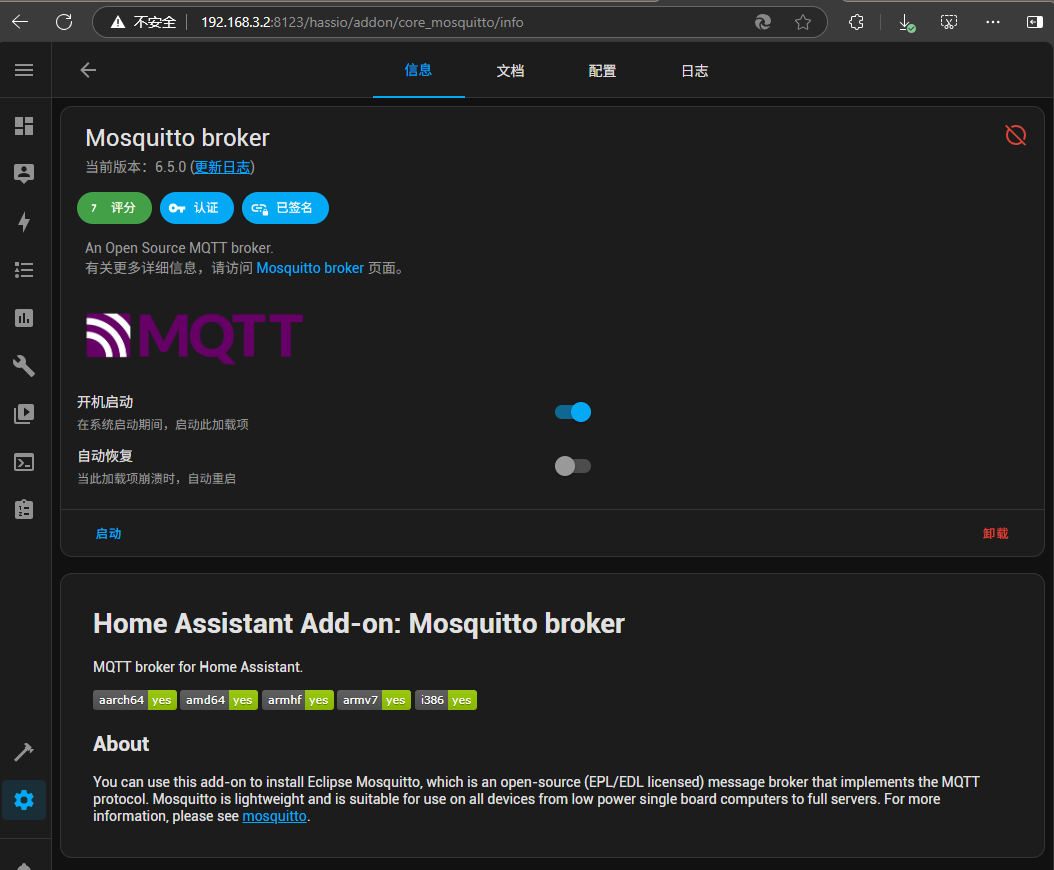
接下来是配置mqtt
###### 开启自动恢复
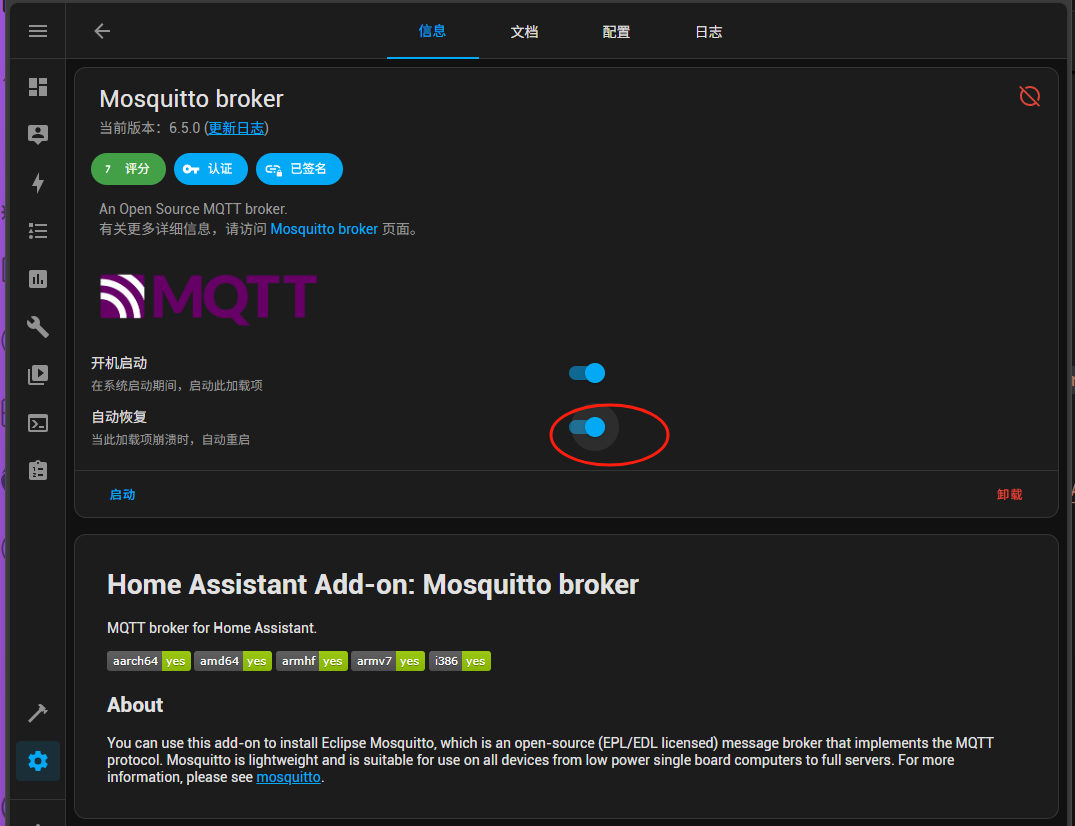
###### 配置mqtt的用户名密码及定制配置
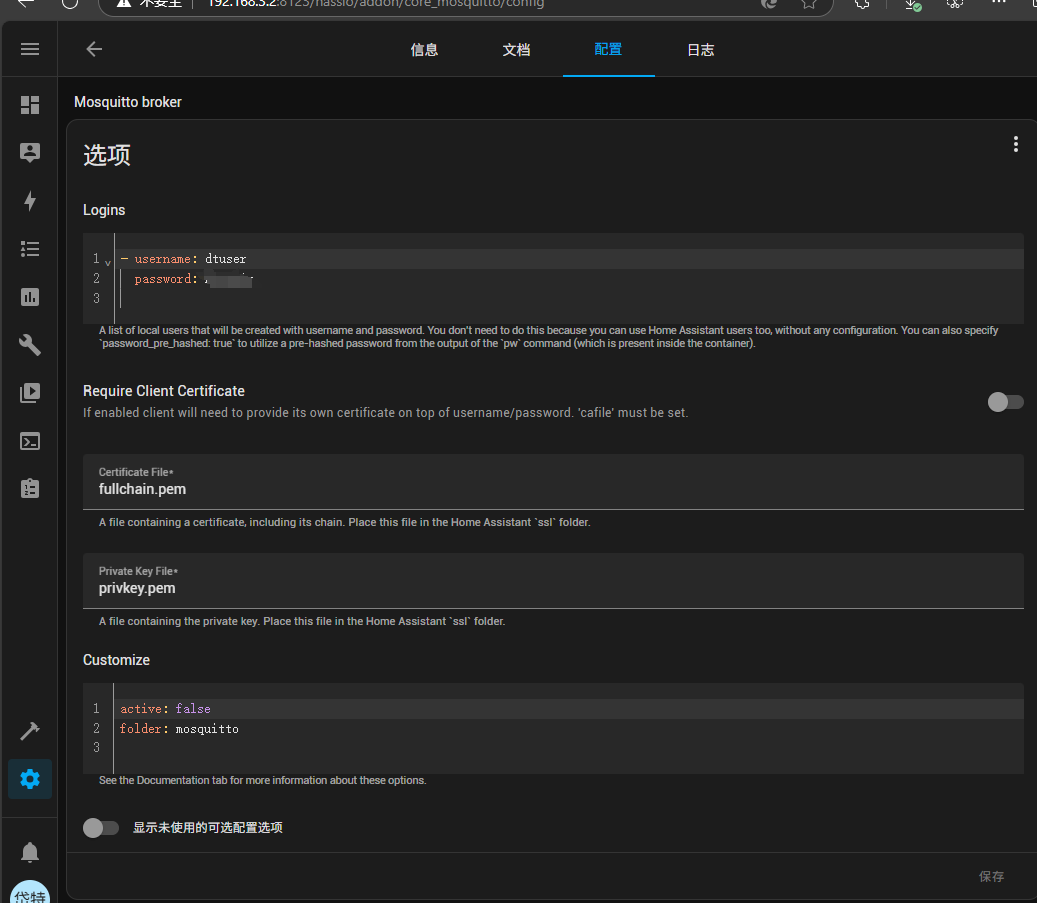
```
username:dtuser
password:****** #此处的密码请咨询管理员
```
配置完成后,启动mqtt服务
日志中显示如下信息,说明成功
```
s6-rc: info: service s6rc-oneshot-runner: starting
s6-rc: info: service s6rc-oneshot-runner successfully started
s6-rc: info: service fix-attrs: starting
s6-rc: info: service fix-attrs successfully started
s6-rc: info: service legacy-cont-init: starting
cont-init: info: running /etc/cont-init.d/mosquitto.sh
[16:33:27] INFO: Setting up user dtuser
[16:33:28] INFO: SSL is not enabled
cont-init: info: /etc/cont-init.d/mosquitto.sh exited 0
cont-init: info: running /etc/cont-init.d/nginx.sh
cont-init: info: /etc/cont-init.d/nginx.sh exited 0
s6-rc: info: service legacy-cont-init successfully started
s6-rc: info: service legacy-services: starting
services-up: info: copying legacy longrun mosquitto (no readiness notification)
services-up: info: copying legacy longrun nginx (no readiness notification)
[16:33:29] INFO: Starting NGINX for authentication handling...
s6-rc: info: service legacy-services successfully started
[16:33:29] INFO: Starting mosquitto MQTT broker...
2025-04-17 16:33:29: Warning: Mosquitto should not be run as root/administrator.
2025-04-17 16:33:29: mosquitto version 2.0.20 starting
2025-04-17 16:33:29: Config loaded from /etc/mosquitto/mosquitto.conf.
2025-04-17 16:33:29: Loading plugin: /usr/share/mosquitto/go-auth.so
2025-04-17 16:33:29: ├── Username/password checking enabled.
2025-04-17 16:33:29: ├── TLS-PSK checking enabled.
2025-04-17 16:33:29: └── Extended authentication not enabled.
2025-04-17 16:33:29: Opening ipv4 listen socket on port 1883.
2025-04-17 16:33:29: Opening ipv6 listen socket on port 1883.
2025-04-17 16:33:29: Opening websockets listen socket on port 1884.
2025-04-17 16:33:29: mosquitto version 2.0.20 running
2025-04-17 16:33:29: New connection from ::1:56336 on port 1883.
2025-04-17 16:33:29: Client disconnected due to protocol error.
[16:33:30] INFO: Successfully send discovery information to Home Assistant.
[16:33:31] INFO: Successfully send service information to the Supervisor.
```
当消息,提示发现设备时,点击,弹出的消息中,点check it out,然后,看到已发现mqtt,点击添加
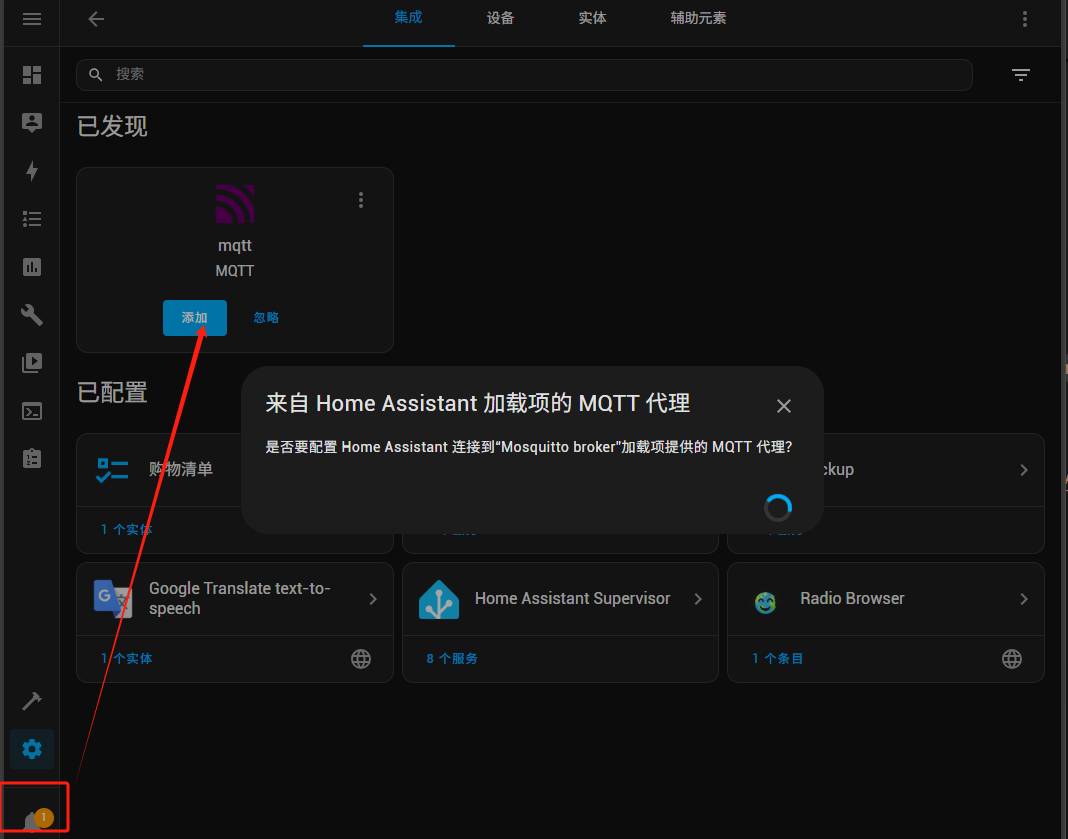
然后,点击完成

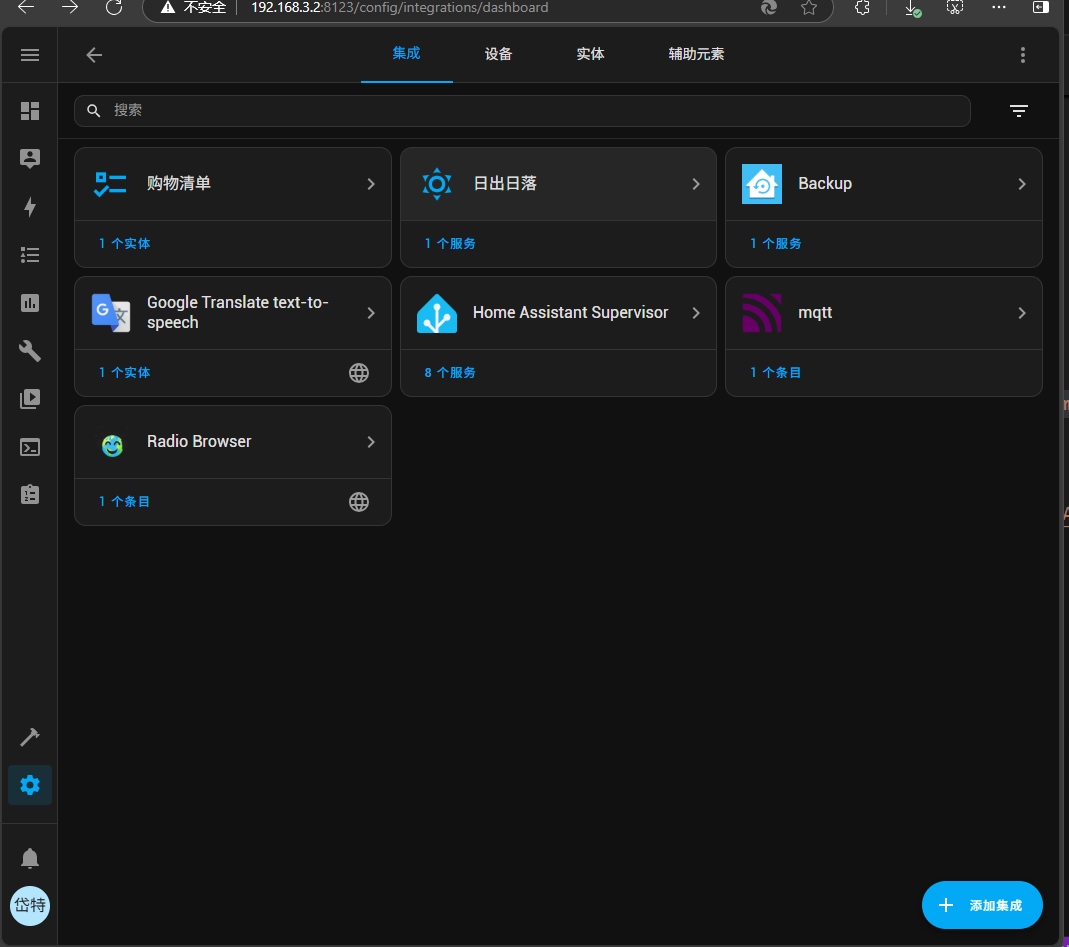
然后就会在设置-设备与服务-集成中,显示Mqtt,以后,所有增加的MQTT类设备,都会显示在这个类别中。
##### 安装Node-RED插件
Node-Red插件是我们集中各种设备的重要消息处理转换插件,属必装插件.
在加载项中,搜索nod显示如下
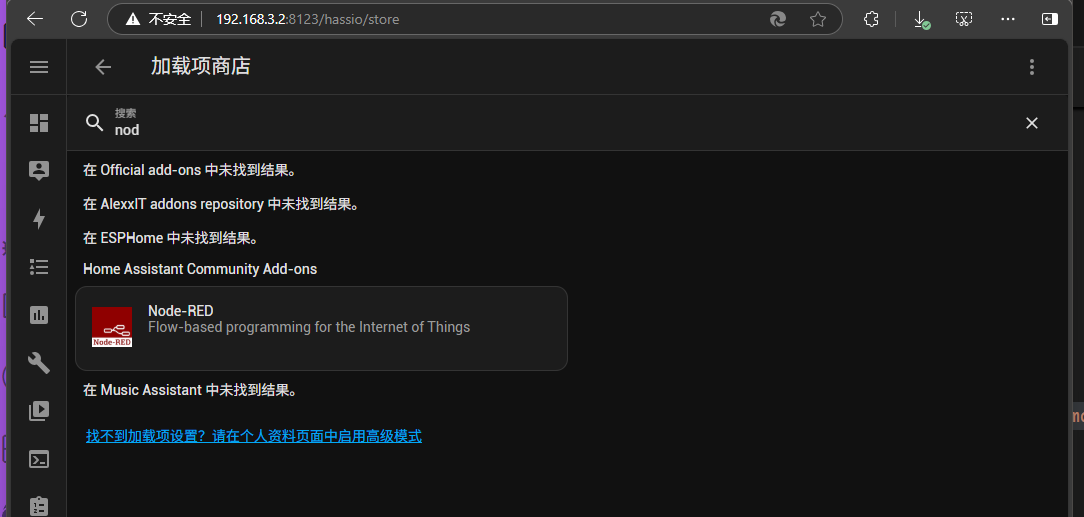
点击,进入详细页面
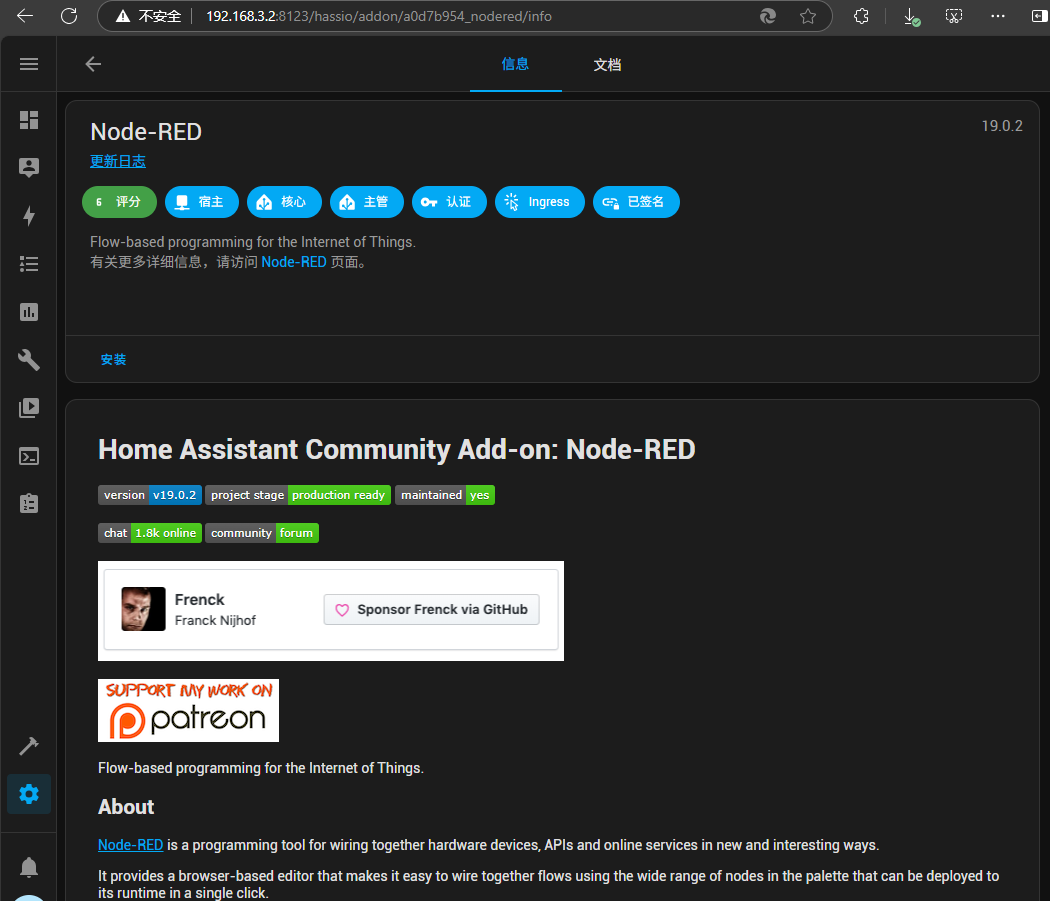
点击安装
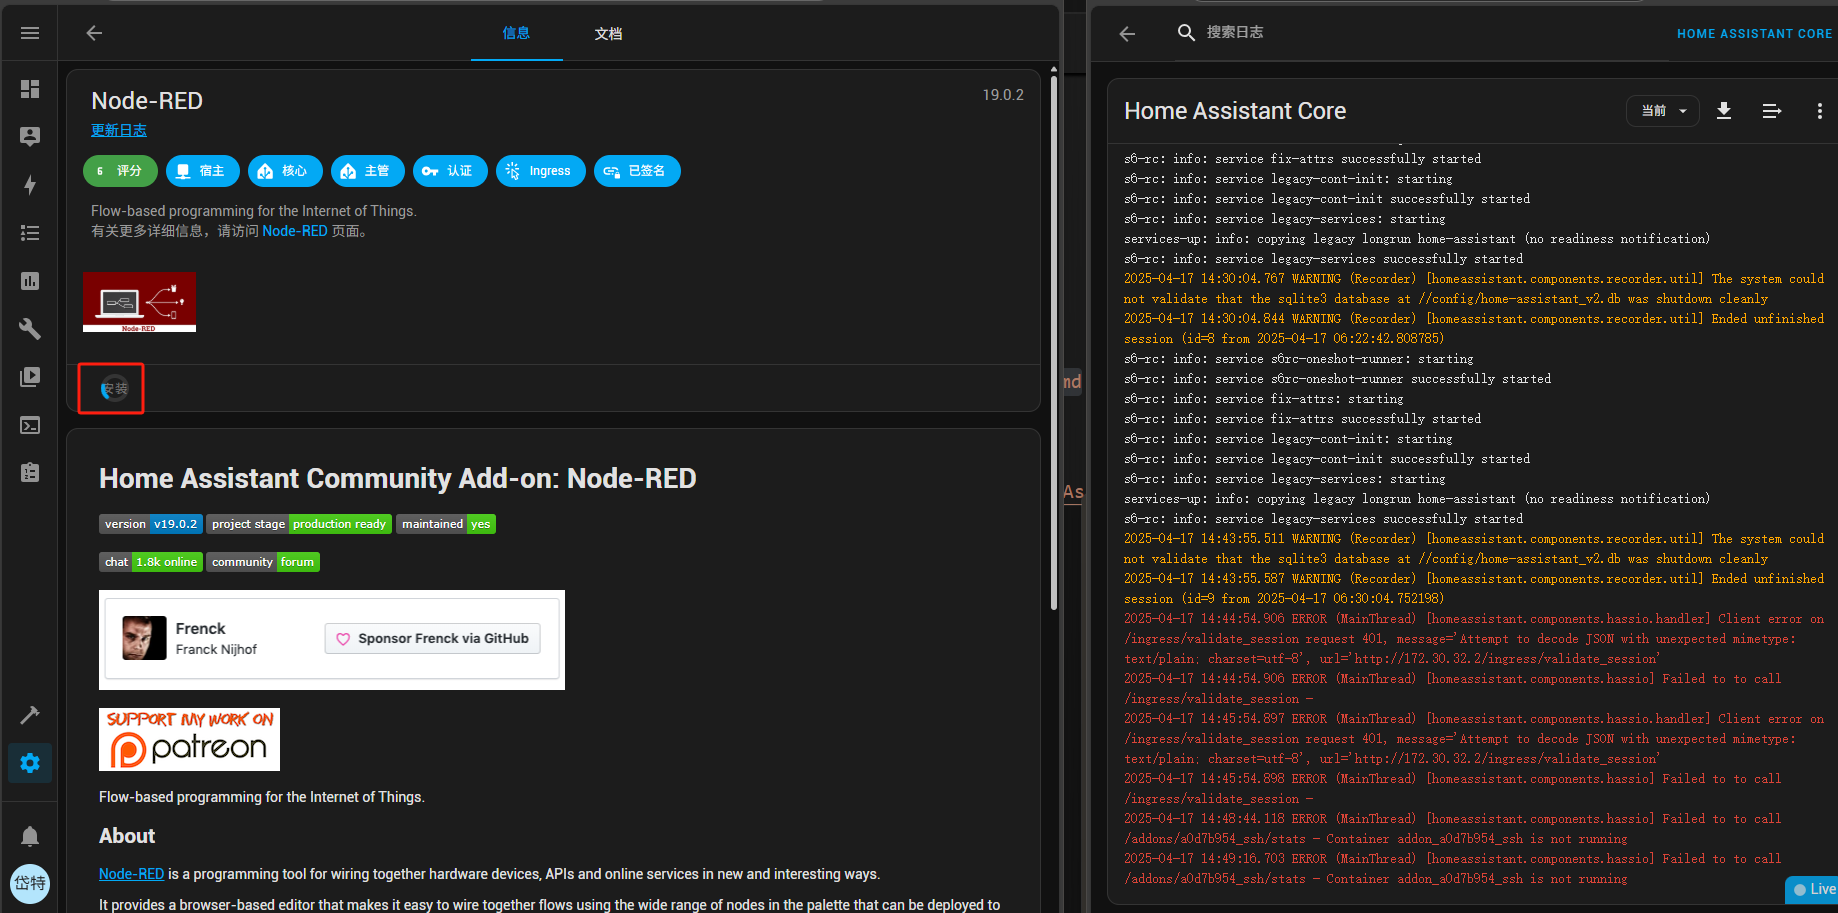
如果安装出错,多半是科学上网的问题,
如现如下页面,说明安装成功
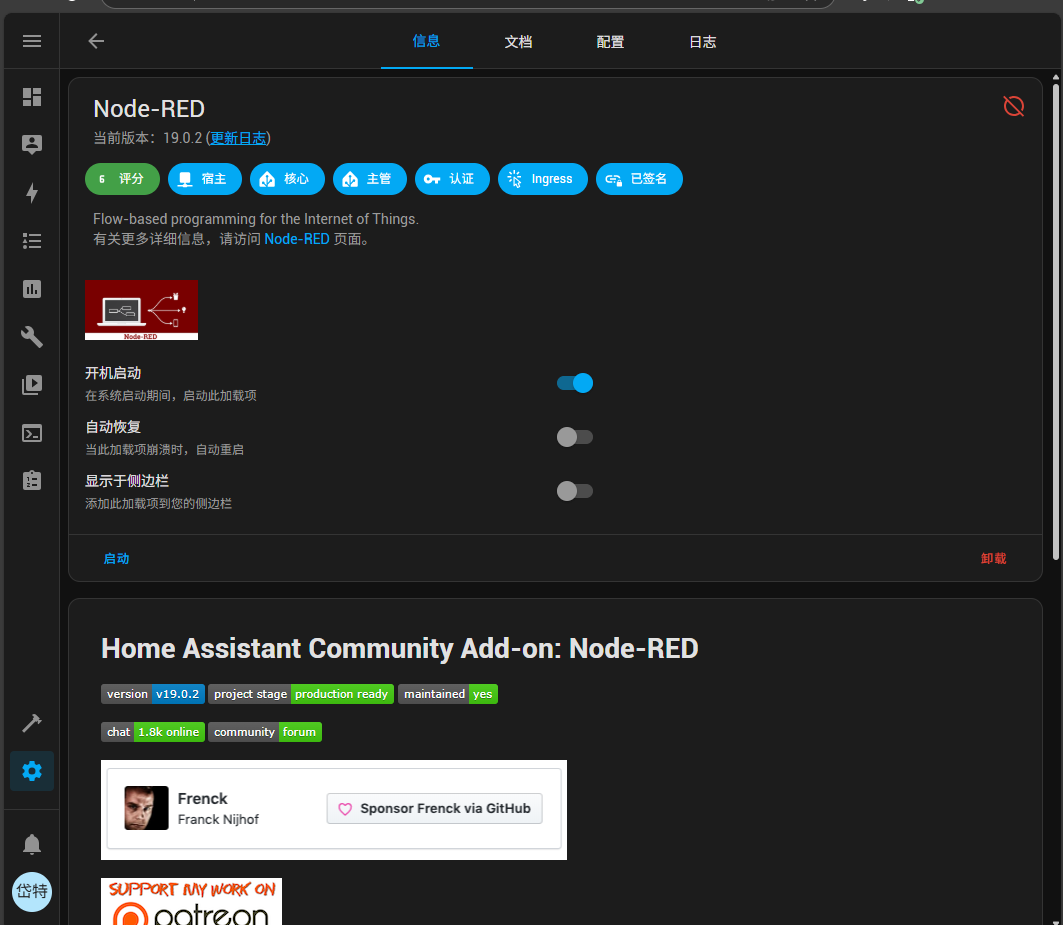
开启自动恢复,关闭侧边栏
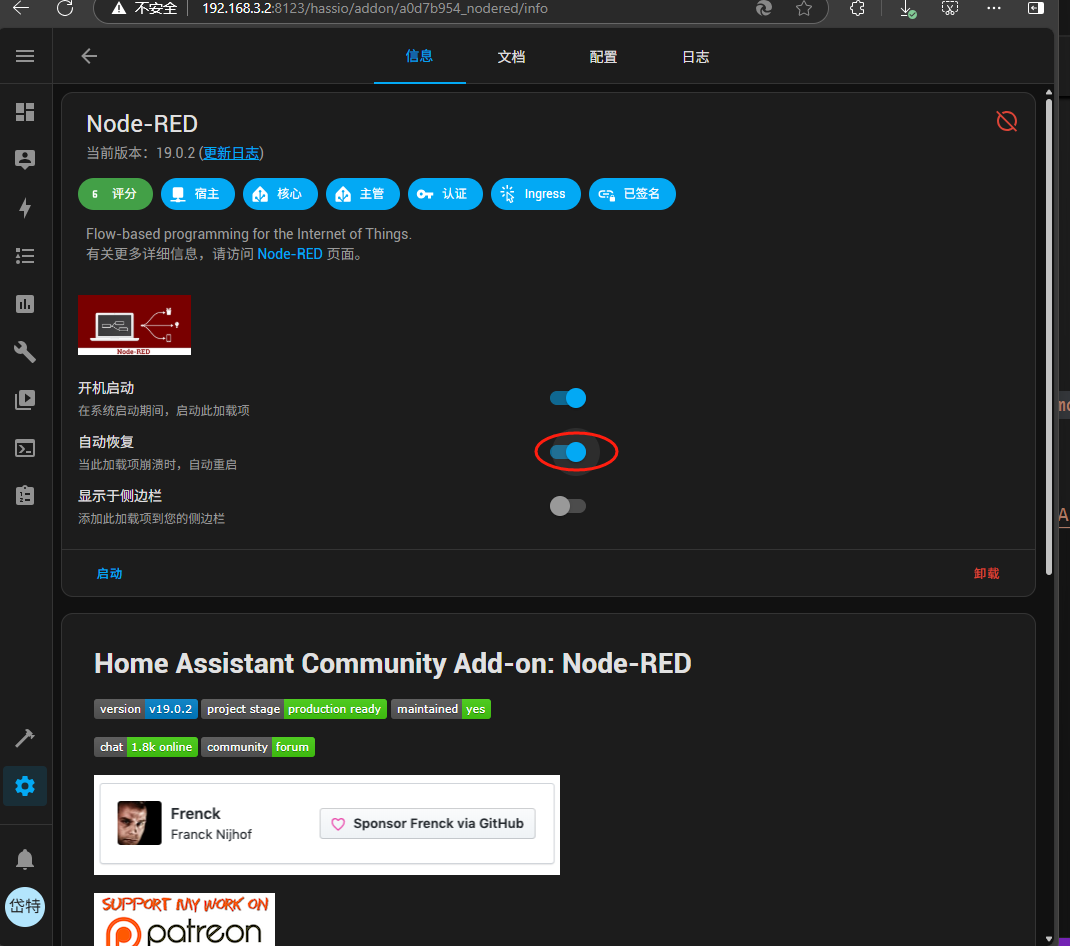
配置nod-red
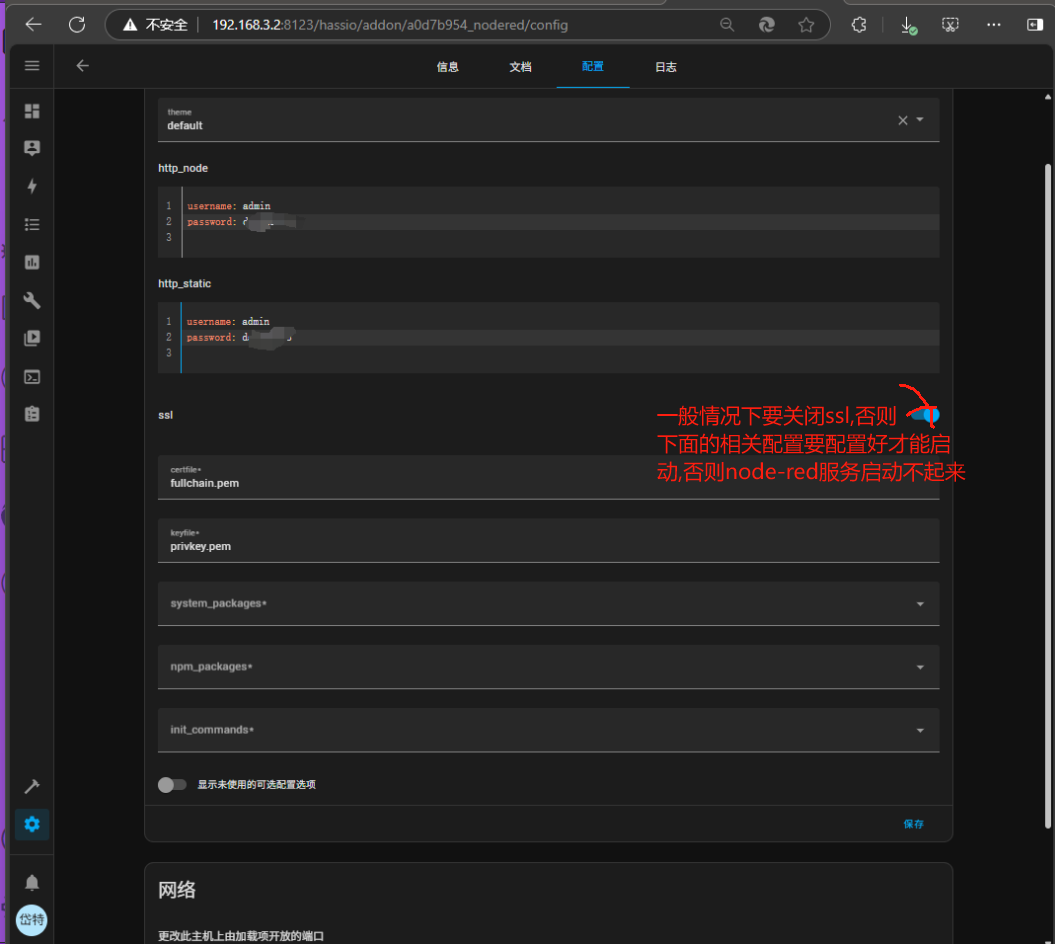
此处的配置信息为
```
username:admin
password:**** #此处的密码,请向管理员获取
### 默认情况下关闭ssl
```
然后启动node-red
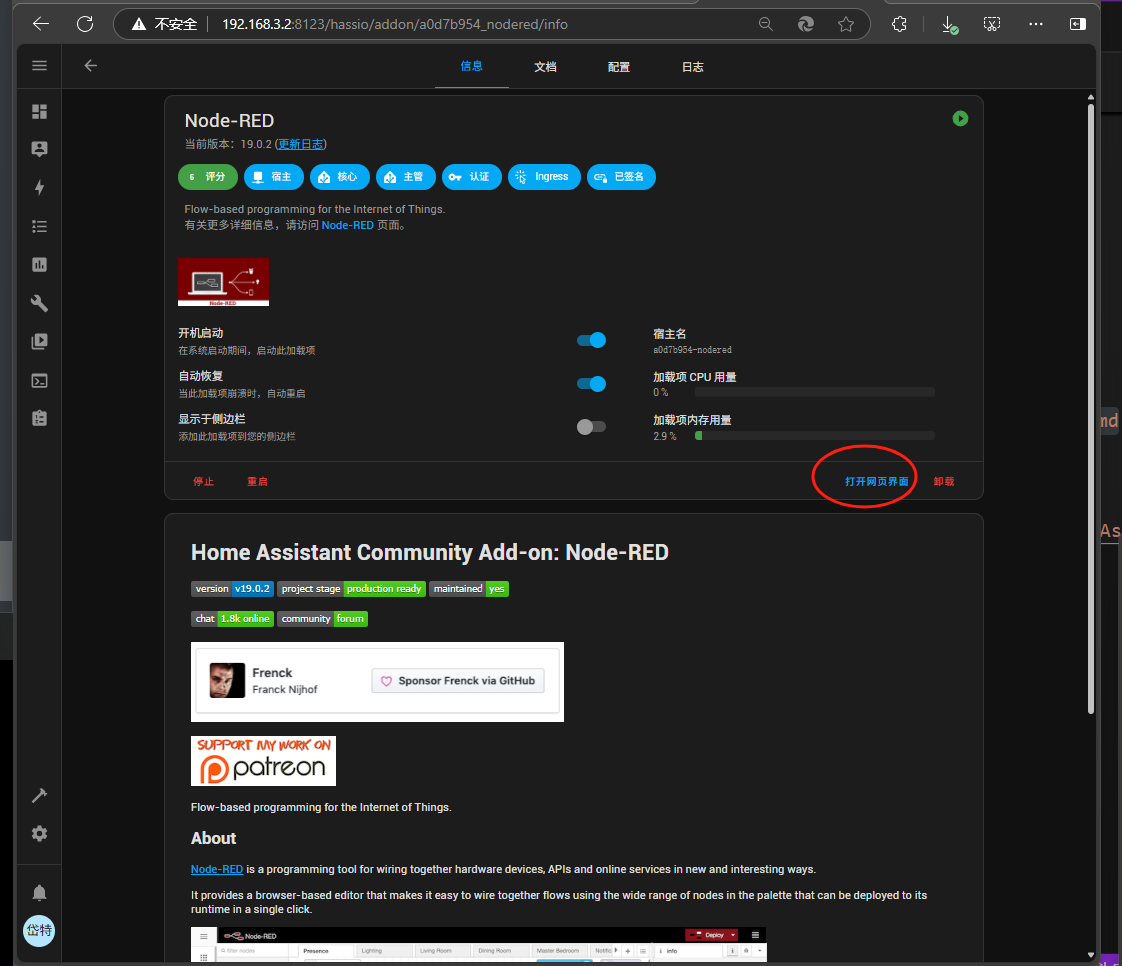
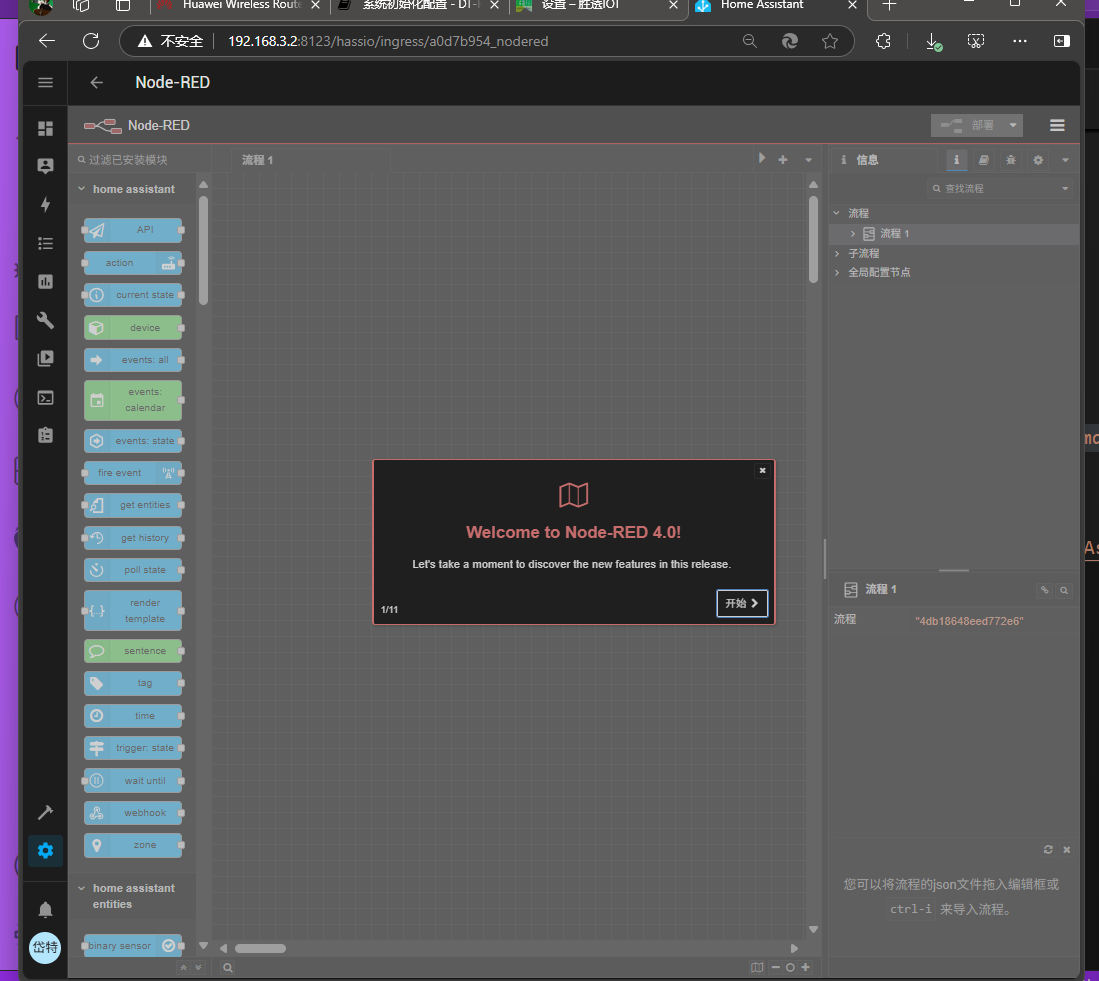
点击打开web-页面如下
##### 利用 Docker 安装 PostgreSQL
虽然 Home Assistant OS 本身不允许直接访问系统底层,但它内置了 Docker 支持,因此可以直接运行 PostgreSQL 的 Docker 容器。
###### **步骤**
1. **确保您有 SSH 访问权限**
- 安装 Home Assistant 的 SSH & Web Terminal Add-on(高级模式)。
- 开启 SSH 访问,具体步骤如下:
1. 前往 **Supervisor > Add-on Store**。
2. 搜索并安装 **SSH & Web Terminal**(官方插件)。
3. 配置 SSH 插件,确保 `protected` 设置为 `false`,然后启动它。
2. **运行 PostgreSQL 容器**
- 在 SSH 或 Web Terminal 中运行以下命令:
```
BASHdocker run -d \
--name=postgresql \
-e POSTGRES_USER=homeassistant \
-e POSTGRES_PASSWORD=yourpassword \
-e POSTGRES_DB=homeassistant \
-v /mnt/data/supervisor/postgresql:/var/lib/postgresql/data \
-p 5432:5432 \
postgres
```
- 替换 `yourpassword` 为您想要设置的数据库密码。
- 数据库名称为 `homeassistant`,用户名为 `homeassistant`。
- 数据将存储在 `/mnt/data/supervisor/postgresql`,确保数据在重启后不会丢失。
注意,这个操作,一般是从两个地方获取更新包,一是github一个是docker的仓库,所以,**要保持科学上网的畅通**。这个过程 ,估计要几分钟,需要耐心等等,也有可能会更新失败,然后,再次更新。
更新时,如果网络有问题可能会出在日志 中报出如下错误
```
aiodns.error.DNSError: (12, 'Timeout while contacting DNS servers')
2025-04-16 17:26:15.438 ERROR (MainThread) [homeassistant] Error doing job: Future exception was never retrieved (None)
aiodns.error.DNSError: (12, 'Timeout while contacting DNS servers')
2025-04-16 17:26:15.438 ERROR (MainThread) [homeassistant] Error doing job: Future exception was never retrieved (None)
aiodns.error.DNSError: (12, 'Timeout while contacting DNS servers')
2025-04-16 17:26:15.438 ERROR (MainThread) [homeassistant] Error doing job: Future exception was never retrieved (None)
aiodns.error.DNSError: (12, 'Timeout while contacting DNS servers')
2025-04-16 17:26:15.438 ERROR (MainThread) [homeassistant] Error doing job: Future exception was never retrieved (None)
aiodns.error.DNSError: (12, 'Timeout while contacting DNS servers')
2025-04-16 17:26:15.438 ERROR (MainThread) [homeassistant] Error doing job: Future exception was never retrieved (None)
aiodns.error.DNSError: (12, 'Timeout while contacting DNS servers')
2025-04-16 17:26:15.439 ERROR (MainThread) [homeassistant] Error doing job: Future exception was never retrieved (None)
aiodns.error.DNSError: (12, 'Timeout while contacting DNS servers')
2025-04-16 17:26:15.440 ERROR (MainThread) [homeassistant] Error doing job: Future exception was never retrieved (None)
aiodns.error.DNSError: (12, 'Timeout while contacting DNS servers')
2025-04-16 17:26:15.440 ERROR (MainThread) [homeassistant] Error doing job: Future exception was never retrieved (None)
aiodns.error.DNSError: (12, 'Timeout while contacting DNS servers')
2025-04-16 17:26:15.440 ERROR (MainThread) [homeassistant] Error doing job: Future exception was never retrieved (None)
aiodns.error.DNSError: (12, 'Timeout while contacting DNS servers')
[09:26:17] INFO: Home Assistant Core finish process exit code 0
[09:26:17] INFO: Home Assistant Core service shutdown
s6-rc: info: service legacy-services successfully stopped
s6-rc: info: service legacy-cont-init: stopping
s6-rc: info: service legacy-cont-init successfully stopped
s6-rc: info: service fix-attrs: stopping
s6-rc: info: service fix-attrs successfully stopped
s6-rc: info: service s6rc-oneshot-runner: stopping
s6-rc: info: service s6rc-oneshot-runner successfully stopped
s6-rc: info: service s6rc-oneshot-runner: starting
s6-rc: info: service s6rc-oneshot-runner successfully started
s6-rc: info: service fix-attrs: starting
s6-rc: info: service fix-attrs successfully started
s6-rc: info: service legacy-cont-init: starting
s6-rc: info: service legacy-cont-init successfully started
s6-rc: info: service legacy-services: starting
services-up: info: copying legacy longrun home-assistant (no readiness notification)
s6-rc: info: service legacy-services successfully started
2025-04-16 17:28:26.876 ERROR (MainThread) [homeassistant.components.homeassistant_alerts.coordinator] Timeout fetching homeassistant_alerts data
2025-04-16 17:51:56.276 WARNING (MainThread) [homeassistant.helpers.translation] Failed to load integration for translation: Invalid domain hassio.update
2025-04-16 17:51:56.278 WARNING (MainThread) [homeassistant.helpers.translation] Failed to load integration for translation: Invalid domain cloud.tts
2025-04-16 17:51:56.278 WARNING (MainThread) [homeassistant.helpers.translation] Failed to load integration for translation: Invalid domain mobile_app.notify
2025-04-16 17:51:56.278 WARNING (MainThread) [homeassistant.helpers.translation] Failed to load integration for translation: Invalid domain backup.sensor
2025-04-16 17:51:56.279 WARNING (MainThread) [homeassistant.helpers.translation] Failed to load integration for translation: Invalid domain energy.sensor
2025-04-16 17:51:56.279 WARNING (MainThread) [homeassistant.helpers.translation] Failed to load integration for translation: Invalid domain sun.sensor
2025-04-16 17:51:56.279 WARNING (MainThread) [homeassistant.helpers.translation] Failed to load integration for translation: Invalid domain homeassistant.scene
2025-04-16 17:51:56.279 WARNING (MainThread) [homeassistant.helpers.translation] Failed to load integration for translation: Invalid domain hassio.binary_sensor
2025-04-16 17:51:56.280 WARNING (MainThread) [homeassistant.helpers.translation] Failed to load integration for translation: Invalid domain hassio.sensor
```
上述错误多是由于网络问题引起的,要去检是科学上网是否还正常.
更完完成后,再次启动后,会显示没有可用的更新

#### 配置-通用
点击,开始,通用

更改名称为:岱特智能
其它的不变

#### 配置-网络-主机名

把主机名配置成为局域网中唯一的,实际让就是计算机名,因为同一局域网中,计算机名,不允许相同
#### 配置-设置-加载项
加载项中有许多必装组件,需要一一安装,首次进入时,可能会显示如下页面

点击下角的"加载项商店"

##### 安装File editor

File editor 是一个用于修改HA的配置文件的集成工具,属必装项,点击安装

点击安装,系统会在后台自动安装此插件,

安装完成后,会自动重启
有时也会提示安装失败

这种经查看日志 多为网强行问题无法访问.docker.io,这是因为科学上风的原因,重点排查网络,安装成功后,再次进入会显示如下界面

勾选,开机启动,自动恢复,显示于侧边栏

点击启动,或重启,将会在侧边栏看到此图标,点击打开网页界面

能看到如下界面,说明安装成功

此时加载项中,就多出了File editor选项

##### 安装Samba share插件
Samba share插件是一个提供共享目录的方式允行其它计算机用这种方式查看编辑ha的文件的组件.

点击安装

安装失败时,会有如下提下提示


打开自动恢复

接下来我们需要到配置选项中

此处我们设置如下信息
```
Username:dtuser
Password:***** # 此处请咨询管理员
Workgroup:WORKGROUP # 保持不变
```
更改完成后,有如下配置

配置 完成后,点击启动

启动成功后,会出下图显示

此时,如果,与HA在同一局域网,我们可以使用如下方式查看HA的文件目录
在地址栏输入\\HA的IP

输入预设的用户名与密码,即可查看,编辑HA的各种文件。

##### 安装Terminal & SSH
Terminal & SSH 插件为HA提供了在web端使用控制台终端功能,及开启了ssh服务,使之可以远程使用SSH访问HA终端。
在搜索中输入Terminal & SSH
结果有可能显示

搜索不到,这时,可能是因为仓库没有配置,还是使用的默认的仓库,我们可以增加一下仓库,如下:
```
https://github.com/AlexxIT/hassio-addons
```

点击右上解的三个点,选中仓库

在弹出折对话框中输入,我们记录的仓库地址,然后点添加

完成后,点击关闭.
然后,点击返回,重新搜索

这次找到了Advance SSH & Web Terminal

点击安装,打开如下页面

点击安装,有时会安装失败,
失败后,需再次安装,同时检查日志中提到的哪个网址无法访问 ,把其加科学上网的代理名单中.


安装完成后,就变成如下

开启自动恢得,显示侧边栏

接下来,我们配置ssh的登录信息,如下

相关信息如下:
```
username:dtuser
passsword:**** # 此处需要咨询管理员
```
其它配置选项如下,注意选项,选错了ssh可能启不起来,sftp关闭,zsh关闭.compatibility_mode要开启

然后,点击启动按钮

启动后如下

我们可以通过两个地方进入

在日志 端能看到 ssh已启动成功
```
s6-rc: info: service base-addon-banner successfully started
s6-rc: info: service fix-attrs: starting
s6-rc: info: service base-addon-log-level: starting
s6-rc: info: service fix-attrs successfully started
s6-rc: info: service base-addon-log-level successfully started
s6-rc: info: service legacy-cont-init: starting
s6-rc: info: service legacy-cont-init successfully started
s6-rc: info: service init-ssh: starting
s6-rc: info: service init-mysql: starting
s6-rc: info: service init-mosquitto: starting
s6-rc: info: service init-docker: starting
s6-rc: info: service init-docker successfully started
s6-rc: info: service init-mysql successfully started
s6-rc: info: service init-mosquitto successfully started
[14:51:05] WARNING:
[14:51:05] WARNING: Logging in with a SSH password is security wise, a bad idea!
[14:51:05] WARNING: Please, consider using a public/private key pair.
[14:51:05] WARNING: What is this? https://kb.iu.edu/d/aews
[14:51:05] WARNING:
[14:51:05] NOTICE: RSA host key missing, generating one...
Generating public/private rsa key pair.
Your identification has been saved in /data/ssh_host_rsa_key
Your public key has been saved in /data/ssh_host_rsa_key.pub
The key fingerprint is:
SHA256:+9pEl2QvyUqsu4B3gnPjhL/Ab71iBIDjWRdYvgZeg0c root@a0d7b954-ssh
The key's randomart image is:
+---[RSA 3072]----+
| . oE. |
|o .o+. |
|..o+.= o |
| o. = o . + + |
| . + S + * . |
| ..+. = o . |
| B.B.+ o |
| X+=.= |
| o=o=+o |
+----[SHA256]-----+
[14:51:08] NOTICE: ED25519 host key missing, generating one...
Generating public/private ed25519 key pair.
Your identification has been saved in /data/ssh_host_ed25519_key
Your public key has been saved in /data/ssh_host_ed25519_key.pub
The key fingerprint is:
SHA256:MgbUsAJ+23skjVTwD0pWVRBCmZ0BjU3jwV/99gGnNVc root@a0d7b954-ssh
The key's randomart image is:
+--[ED25519 256]--+
|. o+o*%O*. . E|
|.. . .=+o*o o =.|
| ...o+ o .. . = +|
| ..*.+ o . . .o|
| . =+oS. .o|
| .+o .|
| . . |
| . |
| |
+----[SHA256]-----+
s6-rc: info: service init-ssh successfully started
s6-rc: info: service init-user: starting
[14:51:08] NOTICE: Session sharing has been disabled!
s6-rc: info: service init-user successfully started
s6-rc: info: service ttyd: starting
s6-rc: info: service sshd: starting
s6-rc: info: service sshd successfully started
s6-rc: info: service ttyd successfully started
s6-rc: info: service legacy-services: starting
[14:51:09] INFO: Starting the ttyd daemon...
[14:51:09] INFO: Starting the SSH daemon...
s6-rc: info: service legacy-services successfully started
Server listening on 0.0.0.0 port 22.
Server listening on :: port 22.
```
配置成功后,可以通过如下命令来测试是否可以远程SSH连入

输入yes后会要求 输入密码,验证正确后,会进入看到如个图,就说明ssh已正常的开启成功了

以下界面是在ha中看到的内置的ssh

其它,当访问一些系统操作无权限时,可以关闭保护开关

##### 安装Mosquitto broker
Mosquitto broker是一个重要的插件,其提供的MQTT 服务为公司大多数数设备折集成,mqtt通信通道,所以,此为必装插件。

点击安装

看到如下界面,说明安装成功,

接下来是配置mqtt
###### 开启自动恢复

###### 配置mqtt的用户名密码及定制配置

```
username:dtuser
password:****** #此处的密码请咨询管理员
```
配置完成后,启动mqtt服务

日志中显示如下信息,说明成功
```
s6-rc: info: service s6rc-oneshot-runner: starting
s6-rc: info: service s6rc-oneshot-runner successfully started
s6-rc: info: service fix-attrs: starting
s6-rc: info: service fix-attrs successfully started
s6-rc: info: service legacy-cont-init: starting
cont-init: info: running /etc/cont-init.d/mosquitto.sh
[16:33:27] INFO: Setting up user dtuser
[16:33:28] INFO: SSL is not enabled
cont-init: info: /etc/cont-init.d/mosquitto.sh exited 0
cont-init: info: running /etc/cont-init.d/nginx.sh
cont-init: info: /etc/cont-init.d/nginx.sh exited 0
s6-rc: info: service legacy-cont-init successfully started
s6-rc: info: service legacy-services: starting
services-up: info: copying legacy longrun mosquitto (no readiness notification)
services-up: info: copying legacy longrun nginx (no readiness notification)
[16:33:29] INFO: Starting NGINX for authentication handling...
s6-rc: info: service legacy-services successfully started
[16:33:29] INFO: Starting mosquitto MQTT broker...
2025-04-17 16:33:29: Warning: Mosquitto should not be run as root/administrator.
2025-04-17 16:33:29: mosquitto version 2.0.20 starting
2025-04-17 16:33:29: Config loaded from /etc/mosquitto/mosquitto.conf.
2025-04-17 16:33:29: Loading plugin: /usr/share/mosquitto/go-auth.so
2025-04-17 16:33:29: ├── Username/password checking enabled.
2025-04-17 16:33:29: ├── TLS-PSK checking enabled.
2025-04-17 16:33:29: └── Extended authentication not enabled.
2025-04-17 16:33:29: Opening ipv4 listen socket on port 1883.
2025-04-17 16:33:29: Opening ipv6 listen socket on port 1883.
2025-04-17 16:33:29: Opening websockets listen socket on port 1884.
2025-04-17 16:33:29: mosquitto version 2.0.20 running
2025-04-17 16:33:29: New connection from ::1:56336 on port 1883.
2025-04-17 16:33:29: Client disconnected due to protocol error.
[16:33:30] INFO: Successfully send discovery information to Home Assistant.
[16:33:31] INFO: Successfully send service information to the Supervisor.
```
当消息,提示发现设备时,点击,弹出的消息中,点check it out,然后,看到已发现mqtt,点击添加

然后,点击完成

然后就会在设置-设备与服务-集成中,显示Mqtt,以后,所有增加的MQTT类设备,都会显示在这个类别中。

##### 安装Node-RED插件
Node-Red插件是我们集中各种设备的重要消息处理转换插件,属必装插件.
在加载项中,搜索nod显示如下

点击,进入详细页面

点击安装

如果安装出错,多半是科学上网的问题,
如现如下页面,说明安装成功

开启自动恢复,关闭侧边栏

配置nod-red

此处的配置信息为
```
username:admin
password:**** #此处的密码,请向管理员获取
### 默认情况下关闭ssl
```
然后启动node-red

点击打开web-页面如下

##### 利用 Docker 安装 PostgreSQL
虽然 Home Assistant OS 本身不允许直接访问系统底层,但它内置了 Docker 支持,因此可以直接运行 PostgreSQL 的 Docker 容器。
###### **步骤**
1. **确保您有 SSH 访问权限**
- 安装 Home Assistant 的 SSH & Web Terminal Add-on(高级模式)。
- 开启 SSH 访问,具体步骤如下:
1. 前往 **Supervisor > Add-on Store**。
2. 搜索并安装 **SSH & Web Terminal**(官方插件)。
3. 配置 SSH 插件,确保 `protected` 设置为 `false`,然后启动它。
2. **运行 PostgreSQL 容器**
- 在 SSH 或 Web Terminal 中运行以下命令:
```
BASHdocker run -d \
--name=postgresql \
-e POSTGRES_USER=homeassistant \
-e POSTGRES_PASSWORD=yourpassword \
-e POSTGRES_DB=homeassistant \
-v /mnt/data/supervisor/postgresql:/var/lib/postgresql/data \
-p 5432:5432 \
postgres
```
- 替换 `yourpassword` 为您想要设置的数据库密码。
- 数据库名称为 `homeassistant`,用户名为 `homeassistant`。
- 数据将存储在 `/mnt/data/supervisor/postgresql`,确保数据在重启后不会丢失。